


Whose the Leading CSP?
Business needs high-end technologies and core services for their application to work smoothly. But managing these technologies and services at our end sometimes gets challenging because of heavy investment in hardware, setting up infrastructure, configuring the environment for particular services, time consumption, etc. This challenge was solved by CSP i.e cloud service providers Like AWS, GCP, Azure, etc.
These CSPs have the infrastructure ready and available at their end. Now Businesses/ organizations can utilize this infrastructure for their requirements by taking those on rent. So now they don't need to invest in the upfront hardware or care about its maintenance or its configuration.
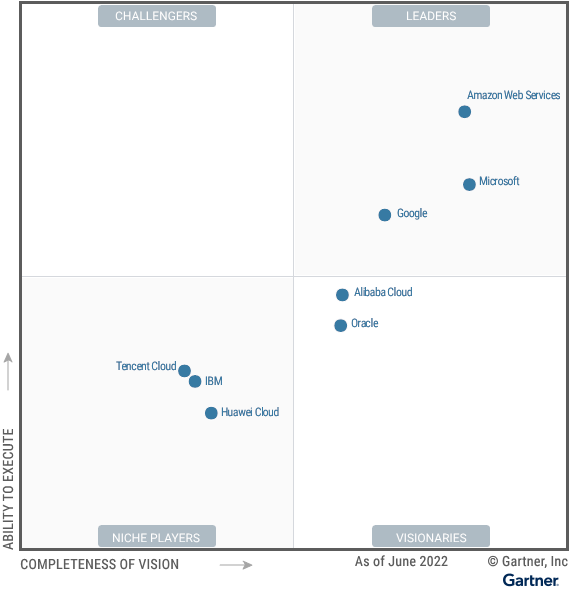
According to the Garther report, AWS (Amazon Web Services) is leading among the rest of the services provided (CSPs). AWS has 31 regions with multiple availability zones And now 4 more regions plans are announced.
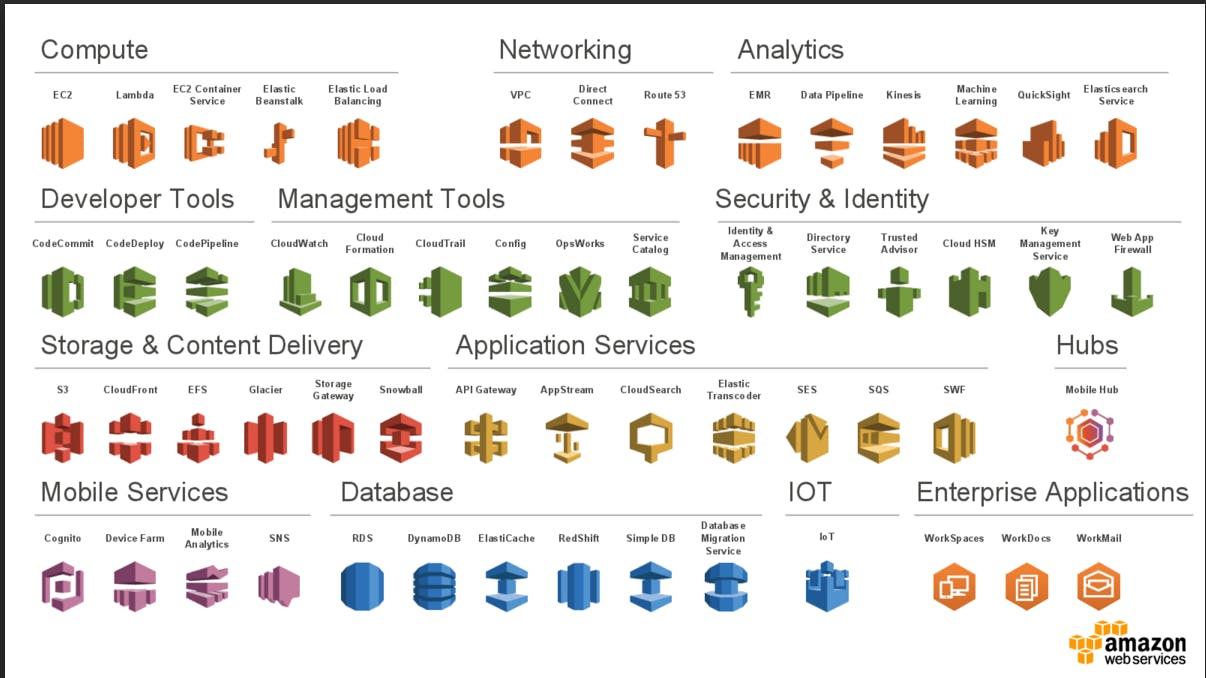
More than this AWS offers pay-as-we-go pricing, which enables you to pay only for what you use. Once you stop your usage, there is no fee to terminate, and billing stops immediately. Pay-as-you-go pricing offers you the chance to save over on-premises infrastructure without buying a perpetual software license. The services offered have unmatched experience, maturity, reliability, security, and performance that businesses can depend upon for their most important applications. In total AWS offers over 200 fully featured services from data centers all over the globe.

What Does AWS offers?
AWS being the leader in the cloud industry offers more than 200 fully featured services available from data centers globally. They offer services right from computing, networking, storage, databases, Data analytics, IoT, AI/ML, ... etc.
Alright now its time to use and understand some foundational services of AWS and alongside study some terminologies of AWS world
Regions and Availablity Zones in AWS
Regions is a term in AWS that refers to physical locations around the world where we have a cluster of data centers. Each Region is designed to be isolated from the other Regions because of this AWS can achieve the greatest fault tolerance and stability. because of this concept now customers sitting in any part of the world can launch their resources/ services/ datacentre in any of the regions of the AWS. AWS has also associated this region with the region code
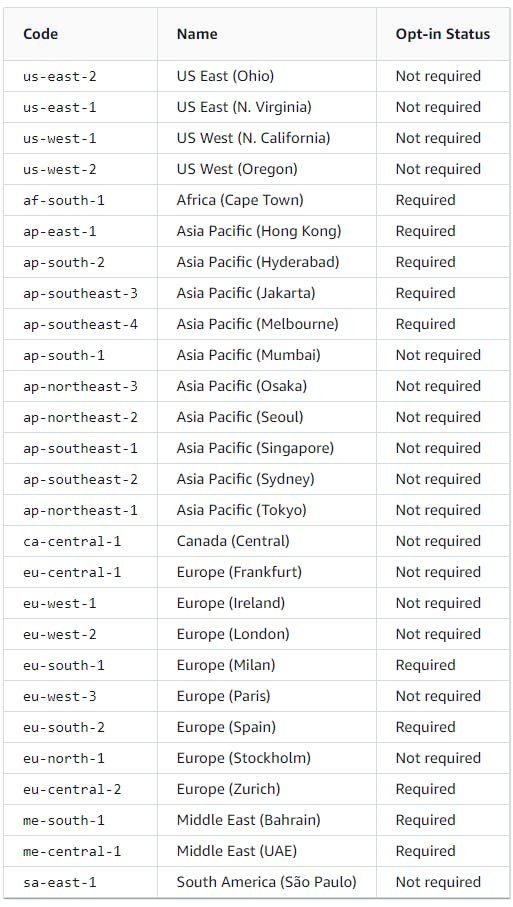
Now each of these regions has consist of multiple, physically separated, and isolated Availablity zones(Data centers) that are connected with low latency, high throughput, and highly redundant networking. Like AWS regions an availability zone is also represented by a code which is the AWS Region code followed by a letter identifier (for example, us-east-1a). In total currently, AWS has 99 Availability Zones within 31 geographic regions around the world, with announced plans for 12 more Availability Zones and 4 more AWS Regions

Because of the availability zones now users can plan on their side for making their application fault tolerant. by deploying the application across multiple AZ rather than a single AZ.
💡Good to know stuff:
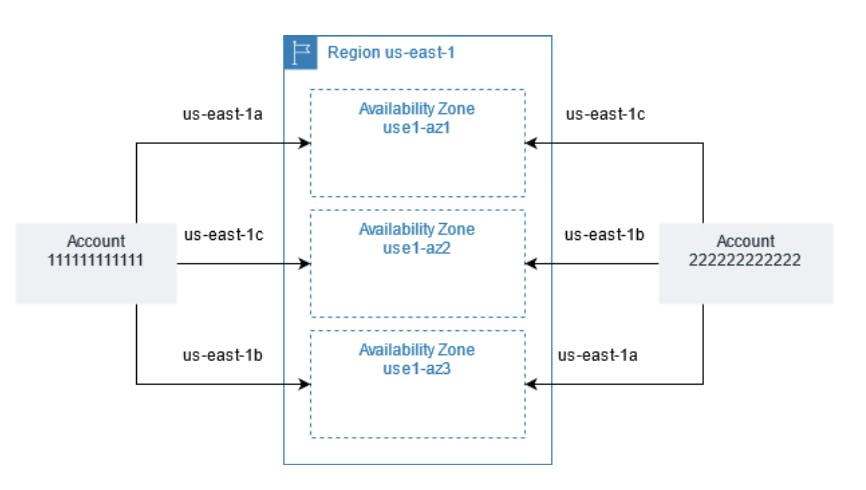
let's say tom and eric are the users of AWS. Tom deploys his application on top of the "ap-south-1a" availability zone and eric also deploys his application on the same availability zone from his account
here it looks like both of them might have their applications deployed on the same physical resources because their AZ is the same
But this is not the case to ensure that resources are distributed across the Availability Zones for a Region, AWS independently maps Availability Zones to codes for each AWS account. For example, the Availability Zone us-east-1a for Tom's AWS account might not be the same physical location as us-east-1a for Eric's AWS account.
NOTE:
AWS offers 1 year of Free tier for new users for experimenting and testing out their services. To avail of this offer sign up at: https://aws.amazon.com/free/free-tier/
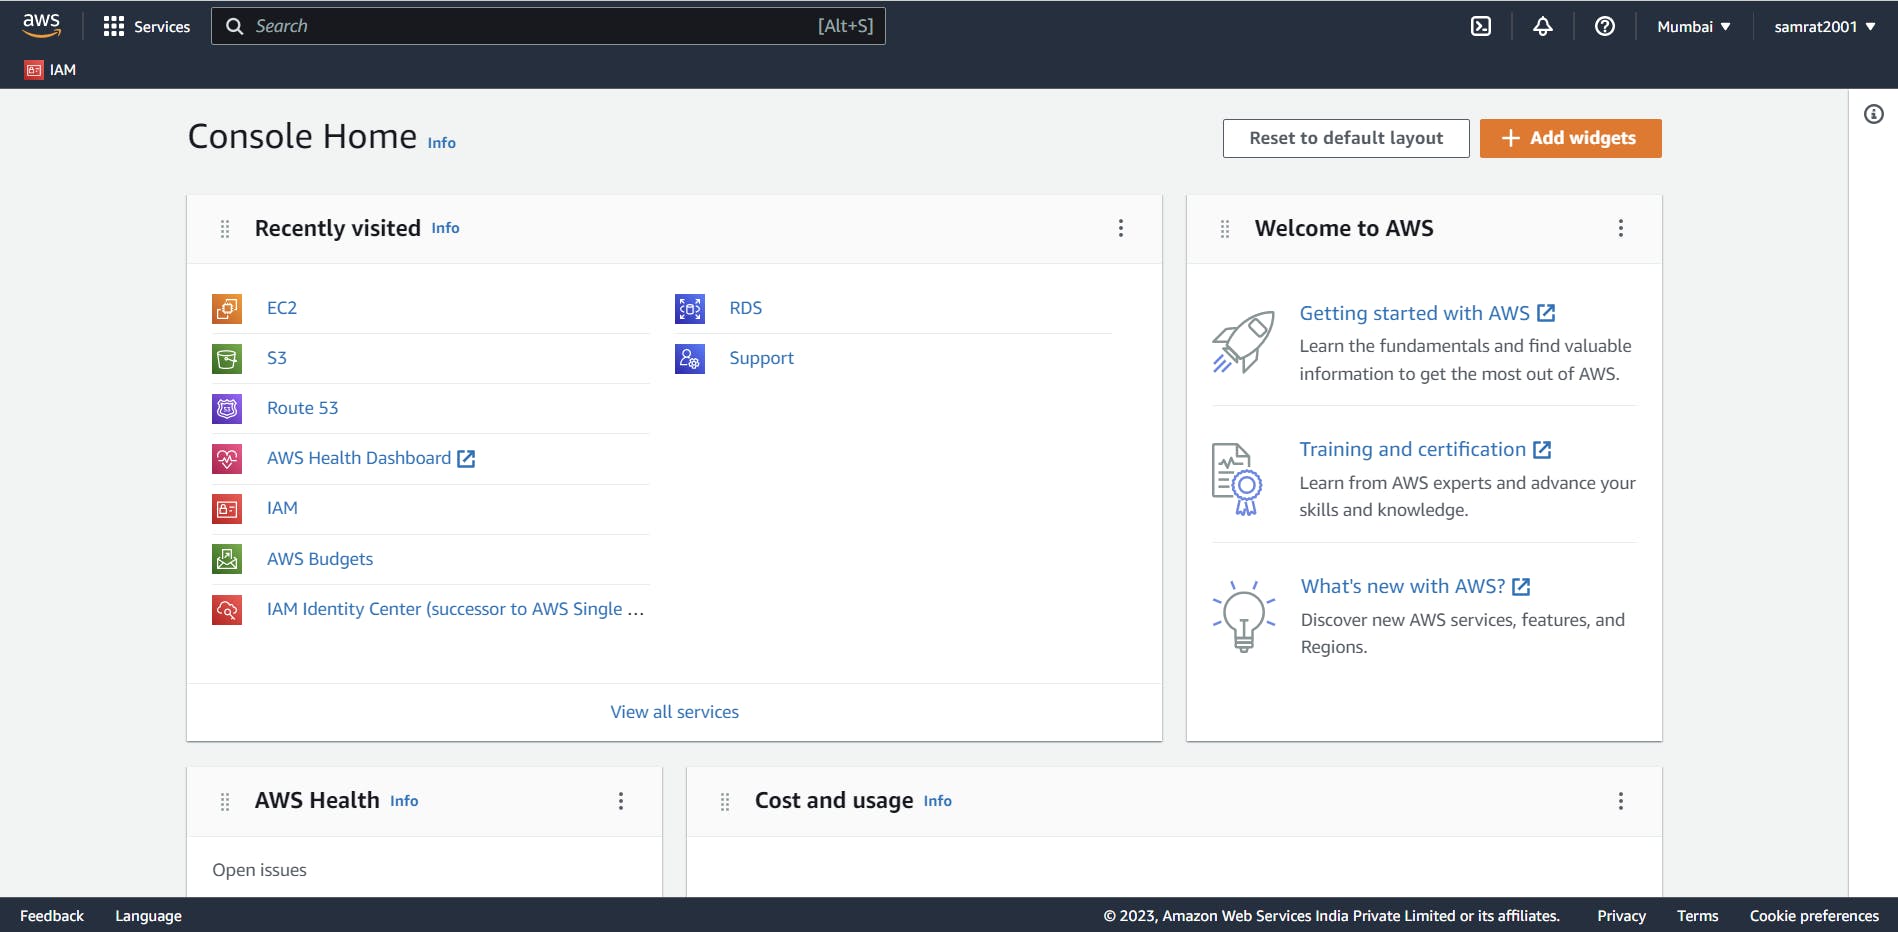
After signing up and login we can get landed to the console home where we can see the recently visited services, our custom widgets, etc.
From here we can navigate to any services we need.
(NOTE: here while login I have used the root i.e admin account so that I will not get any permission issues for now.)
Amazon Elastic cloud compute (EC2)
Amazon EC2 is an on-demand computing service offered by AWS that provides re-sizable compute capacity in the cloud. With Amazon Ec2 we can get virtual machines in a number of sizes with multiple options available.
Now to launch an Amazon Ec2 instance which is internally a virtual machine for this we need to use some base image (operating system), storage, ram, CPU, etc. AWS will be providing us with all of these facilities.
Launching EC2 instance
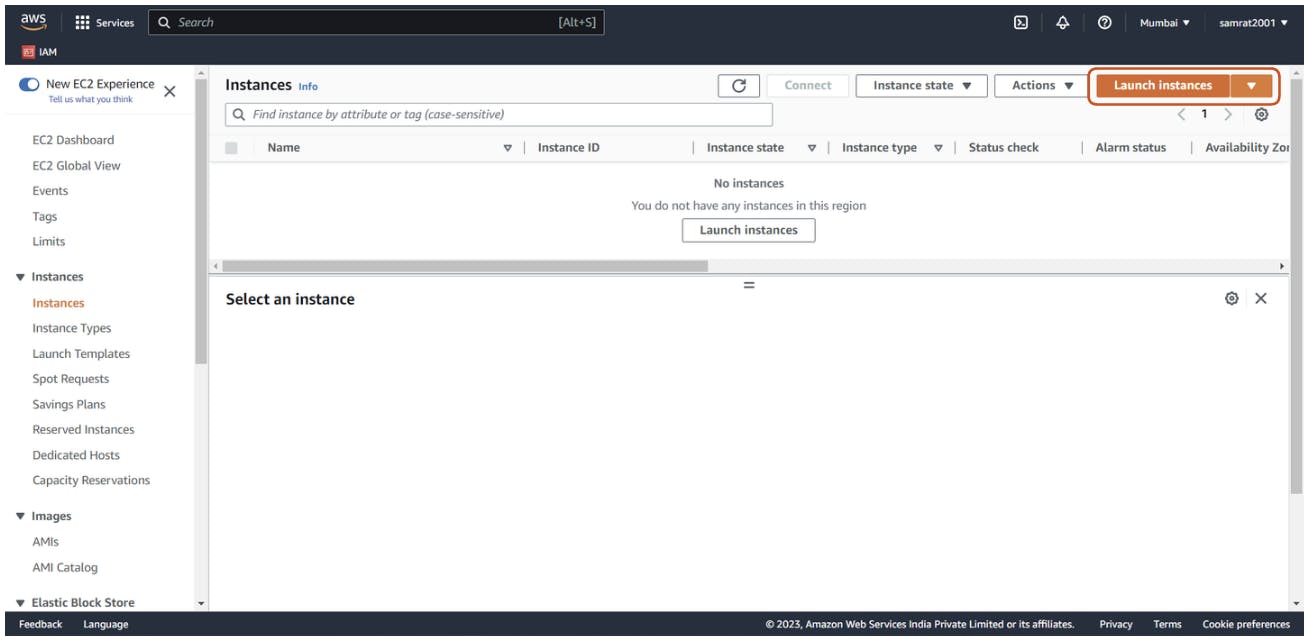
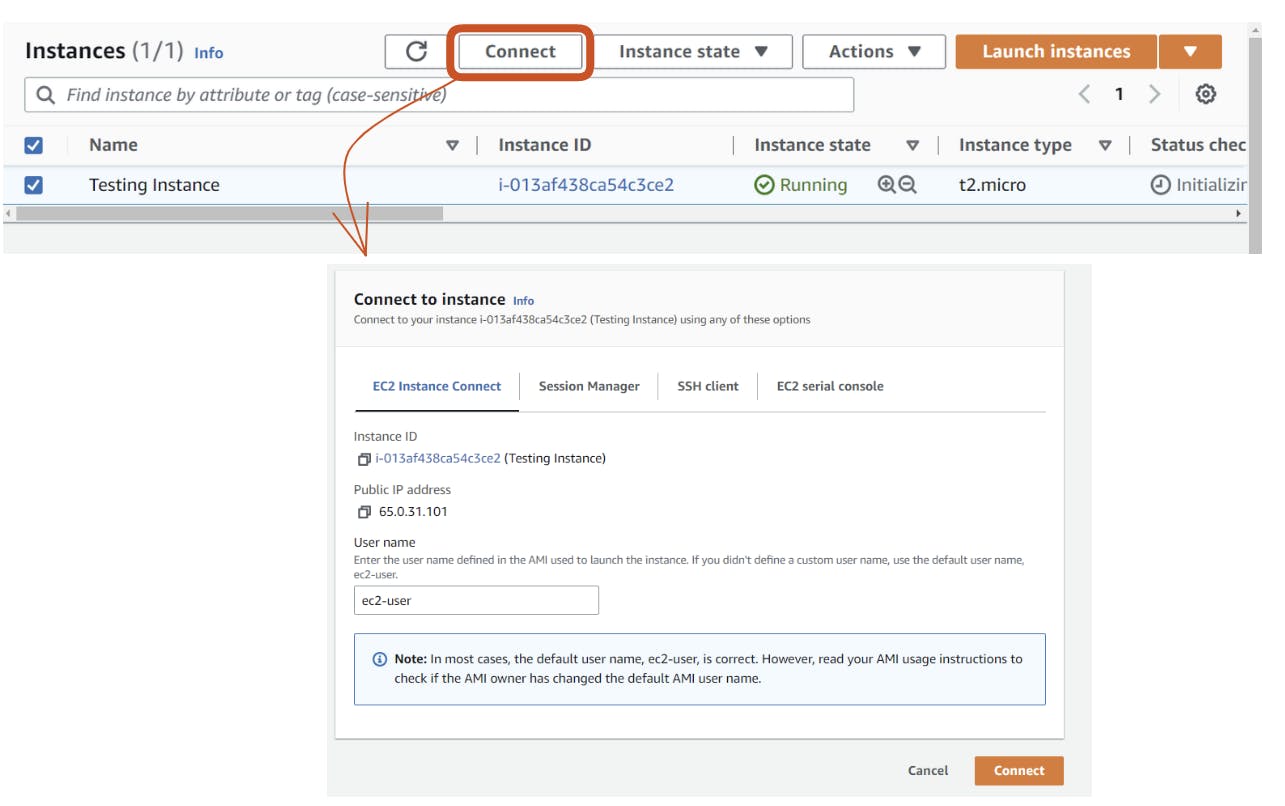
First, we need to go to the EC2 home page and then to the instance tab where we can find the option to launch instances. Further, we need to fill in the details.
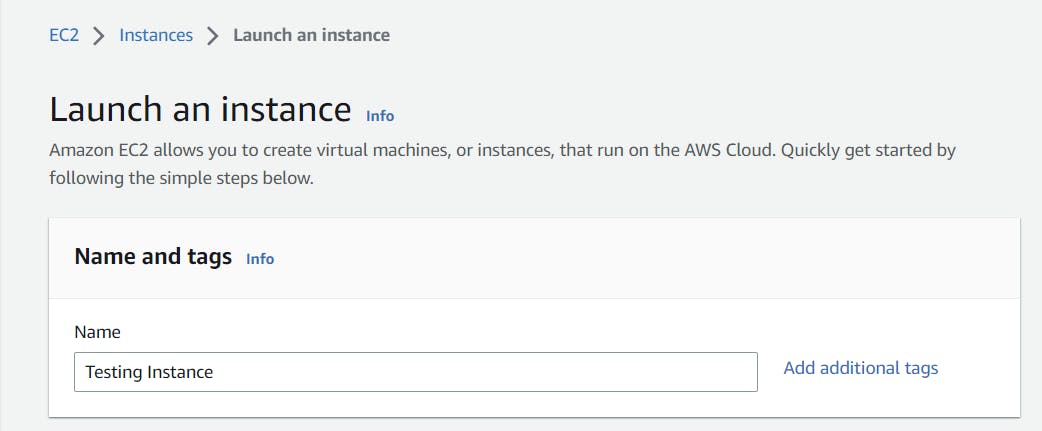
Name of the instance. here I have given the instance name "Testing Instance".
To get the base image(OS) for our virtual machine i.e ec2 instance, we can use the amazon AMI (Amazon Machine Image). The cool thing about AMI is we can get not only we can get official AMI from verified providers but we can also create our own custom AMI if needed on top of this can publish our AMI in the marketplace, there are community AMIs available too.
Here I have selected the amazon Linux 2 AMI.

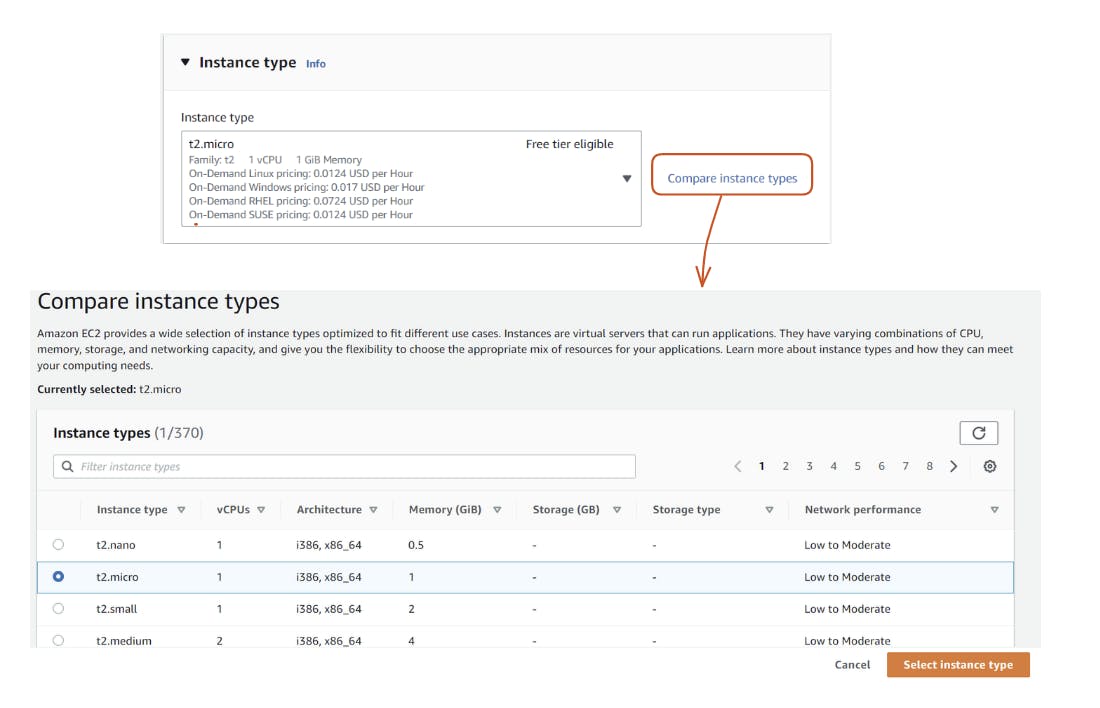
Now use case to use case the resources needed varies hence AWS has provided multiple instance type where users can decide which type of configuration they want.
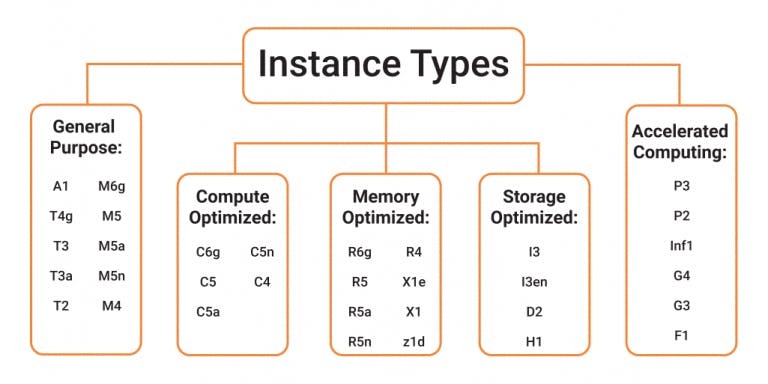
Now select the instance type you want here I have selected t2.micro. t2.micro belongs to T2 family and it provides 1vCpu and 1Gib Memory.
NOTE: With AWS free tier which is for 12 months we can use up to 750 instance hours per month for each of t2.micro instances running Linux and Windows for free.
We would also need to log in to the VM we launched and for the authentication purpose AWS uses key-based authentication for which we need to generate a key pair or choose from the available ones.

After this, they will be asked to download the key pair download the file/ key in a secure location.
NOTE:
Here I have used the key format as .ppk because further to connect to the VM we will be connecting using the putty software which uses the .ppk file to
connect.
if we directly want to connect via ssh without using any third-party tool like putty for this we have to download the key in .pem format
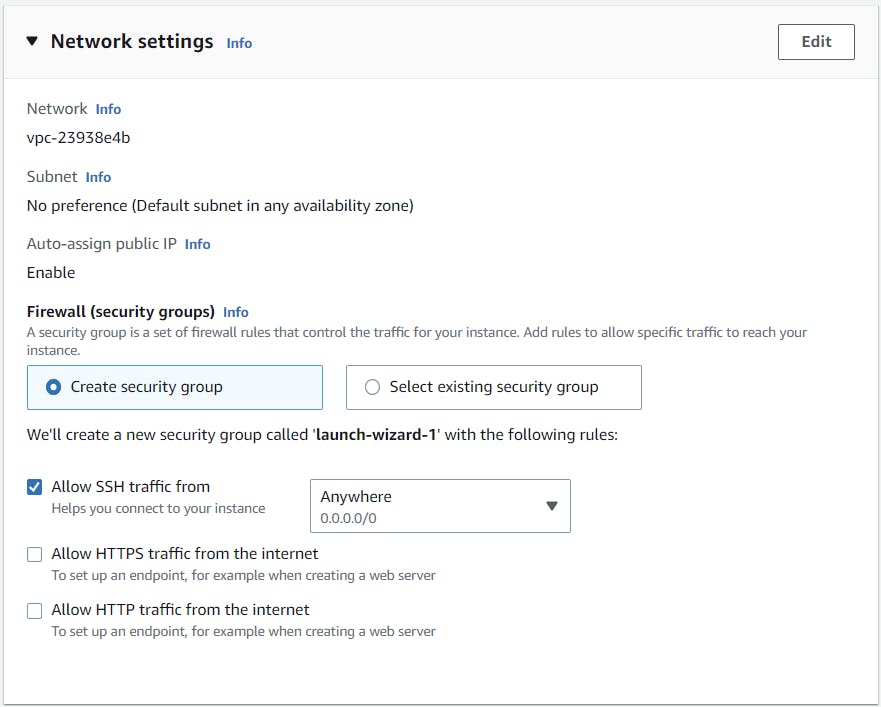
For security purposes, the mostly computers/ servers are associated with the firewall which monitors and filters incoming and outgoing network traffic based on an organization's previously established security policies/ rules. In AWS also the ec2 instances are associated with their firewall called security groups we need to create a security group, mention the policies/ rules we want and attach it to the ec2-instance. If not created AWS will create a security group by default for us with the rule to allow any IP (0.0.0.0/0) to connect via SSH protocol.
SSH Protocol:
SSH Protocol aka Secure shell protocol is a network protocol that allows the connection of one computer/ machine to another remote computer/ machine. SSH works on port number 22.
Moving further we can set up a network regarding settings like regarding VPC and subnets although AWS will pick the default value so no need to do any changes for now here. For now, we can understand VPC as a collection of subnets i.e a network with a bigger network-name we about these concepts in our previous article do check out here
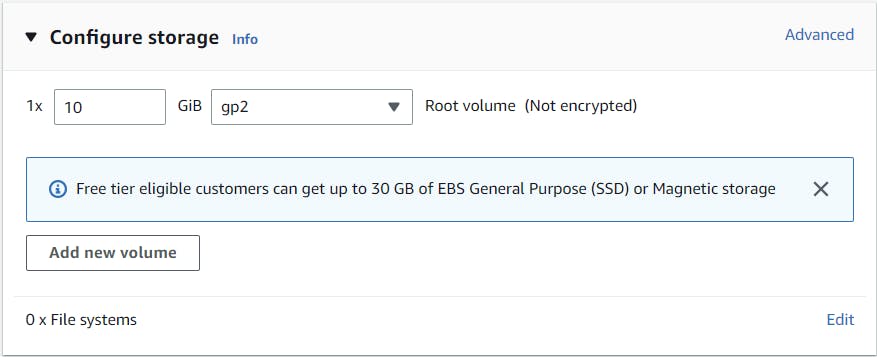
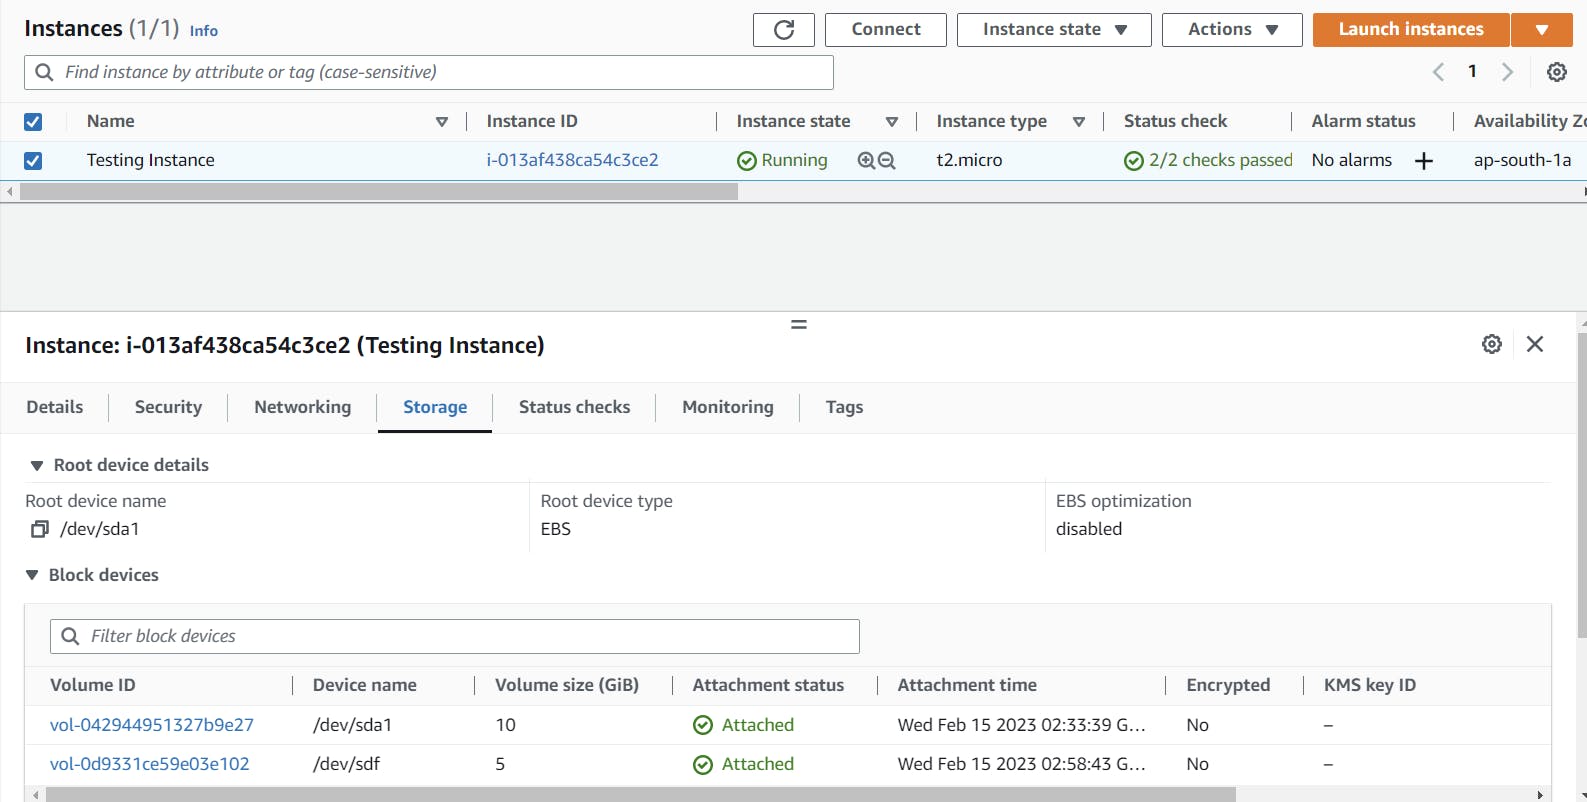
Now one of the important parts to launch a VM is the storage. In EC2 we will be getting the storage from the EBS (Elastic block storage) here we refer to it as volumes. here I have got 10Gib of storage for my root volume of ec2-instance
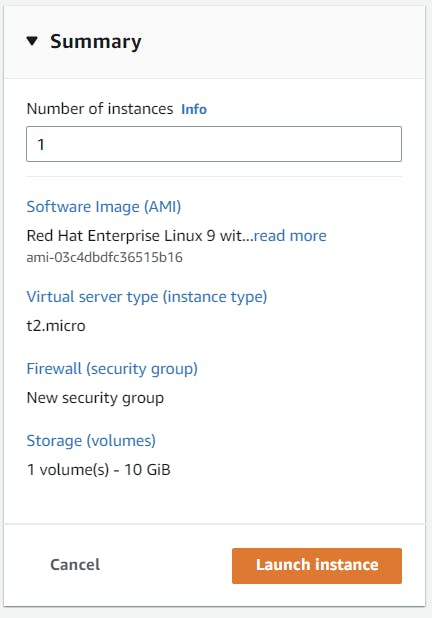
Now we are good to launch the instance. we can review it before launching it.
Now our VM is up and running. To connect it we have 2 ways either we can directly connect from the browser or we can connect using ssh.
To connect via browser:
Note: This method of connecting is not supported by all AMIs here I have used Amazon Linux 2 which supports this feature
To connect via ssh:
To connect via ssh we can directly use the ssh command but I will be using putty software to connect to the VM
Download the putty software using the MSI file
Now enter the connection details. Enter the public IP of the instance in putty
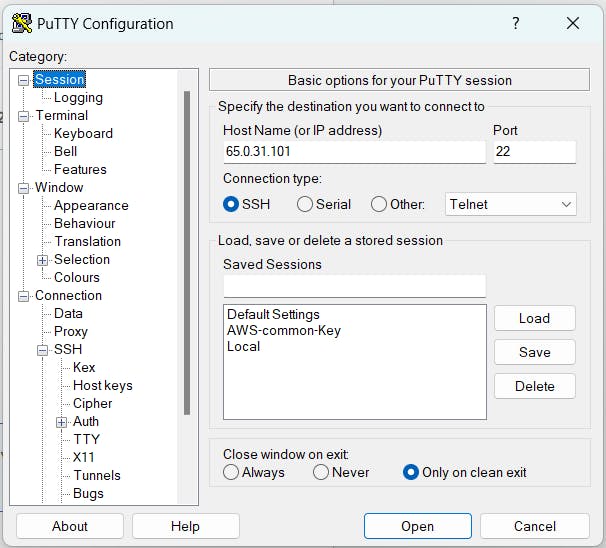
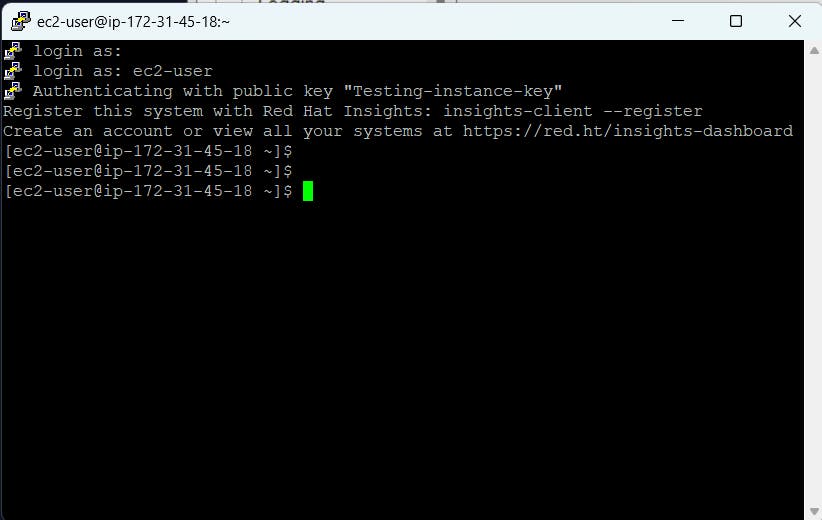
Further, navigate to the connection tab -> ssh -> Auth there specify where is the private key which we downloaded. Now click on the open button and provide the username- ec2-user to start the session.

Amazon Elastic cloud storage (EBS)
With the cloud, we can get on-demand computing services via ec2 and when our use is done we can terminate the instance. But what if we want the data there over ec2 to be persistent i.e permanent? for this we can use the solution provided by AWS - "Amazon elastic cloud storage" aka "EBS". EBS is a block storage system used to store persistent data.
Steps to get an EBS volume and attach it to ec2-instance
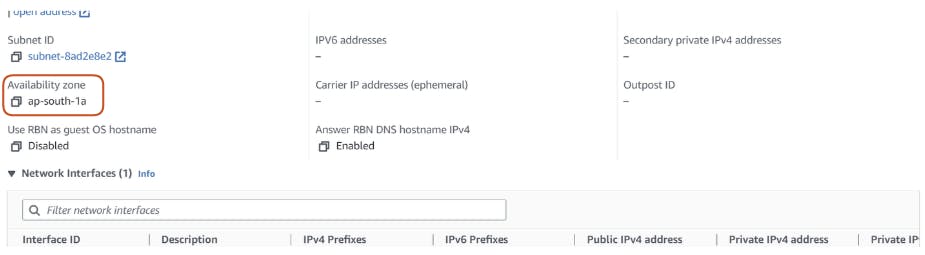
- Before stepping ahead we need to check the availability zone in which our instance is residing we can check that by selecting our required instance in ec2-console further in the network tab we can find AZ.
- At the most, we need to go to the EBS volumes tab in the ec2 console and click on create volume and fill in the details

- At the most, we need to select the type of volumes we want depending on our requirements. Further, we need to specify its size. Then we need to tell in which AZ we want to launch the volume. here we need to note that we want to attach the volume to an ec2-instance which is launched in ap-south-1a
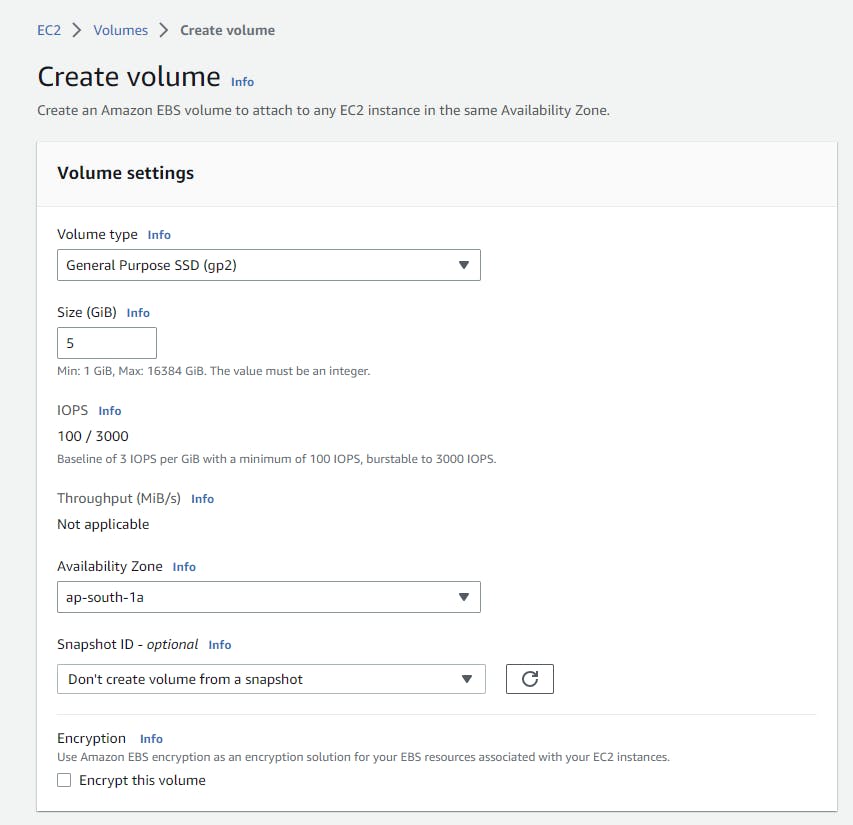
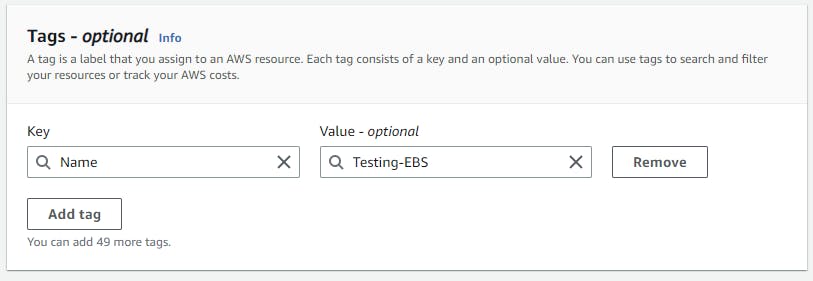
- If we want we can also associate the services with tags for better filtration and monitoring.
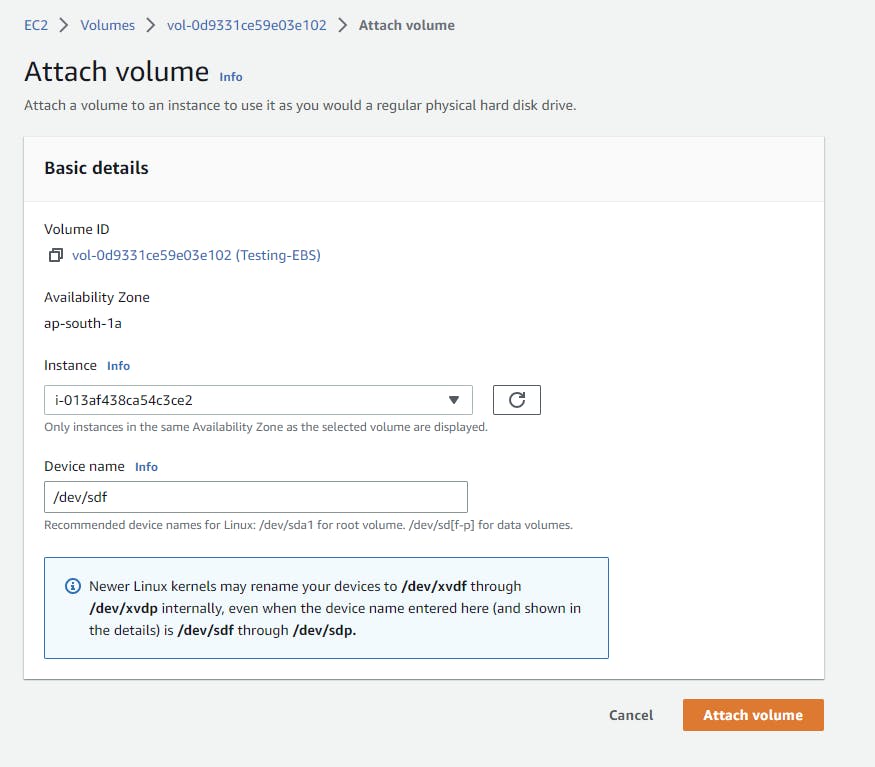
- Now our EBS volume is launched and we need to attach the volume to the ec2-instance.
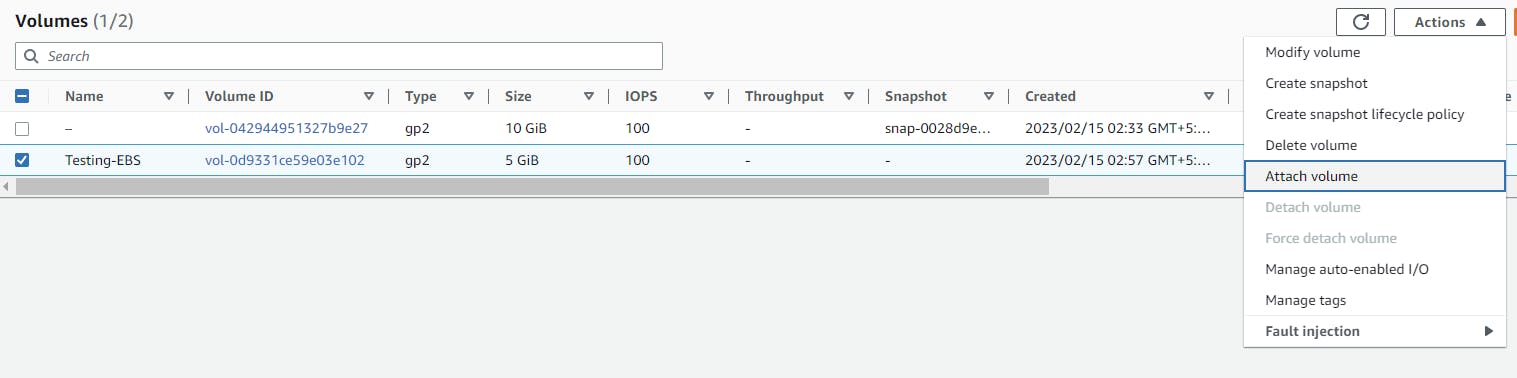
- Once the volume is attached we can see it on the portal also in the storage section we can see 2 EBS volumes one of which is the root volume and another created by us.
🥑Good to Know stuff
Here we have attached the volume but how to use it is the question. whenever any storage device is attached to our machine we need to perform some steps to use it properly same those same steps will be done here also as EBS is like a storage device for the VM.
Steps:
At the most, we need to create a partition in the storage device.
Further, we need to format the partition.
we need to create a folder in the VM and mount the folder with the partition to use it.
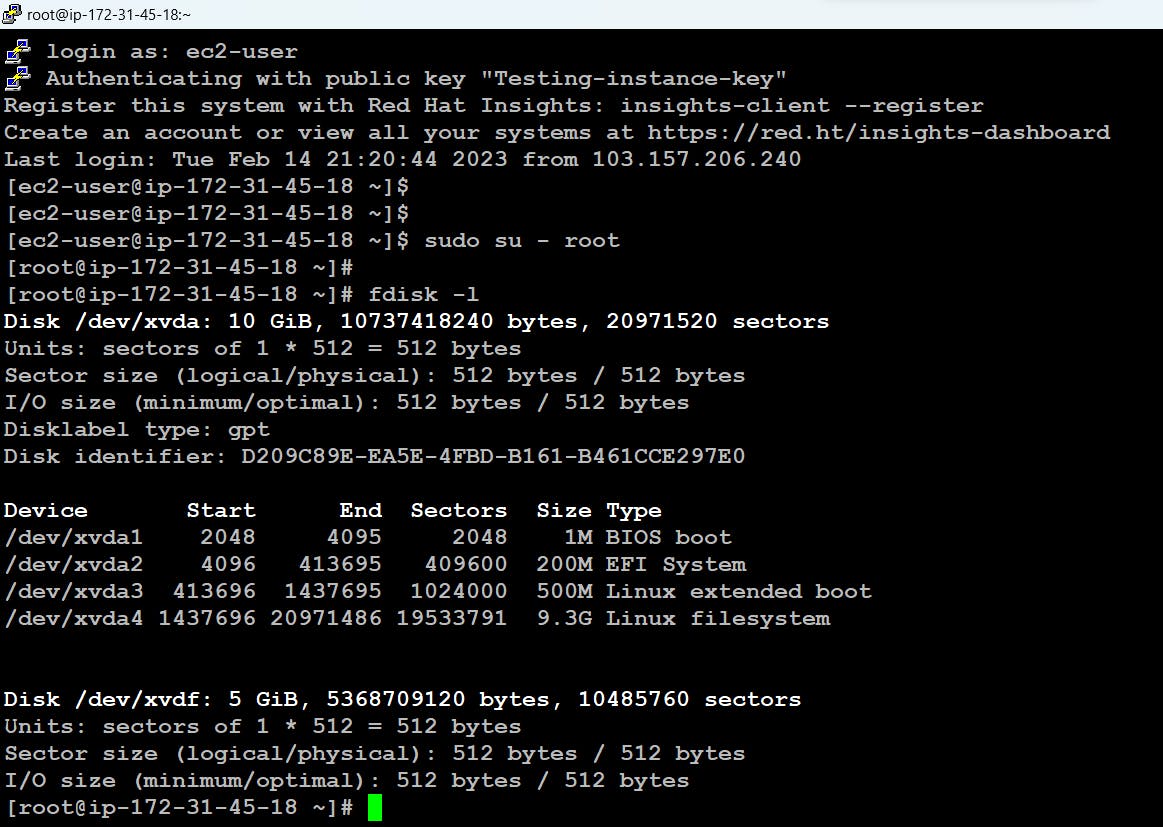
First let's check the storage devices attached using
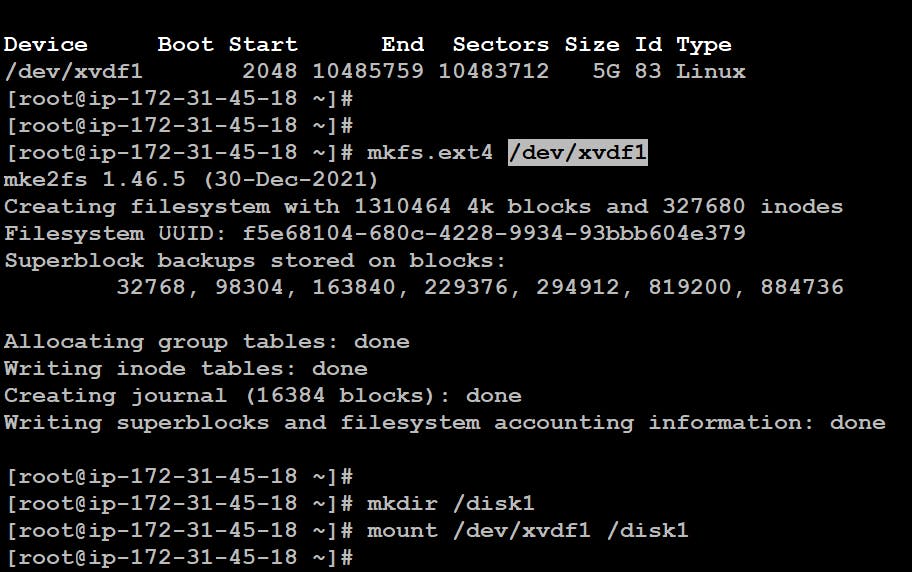
#fdisk -lcommand here we found the device/dev/xvdfhere we can also see there is no partition table associated with it.
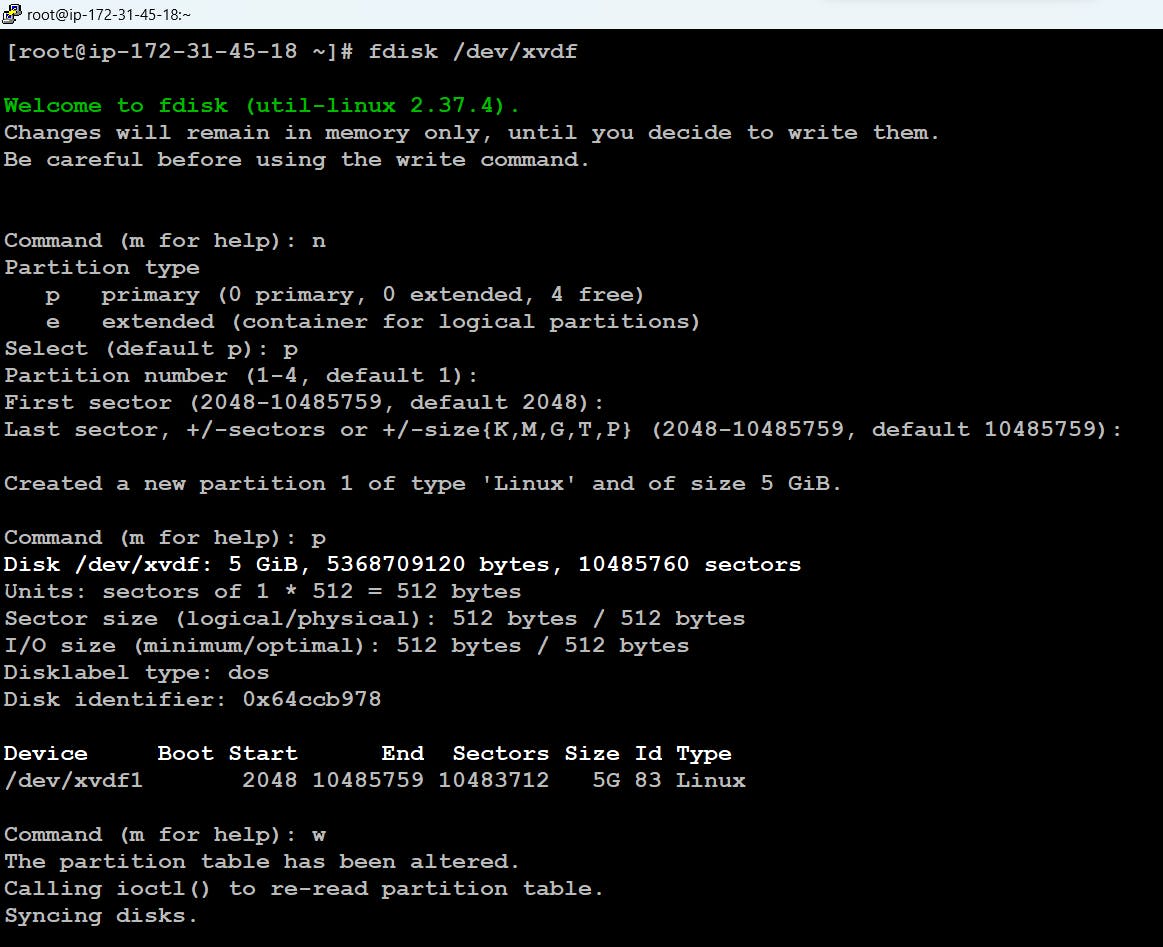
- Now lets create partion in the storage device using the command
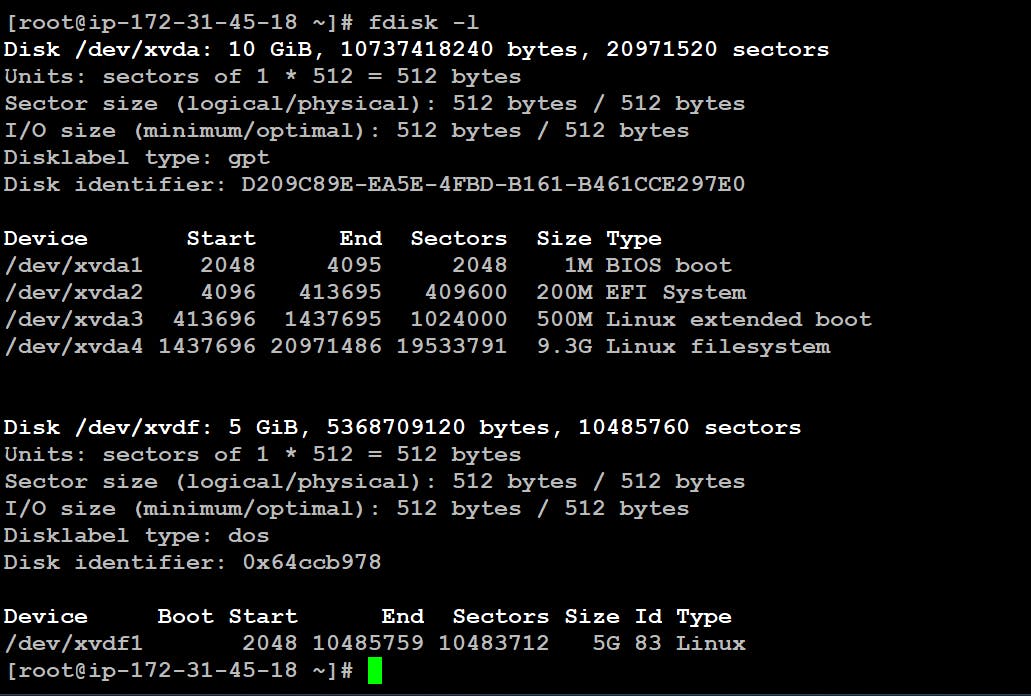
#fdisk <device>here I will be creating a primary partition with default size i.e I will pick the entire storage device as a single partition. to save and exit usewand to print the table usepoption. we can see the reflected changes
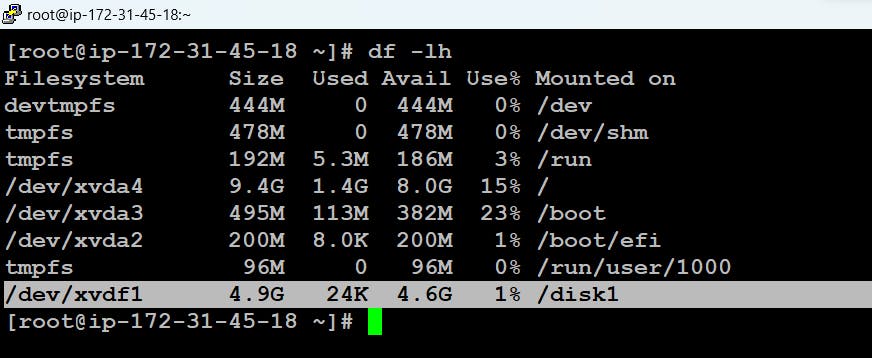
- Now we need to format the partion created i.e /dev/xvdf1 here I have formated using the ext4 format type. Once done we mount the partition to /disk1 folder in the Virtual machine. now any information put in /disk1 will get resided in the EBS volume.
Additional Resources:
That's all for this blog we will be discussing more such services of AWS so stay tuned 🙌
Thank you For Reading :) #HappyLearning
Any query and suggestion are always welcome- Gaurav Pagare