

Azure Database for PostgreSQL
Azure Database for PostgreSQL is a fully-managed database as a service with built-in capabilities, such as high availability and intelligence

My name is Gayatri Barhate, and I am an IT professional with a focus on Azure. I enjoy exploring cloud computing concepts and sharing my insights through blogging. My writing covers various Azure topics, from basic principles to advanced features, aiming to help readers understand and leverage Azure technologies effectively. I am passionate about continuous learning and strive to create content that is both informative and accessible to all skill levels.
An Azure Database for PostgreSQL instance can be created using the Azure portal, Cloud Shell, or Azure CLI.
The Azure portal is a web-based, graphical user interface that provides an alternative to command-line tools. With the Azure portal, you can build, manage, and monitor everything from simple web apps to complex cloud deployments.
Azure Cloud Shell is an interactive shell environment that's accessible through your browser. Bash and PowerShell work with Cloud Shell. It has preinstalled commands for creating and configuring Azure Database for PostgreSQL instances. There's no need to install anything on your local environment.
Azure CLI can be installed locally, giving you the same functionality as the Azure Cloud Shell.
Exercise - Create a database with Azure Database for PostgreSQL
You want to have a large, high-performance database for the trial of your payment app.
In this exercise:
Create an Azure Database for PostgreSQL instance in the Azure portal
Change the pricing tier and backup options
Important
You need your own Azure subscription to run this exercise, and you might incur charges. If you don't already have an Azure subscription, create a free account before you begin.
Sign in to the Azure portal.
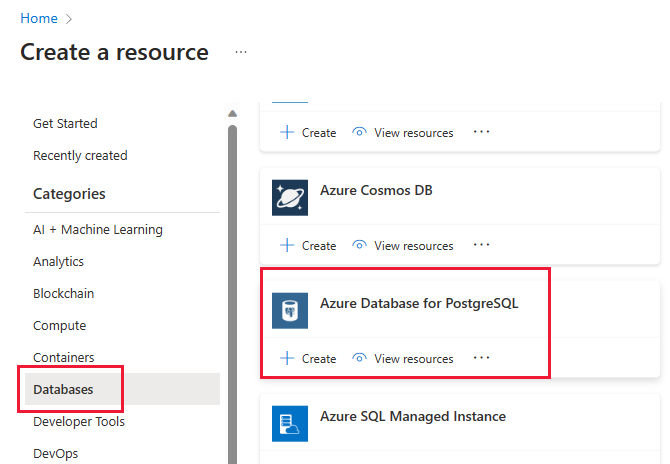
Select Create a Resource\> Databases > Azure Database for PostgreSQL. You can also use the Search functionality to find this category. Select Create.
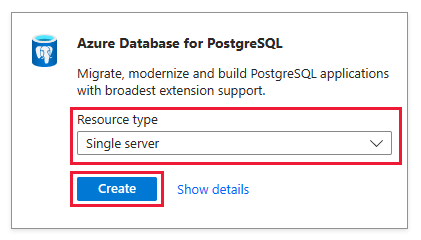
Under Azure Database for PostgreSQL, for a Resource type, select Single server, and then select Create.
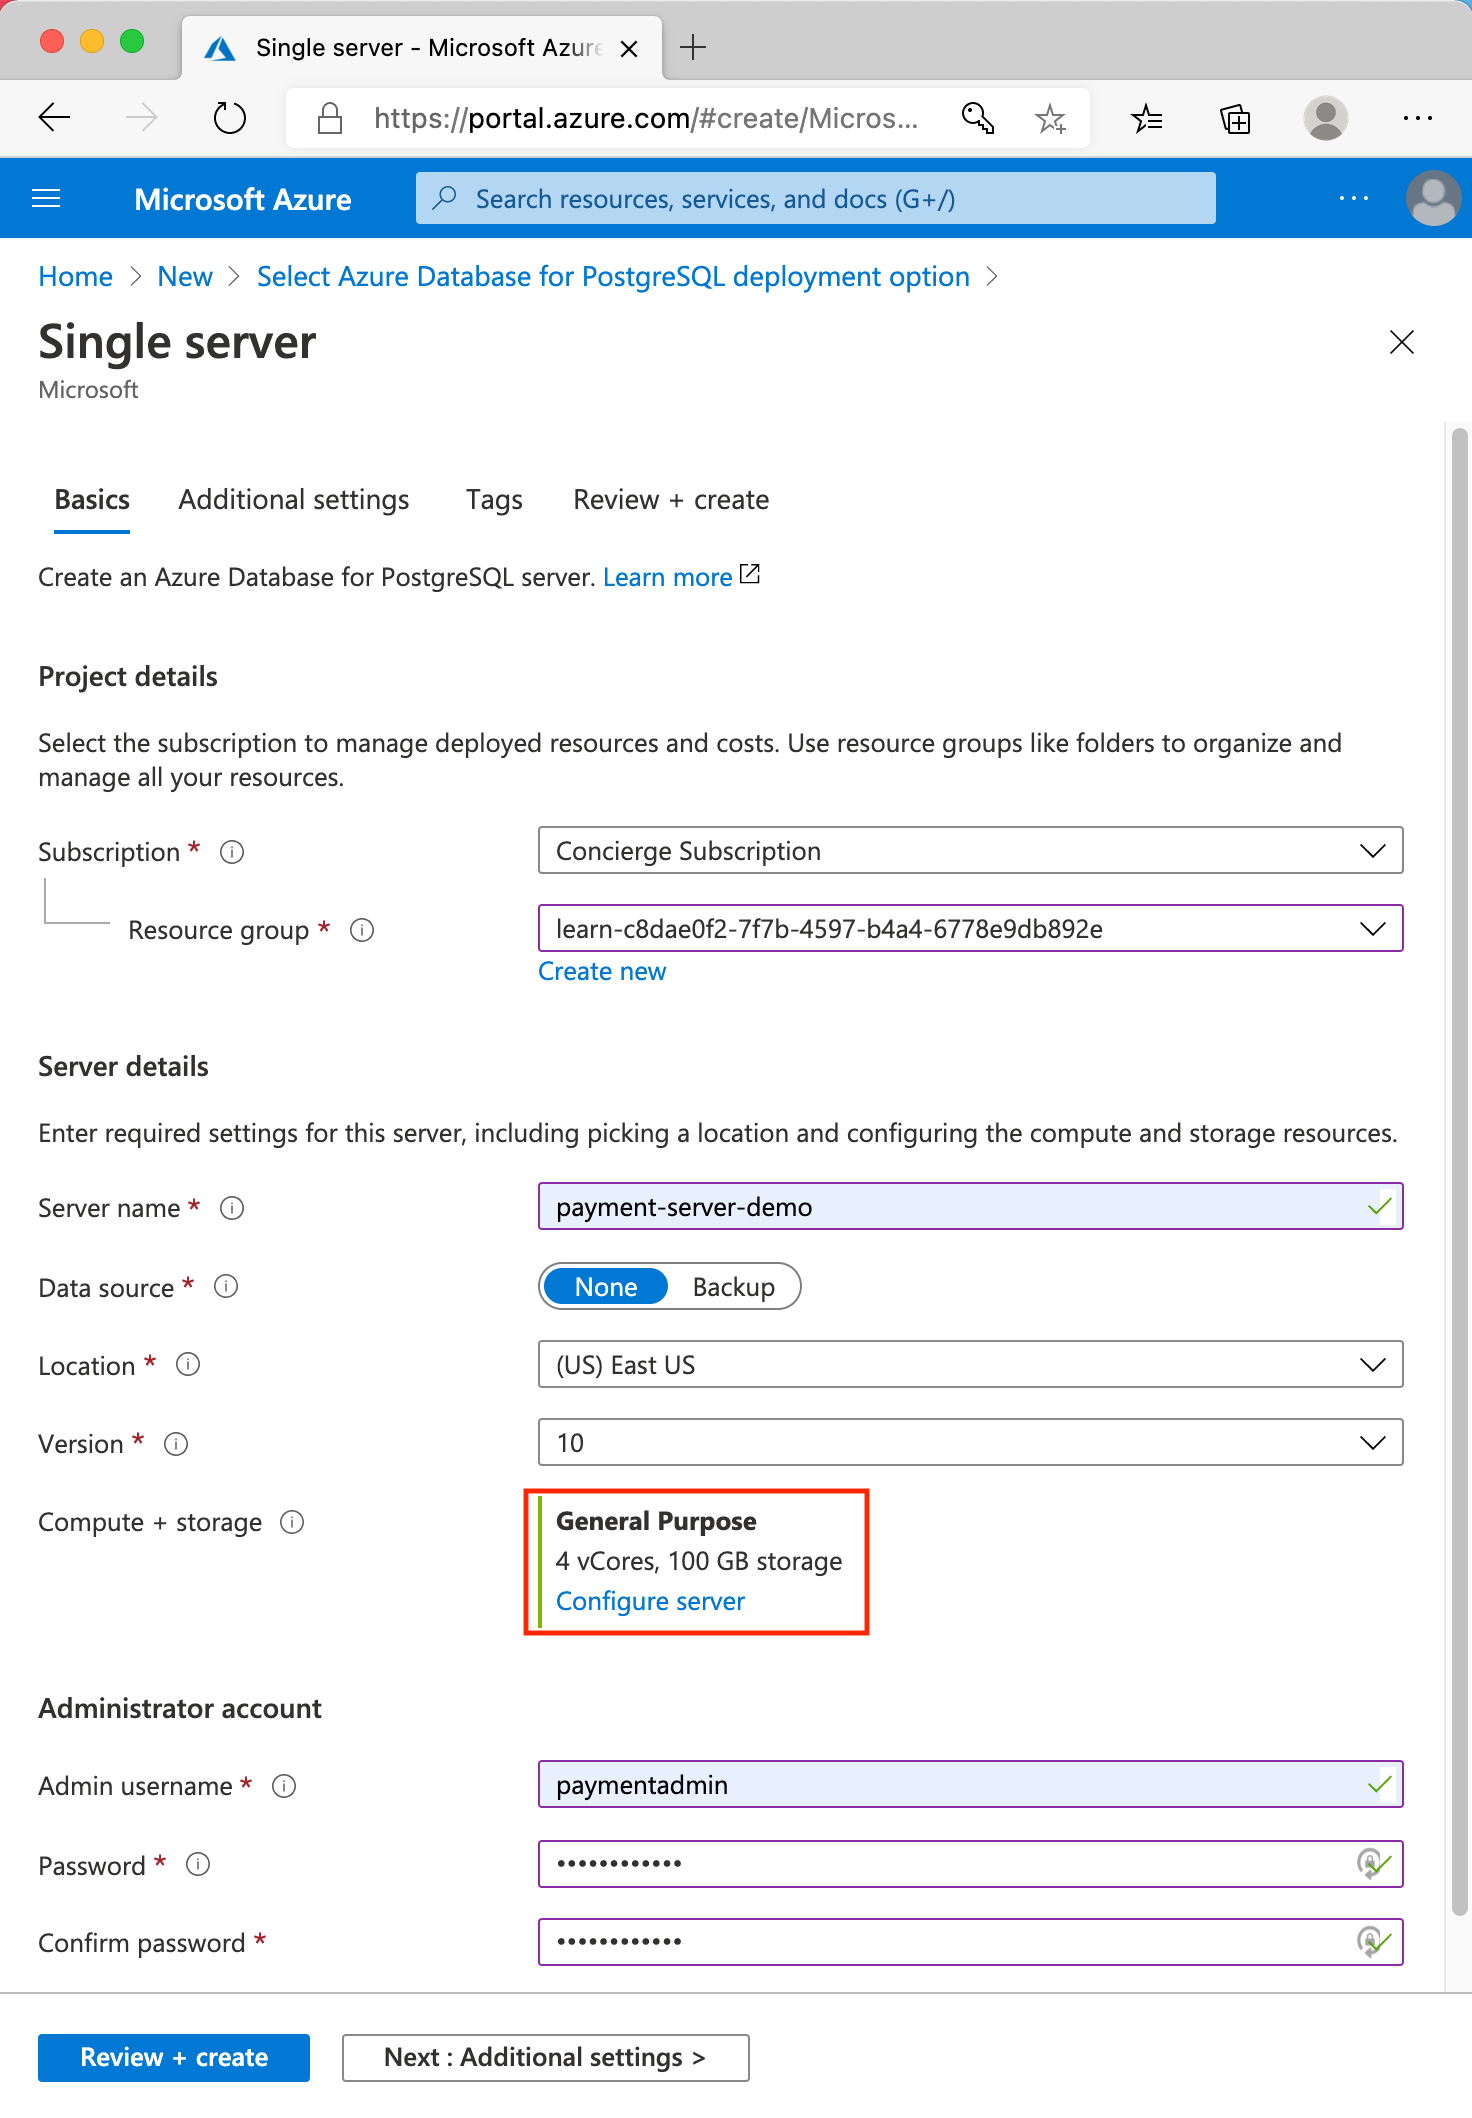
The Azure portal displays a PostgreSQL server configuration screen. Enter the following information.
| Parameter | Value | | --- | --- | | On the Basics tab, under Project details: | | | Subscription | Leave as Concierge subscription. | | Resource group | learn-xxxxx (xxxxx = any name you choose) | | Under Server details: | | | Server name | Choose a unique name, such as payment-server-demo. | | Data source | Leave as none. | | Location | Leave the default, or use a region that's close to you. | | Version | Leave the default version. | | Compute + storage | Leave the default of General Purpose. | | Under Administrator account: | | | Admin username | paymentadmin | | Password/Confirm password | Choose and confirm a password. |
Note
You need the resource group, server name, username and password for later use.
Under the Compute + storage option, select Configure server.
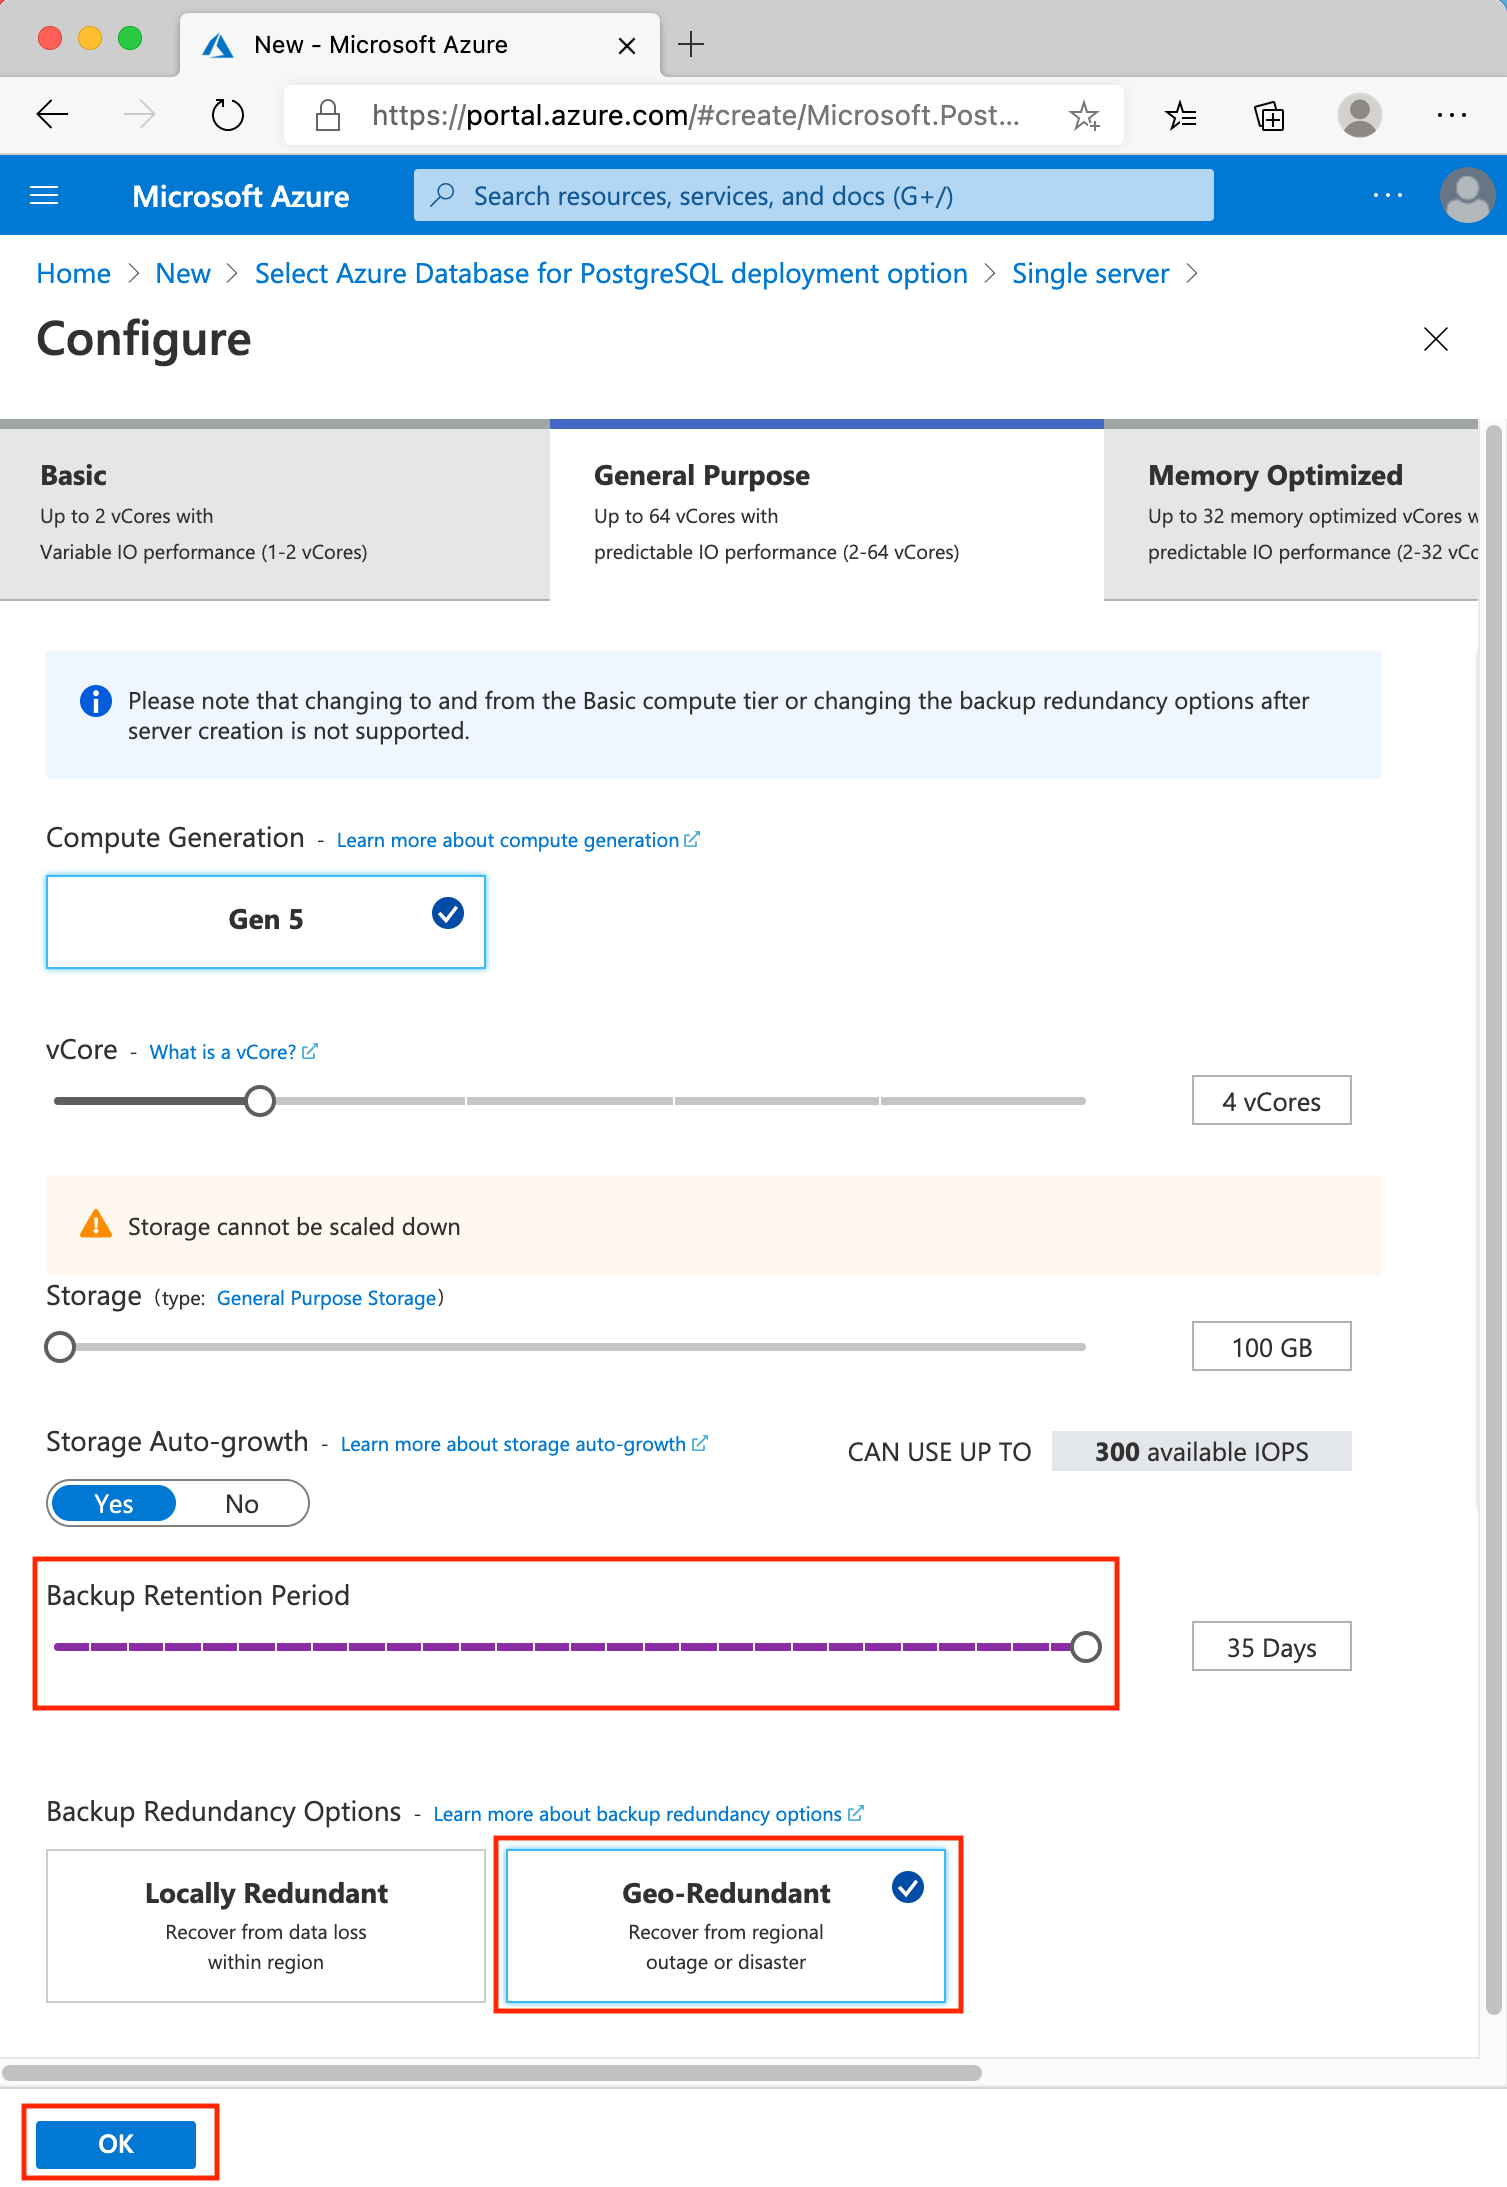
On the Configure page:
Select 35 days in the Backup Retention Period section.
Select Geo-Redundant in the Backup Redundancy Options section. Feel free to increase compute power and storage size, if you like.
Select OK.
- Select Review + Create, then select Create.
Congratulations! Your database is being deployed to Azure.


