


In March 2013 Solomon Hykes demonstrated the docker tool at PyCon and revealed the underlying technology powering the DotCloud platform. This was the beginning of the container revolution.
So what is this Container technology and Docker?
To understand this we need to know what things are needed to run a program. To do so we first need to get an operating system that will provide our program with the file system, and networking resources further we also need to configure all the dependencies and libraries needed for the program. After doing all these things we can get our program running.
So containers are basically a process in which a program or application is encapsulated with all the dependencies and configurations required to run the application in any environment.
Docker is one of the container platform meant to manage those containers. Docker is a tool that has the power to manage all the necessary things regarding the container and as it is a platform it can manage multiple containers if needed.
The world before Docker...
Before Docker was introduced organizations that had multiple applications/ products in them needed to have multiple servers to run them for security and isolation between them which was a costly approach. This challenge was solved by virtualization which enabled them to run multiple servers on top of a single hardware/machine just by introducing a layer of the hypervisor.
But containers are more effective a host machine/server that might be able to comfortably run 10 or more containers could struggle to support a single VM. containers are more resource effective compared to virtual machines.
Although we can see organizations features both virtualization as well as containerization as per needs.

Practicals
Here in my case, I will be using Ubuntu OS for this demonstration but we can perform the same stuff on other OS as well because commands remain exactly.
Docker Installation for Ubuntu:
Note: if you are using some other OS do check the installation guide from docker (here)
- Setting up the repository
$ sudo apt-get update

$ sudo apt-get install ca-certificates curl gnupg lsb-release

$ sudo mkdir -p /etc/apt/keyrings
curl -fsSL https://download.docker.com/linux/ubuntu/gpg | sudo gpg --dearmor -o /etc/apt/keyrings/docker.gpg

$ echo \
  "deb [arch=$(dpkg --print-architecture) signed-by=/etc/apt/keyrings/docker.gpg] https://download.docker.com/linux/ubuntu \
  $(lsb_release -cs) stable" | sudo tee /etc/apt/sources.list.d/docker.list > /dev/null

$ sudo apt-get update
- Install Docker
$ sudo apt-get install docker-ce docker-ce-cli containerd.io docker-compose-plugin
- Check whether the installation is done successfully or not
$ sudo docker info

- Now we have done our setup successfully let's begin🥳
Hands-on
Before moving further we need to understand that the docker tool has created an abstraction such that users of docker can use it without knowing its underlying architecture or how Docker internally works (you can check it here). But we do need to understand a few terminologies before moving forward:
Image/ Container Image:
The container image is a template from which multiple containers will be created it is a bundle consisting of the application, its dependencies, libraries, and the runtime.
Container registry:
A container registry is a centralized storage location where the developers can store their container images, and share their customer-created container images.
Dockerhub is one of the public container registries by docker.
Now Let's run our first docker container ...🏃♂️
$ sudo docker run -it --name myos1 centos /bin/bash
docker runbasically helps us to create, start and run the given program/ command/ application in the container.$sudo docker run -it --name <container_name> <container_image> <command>Here centos is the container image and myos1 is the name of the container. here if have also given
-itwhich is for the interactive terminal that we wantnow we don't have to memorize this all syntax at any point we can use the
$docker <command> --helpor$docker --helpAlso here we have mentioned the container image centos but that image is neither till now created by us nor already present in the local system. so docker will first do to its public repository by default check whether any image of this name is available there or not. if available download it and then launch a container from it.

After running the command we can see we got a new fresh OS which is actually a container and just running the bash shell as we asked for. To get out of the container we can use the exit command which will close the container or we can ask to keep it running in the background by pressing ctrl+P+Q
$ sudo docker ps
$ sudo docker images
$ sudo docker inspect myos1
docker pswill show us the running container anddocker imageswill show us the container images present in the local system
if we want to fetch more information regarding the container we can use the
docker inspectcommand along with the container name.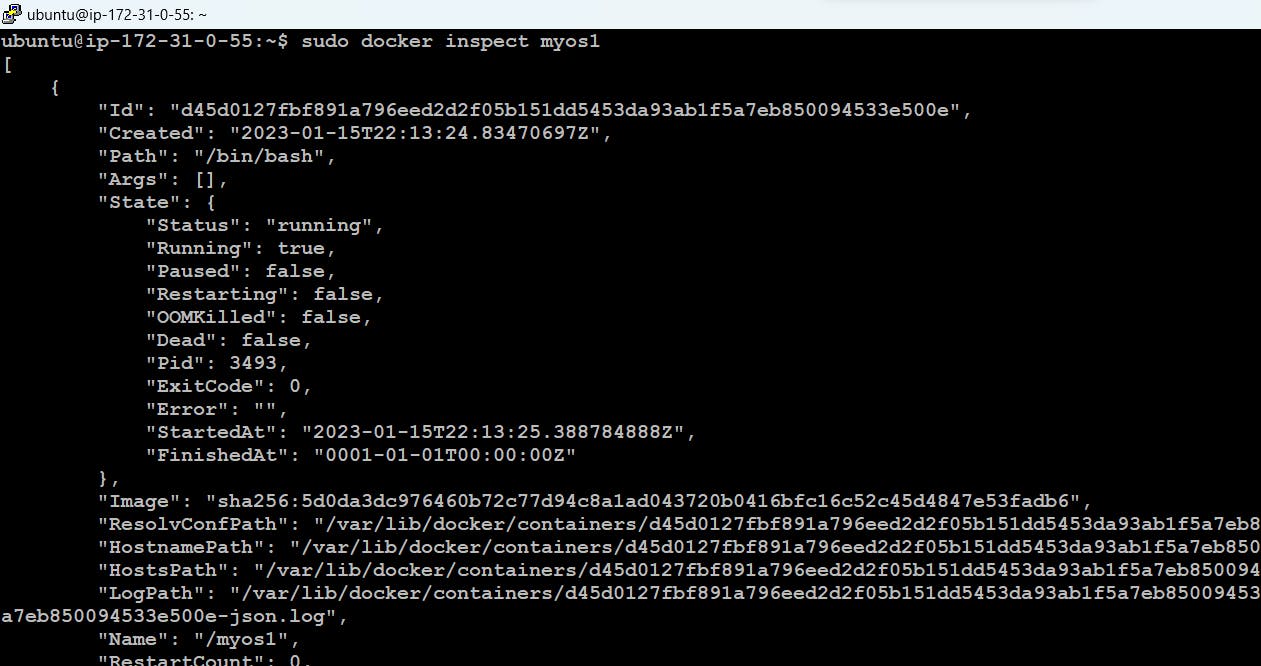
if we want we can also stop the container from using the
docker stop <container_name>command and again start by usingdocker start <container_name>the command.we can also use
docker attach <container_name>the command to attach the standard input/output with the running container
Here in this example, we have pulled the centos image from the dockerhub which got pulled automatically. Now let's try to pull the image from dockerhub manually
docker pull <username>/<image_name>:<version/tag>
$ sudo docker pull httpd
Here we have not given any username or tag/versions. in this case, it will pull the image's latest version available and provided by the community. Also, this image is an official image provided by the apache community so we don't need to give the username in these cases.

This httpd image has the httpd software which helps us to run the web server. now let's try to run it.
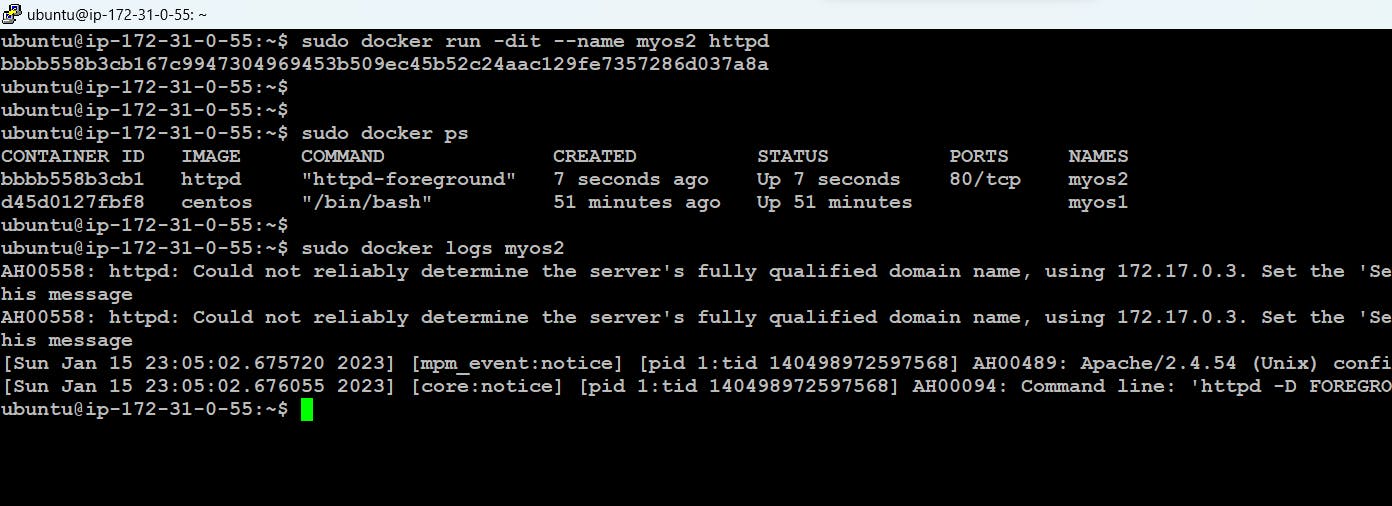
Here we need to note we can't give the same container name to 2 different containers in our system. also here I have used the -d option to run the container in the background.
If we want to retrieve the logs of the container we can also use the docker logs along with the container name.
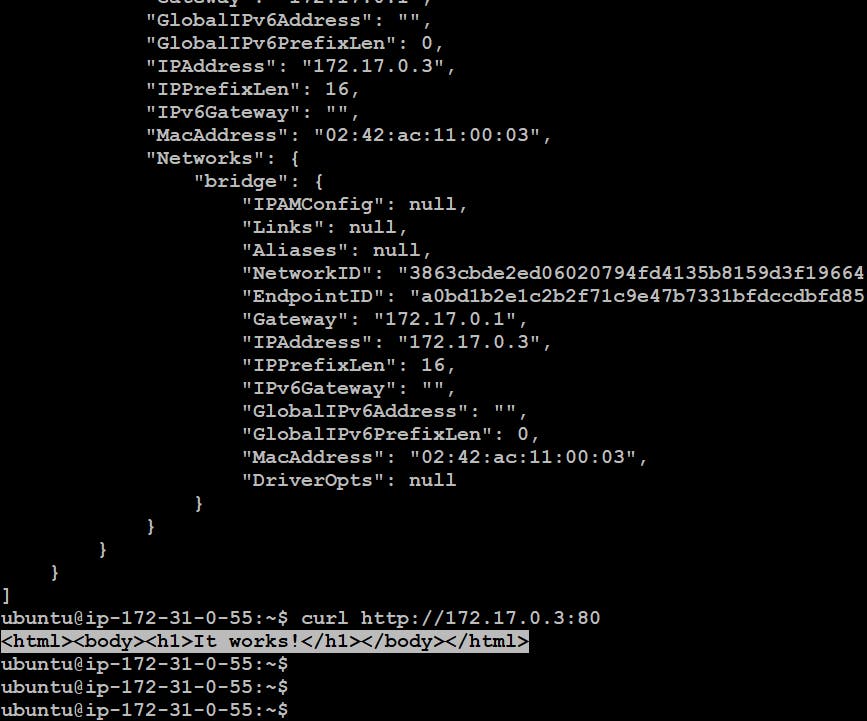
Now if we want to test the web server running inside the container myos2. we need the IP of the container which we can get by using the
docker inspectcommand along with the container name$ sudo docker inspect myos2
Now to connect we can use command line browsers like curl which helps us to get the content of the web server we know the webserver by default runs on port 80 so we need to use port number 80
But here the challenge is the user of this container will not connect to the container directly it has to connect to the base OS (OS over which the docker is running) and then request for the page which is inside the container for this docker provide a very easy option -p.
$ sudo docker run -dit -p 8080:80 --name myos3 httpd
Here we have bind port number 8080 of the BaseOS to port number 80 of the container myos3
Behind the seen docker does the port address translation but again docker has abstracted all these things and made very simple options for the user of docker.

Now we can see the webpage on localhost:8080
Note: In all these cases where we have used the httpd image we have not mentioned which command to run at the end of docker run this is because this is prewritten In the container image itself what command to run by default if not given.
Multiple times there are requirements where we need to run commands over an already running container there we can use the
docker execcommand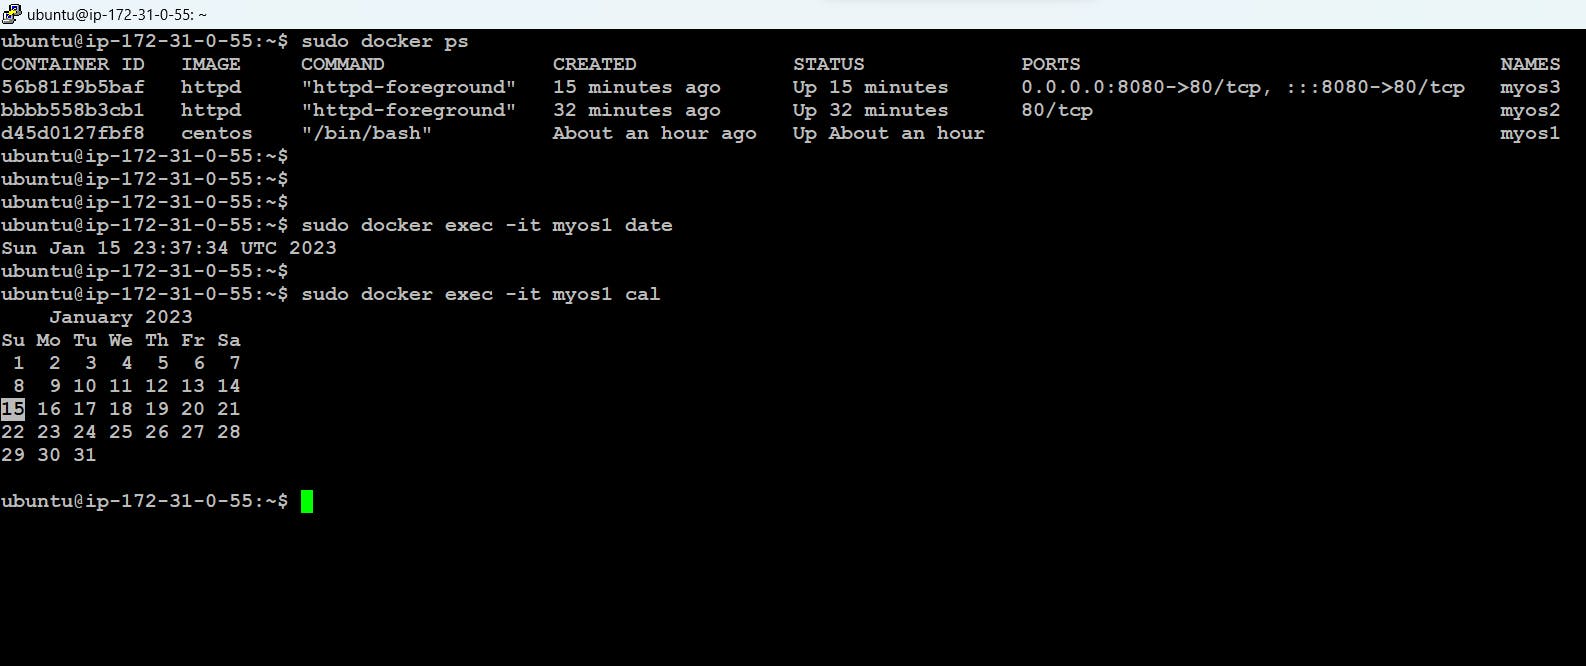
Let's say we have multiple containers or images we can also delete those by using the
docker container rm <container_name/container_id>command or by using thedocker image rm <container_image/container_imageID>(Note: if we want to remove the running container we can use option -f i.e forcefully)


So till now, we learned about containers, the docker tool, its termonologies, and how we can use it with practical demonstration hope you enjoyed learning docker.
We will be performing more such practicals and understanding concepts on docker and multiple other technologies stay tuned.
That's all for this blog 🙌
Thankyou For Reading
Any query and suggestion are always welcome- Gaurav Pagare