


Challenges : Before Helm
Kubernetes is undoubtedly an excellent tool for deploying applications, offering a wide range of features and services. However, deploying an application on a Kubernetes cluster can be highly complex, as multiple components are involved. Consider, for example, deploying a simple WordPress site on Kubernetes. In this case, various pod deployments, such as for WordPress and MySQL, need to be configured, along with services to expose those pods. Additionally, persistent storage requires configuring persistent volumes, storage classes, and persistent volume claims. Furthermore, credentials and password secrets must be stored, and configurations must be saved in config maps. Depending on the specific requirements, there may be even more components involved in the deployment process.
Now, let's imagine that we need to replicate a similar setup in other clusters. In this scenario, we must deal with the same manifest YAML files and apply them again. Moreover, if a particular cluster requires custom configuration, it will be a nightmare as we may have to make changes to all those manifest files carefully. Furthermore, suppose we need to delete this whole setup in the future. In that case, we need to recall all the objects and components launched in the cluster. One might suggest combining all those manifest files into a single file, but this could introduce other challenges, such as working in a team, editing the final manifest file, etc.
This is where Helm comes into the picture. Helm is an excellent tool that simplifies the process of deploying applications on Kubernetes. With Helm, you can execute a few straightforward commands in the terminal, and you're ready to go with your Kubernetes deployment.
What Is Helm?
Helm is an open-source package manager graduated CNCF project originally created by DeisLabs as a third-party utility, now known as the package manager for Kubernetes. It simplifies the process of deploying applications and services to Kubernetes clusters, especially for those that are highly repeatable or used in multiple scenarios. Helm achieves this by using charts, which are a package of pre-configured Kubernetes resources that are ready to be deployed. These charts can be customized according to specific needs, making it easy to deploy complex applications with ease.
Helm is useful not only for deploying applications but also for managing releases thus providing facilities like rollback or upgrade applications as needed. Helm provides a standardized method for packaging and distributing applications, making it easier to manage and update them.
How Does Helm Work?
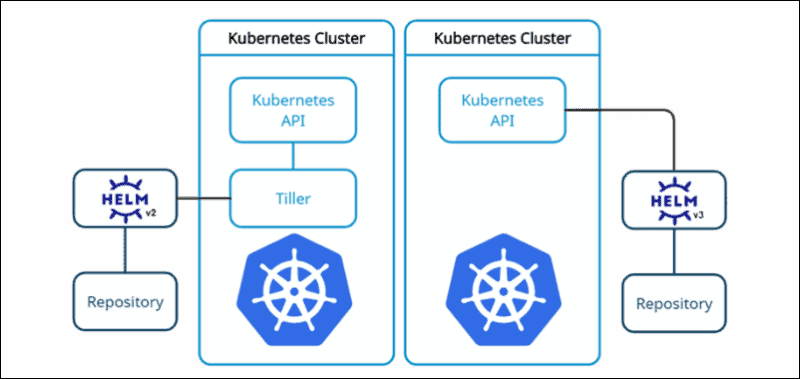
Helm has undergone significant improvements, particularly between Helm version 2.0 and 3.0. In the earlier version, Helm 2.0, a server-client model was used. Helm client interacted with a server-side program called Tiller, which then contacted the Kubernetes API server on behalf of the client. However, in Helm 3.0, Tiller was removed, and the Helm client now directly interacts with the Kubernetes API server, simplifying the deployment process.
In addition to the removal of Tiller, Helm 3.0 comes with other significant changes. Three-way strategic merge patch. Helm 3.0 also uses Secrets as the default storage driver, which offers better security. The inclusion of JSON Schema Chart Validation ensures the validity of charts and makes it easier to validate charts against Kubernetes schemas.
Overall, Helm 3.0 is a significant improvement over its predecessor, and its new features and capabilities make it even more powerful and efficient for managing Kubernetes deployments.
Installation of Helm
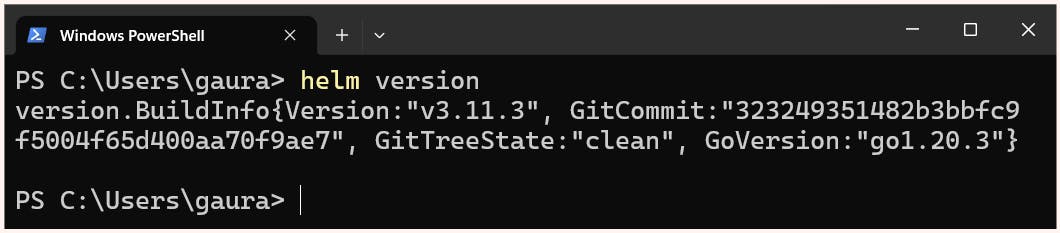
To use Helm, you will need to install and configure it on your Kubernetes client machine. In this case, we are using a Windows machine as the client of Kubernetes, and we will be installing and configuring Helm on top of this machine.
Go to https://github.com/helm/helm/releases and download the helm binary for the required OS
If downloaded in zip format unzip it there we can see the helm binary located.
Now set the path for this helm binary so that it can be accessed anywhere in our OS.
Understanding Charts and Creating our own Custom Charts in Helm
Charts are the backbone of Helm, as they allow developers to deploy complex applications with ease. Here, we will be create a simple chart called "myweb" to demonstrate the process of creating a chart.
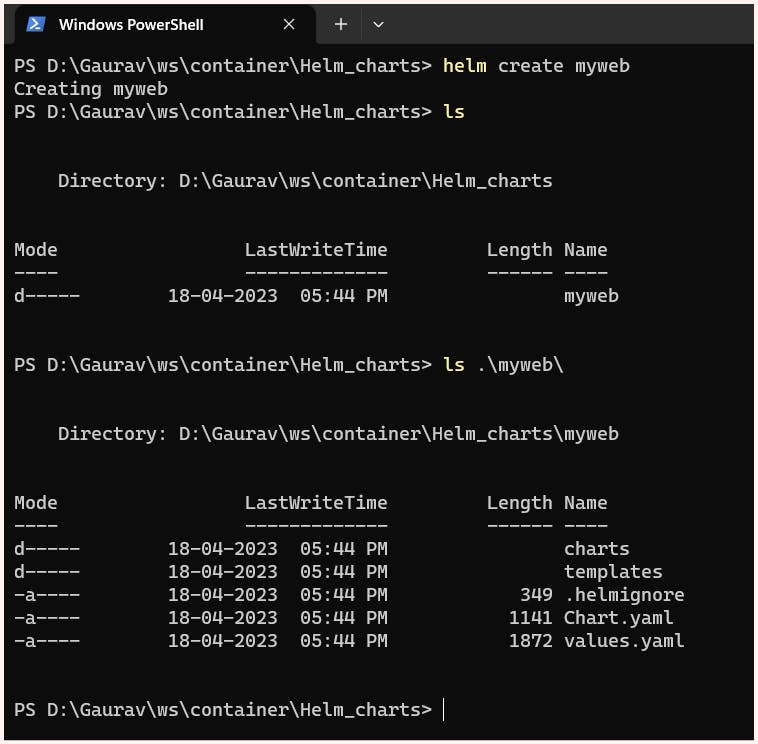
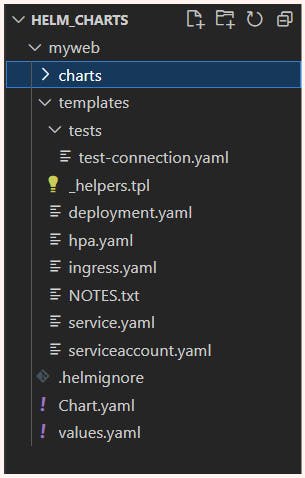
Here we have multiple files and directories:
Chart.yaml: File used to describe the basic information of the Chart, including name, version, etc.Templates: Directory containing resource definition templates in YAML format for each K8s resource in the applicationcharts: Directory that may contain other charts (sub-charts).values.yaml: File that contains chart default valuestest: Directory that contains files that running pre instantiating the chart. for purposes of verification, testing, etc. eg. Validate your configuration from the values.yaml file was properly injected thus make sure your username and password work correctly.
Since we wanted to create our own custom chart let's remove everything in the templates folder and start from scratch.
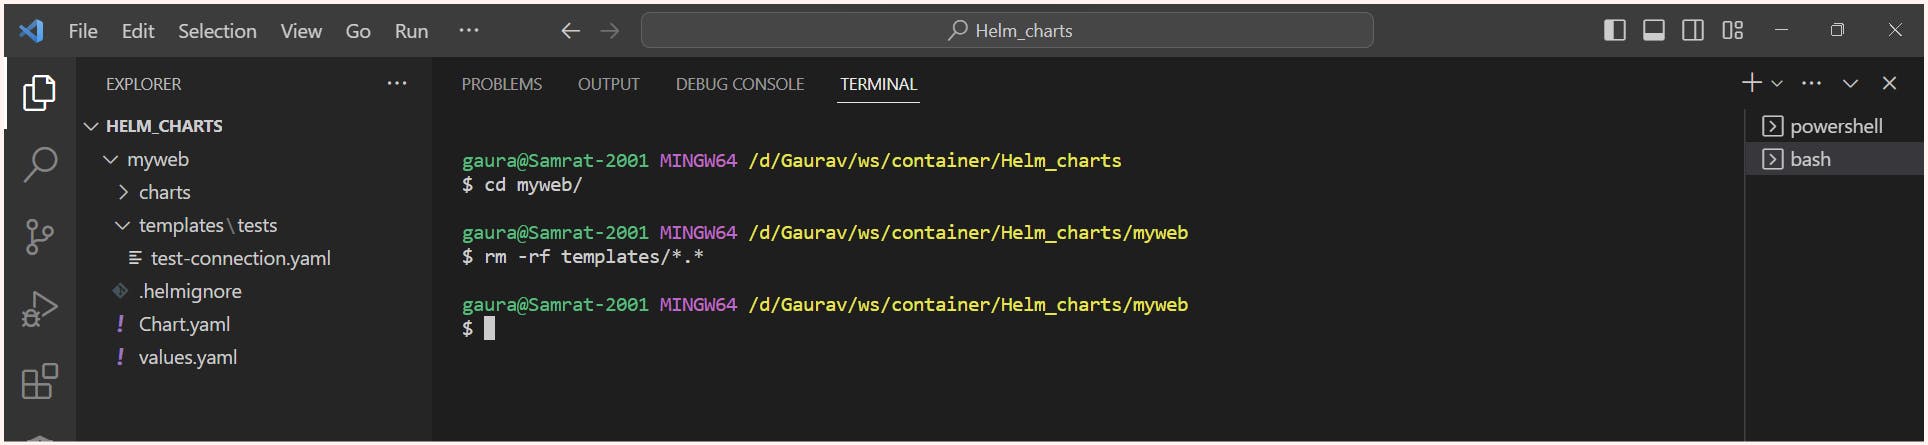
We will be creating an deployment and service for our webtest container image. In order to generate the YAML file for deployment run the below command:
$ Kubectl create deployment web1 --image=gaurav2001/webtest:v1 --dry-run=client -o yaml > deployment.yaml
Note: here we have used the image gaurav2001/webtest of version v1.
deployment.yaml

apiVersion: apps/v1
kind: Deployment
metadata:
  creationTimestamp: null
  labels:
    app: web1
  name: web1
spec:
  replicas: 1
  selector:
    matchLabels:
      app: web1
  strategy: {}
  template:
    metadata:
      creationTimestamp: null
      labels:
        app: web1
    spec:
      containers:
      - image: gaurav2001/webtest:v1
        name: webtest
        resources: {}
status: {}
Now create the service file of Nodeport type.
service.yaml

apiVersion: v1
kind: Service
metadata:
  labels:
    app: web1
  name: web1
spec:
  ports:
  - port: 80
    protocol: TCP
    targetPort: 80
  selector:
    app: web1
  type: NodePort
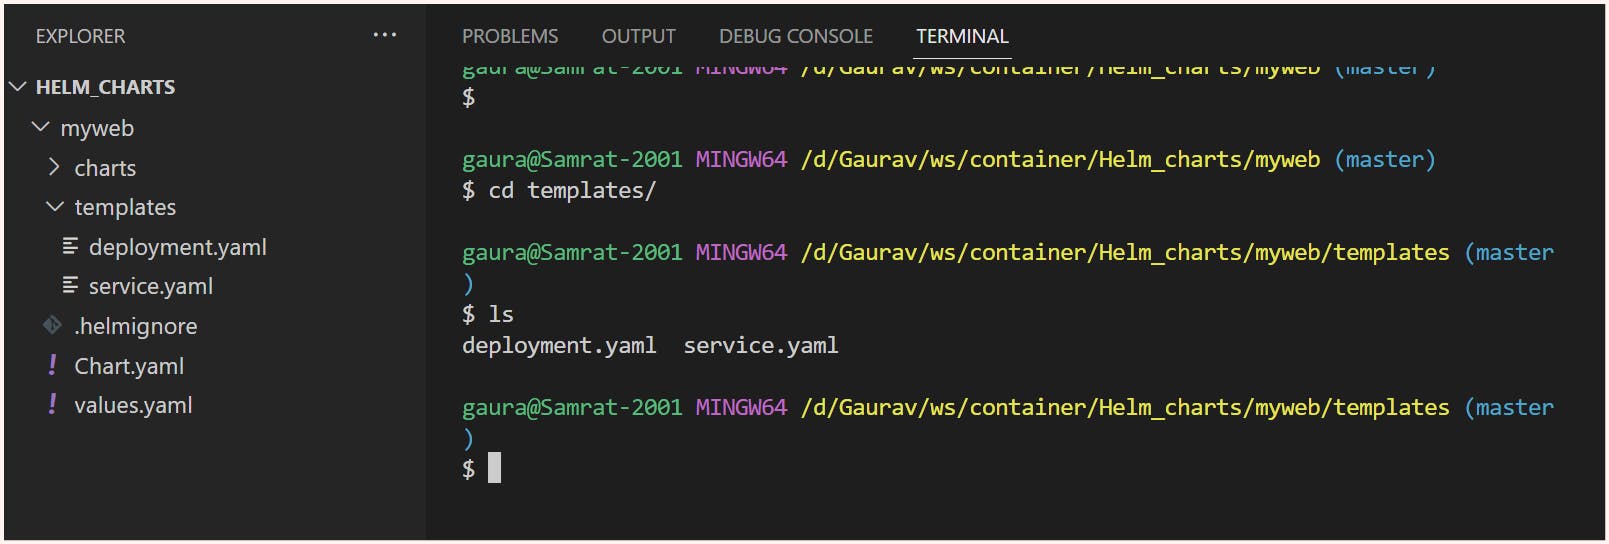
Now our templates are ready lets deploy this helm chart.
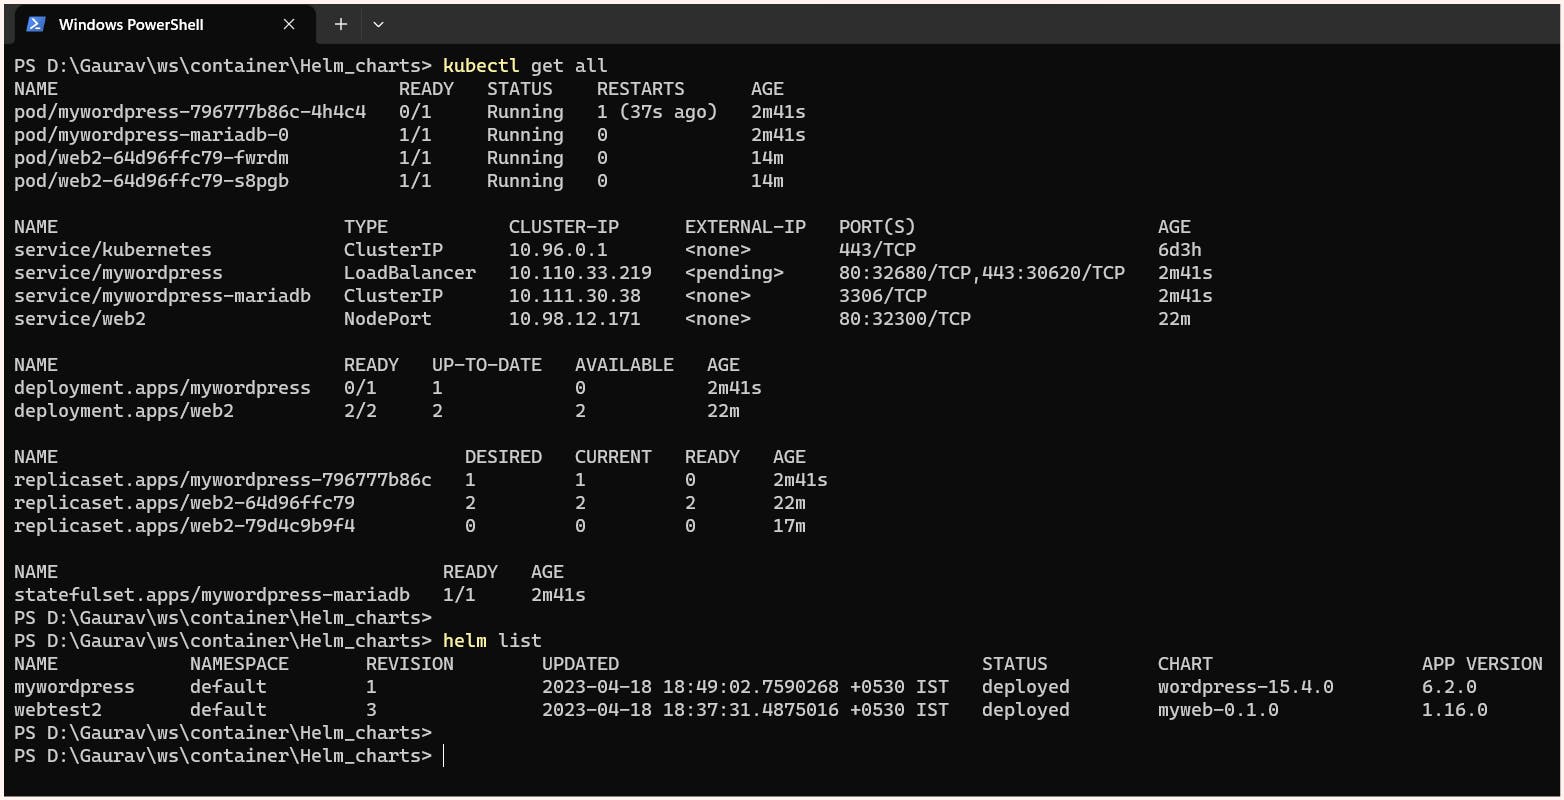
# Command to list all the installed helm chart

$ helm list

# Command to install the helm chart
# Here we need to mention path and name of chart
# We also need to mention the software name i.e after installation by what name the installed chart be recognized by

$ helm install <software name> <path and name of chart>
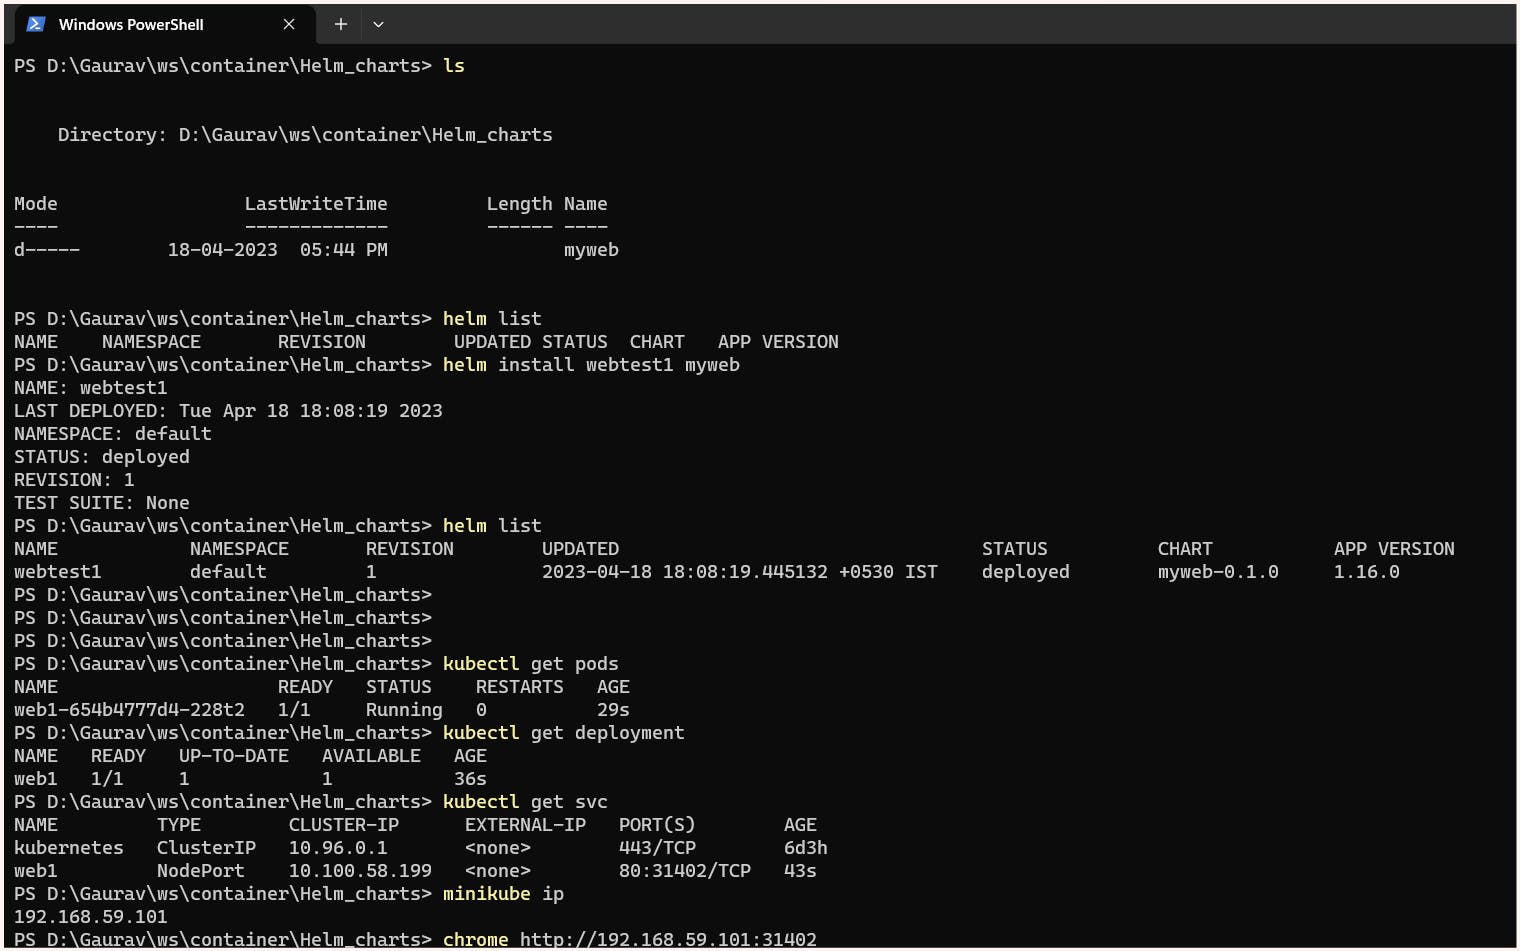
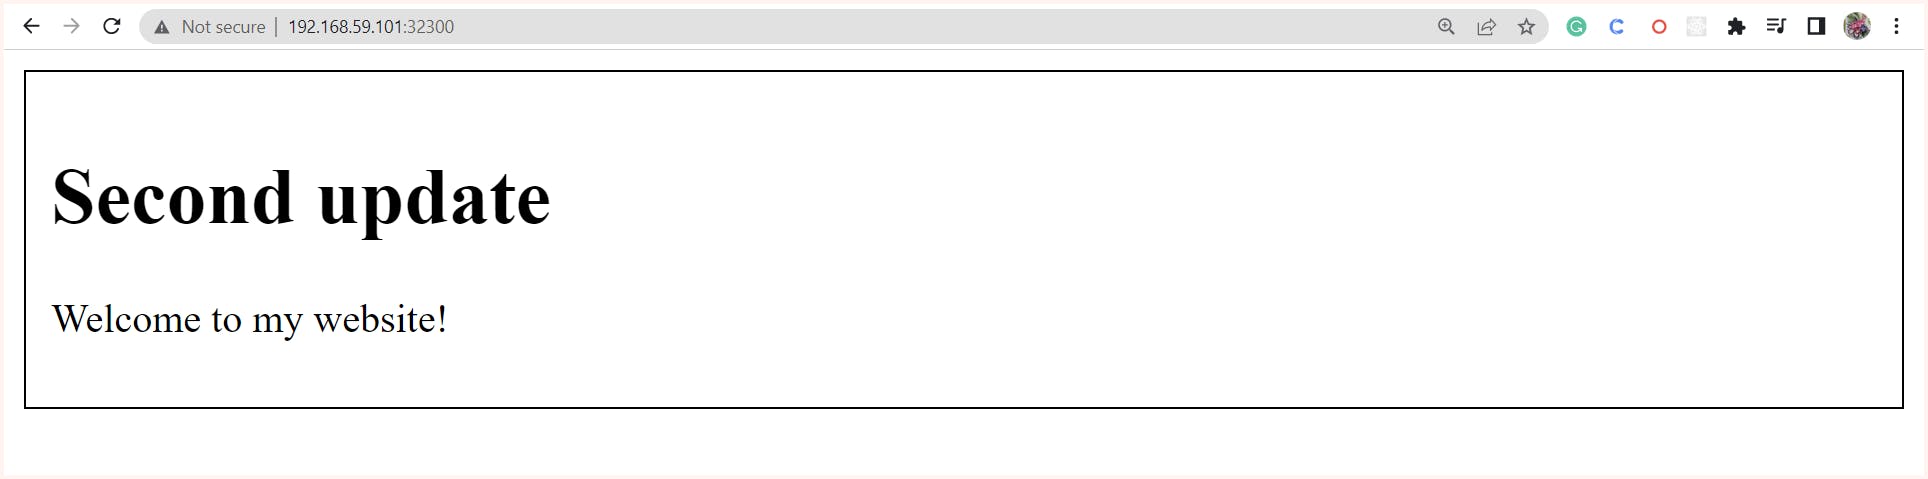
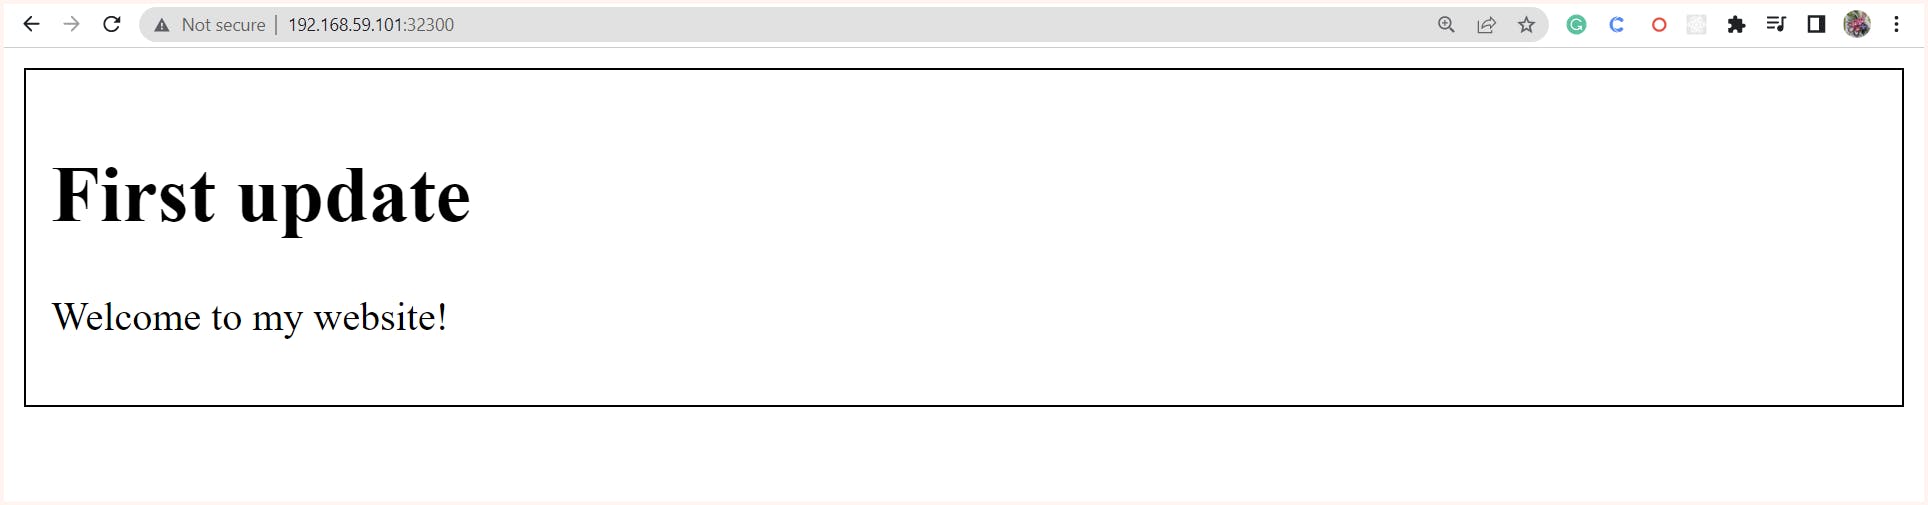
Now when we hit to the minikube IP with nodeport port we can see our app running

The templates we created earlier do not have any variables, which makes them difficult to customize and reuse. Therefore, let's modify our chart once again and add some variables to make it more flexible and adaptable.
Here we create values.yaml file with required variable we wanted to use along with there values.
values.yaml

# Default values for myweb.
# This is a YAML-formatted file.
# Declare variables to be passed into your templates.

replicaCount: 2
imagename: gaurav2001/webtest
imagetag: v1
port: 80
label: web2
Lets understand using these variable in these file with an example consider the example {{ .values.replicacount}} here ".values" refers to the values.yaml file in the chart's directory, which contains user-defined values for the chart. "replicacount" is a variable defined in the values.yaml file, and its value can be changed at deployment time by the user. In similar way other varbles are also created and used.
deployment.yaml

apiVersion: apps/v1
kind: Deployment
metadata:
  creationTimestamp: null
  labels:
    app: {{.Values.label}}
  name: {{.Values.label}}
spec:
  replicas: {{ .Values.replicaCount }}
  selector:
    matchLabels:
      app: {{.Values.label}}
  strategy: {}
  template:
    metadata:
      creationTimestamp: null
      labels:
        app: {{.Values.label}}
    spec:
      containers:
      - image: {{.Values.imagename}}:{{.Values.imagetag}}
        name: webtest
        resources: {}
status: {}
service.yaml

apiVersion: v1
kind: Service
metadata:
  labels:
    app: {{.Values.label}}
  name: {{.Values.label}}
spec:
  ports:
  - port: {{ .Values.port}}
    protocol: TCP
    targetPort: {{ .Values.port}}
  selector:
    app: {{.Values.label}}
  type: NodePort
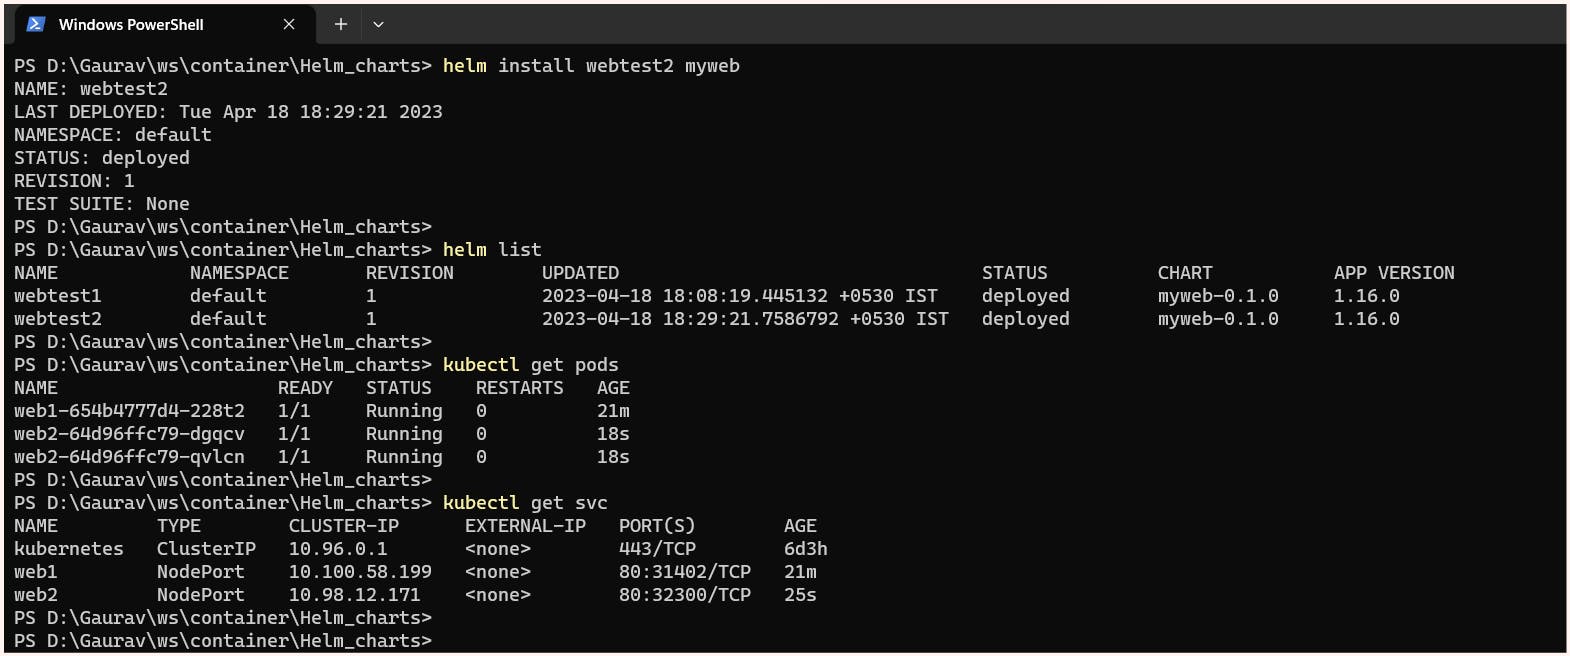
Again we will be installing a new chart using this changed template we name it as webtest2. After checking we get that the gaurav2001/webtest:v1 image was used
In order to avoid confusion we have uninstalled our previous chart.

Now lets do some changes in the chart we will be upgrading the cart with new image version ( gaurav2001/webtest:v2 ). for this we perform changes in values.yaml file.
values.yaml

# Default values for myweb.
# This is a YAML-formatted file.
# Declare variables to be passed into your templates.

replicaCount: 2
imagename: gaurav2001/webtest
imagetag: v2
port: 80
label: web2
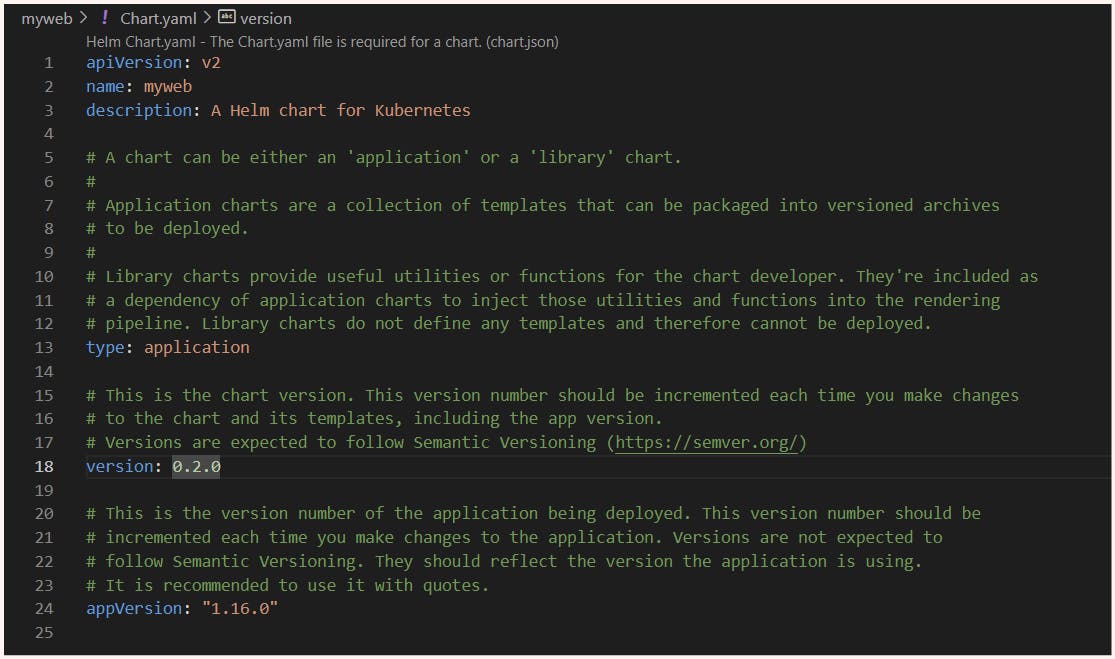
We must also take care that the version of the chart is been change for this we'll go to the chart.yaml file and change version from 0.1.0 to 0.2.0
Now use the command:
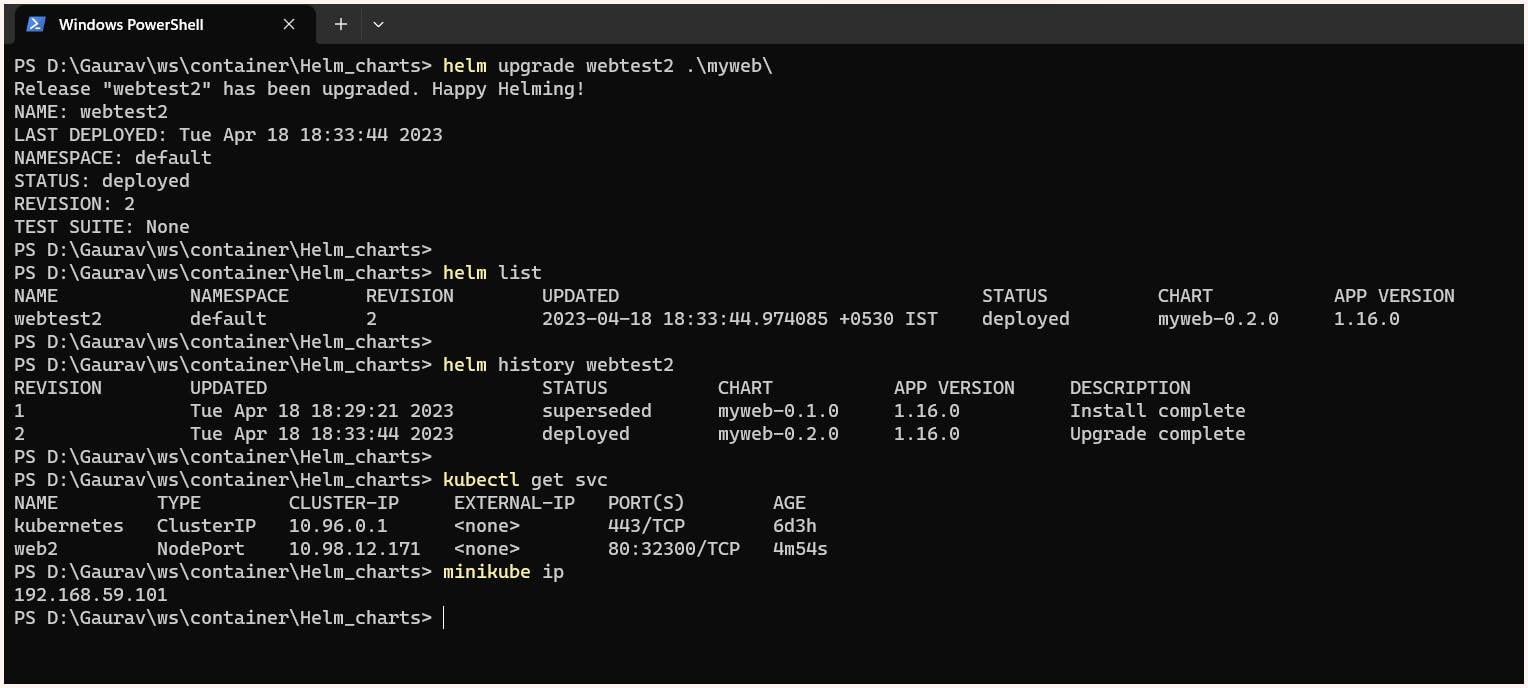
#Upgrade the deployed application with updated chart.
$ helm upgrade <software_name> <path for chart>

# check the history of the software and change done in there timeline
$ helm history <software_name>
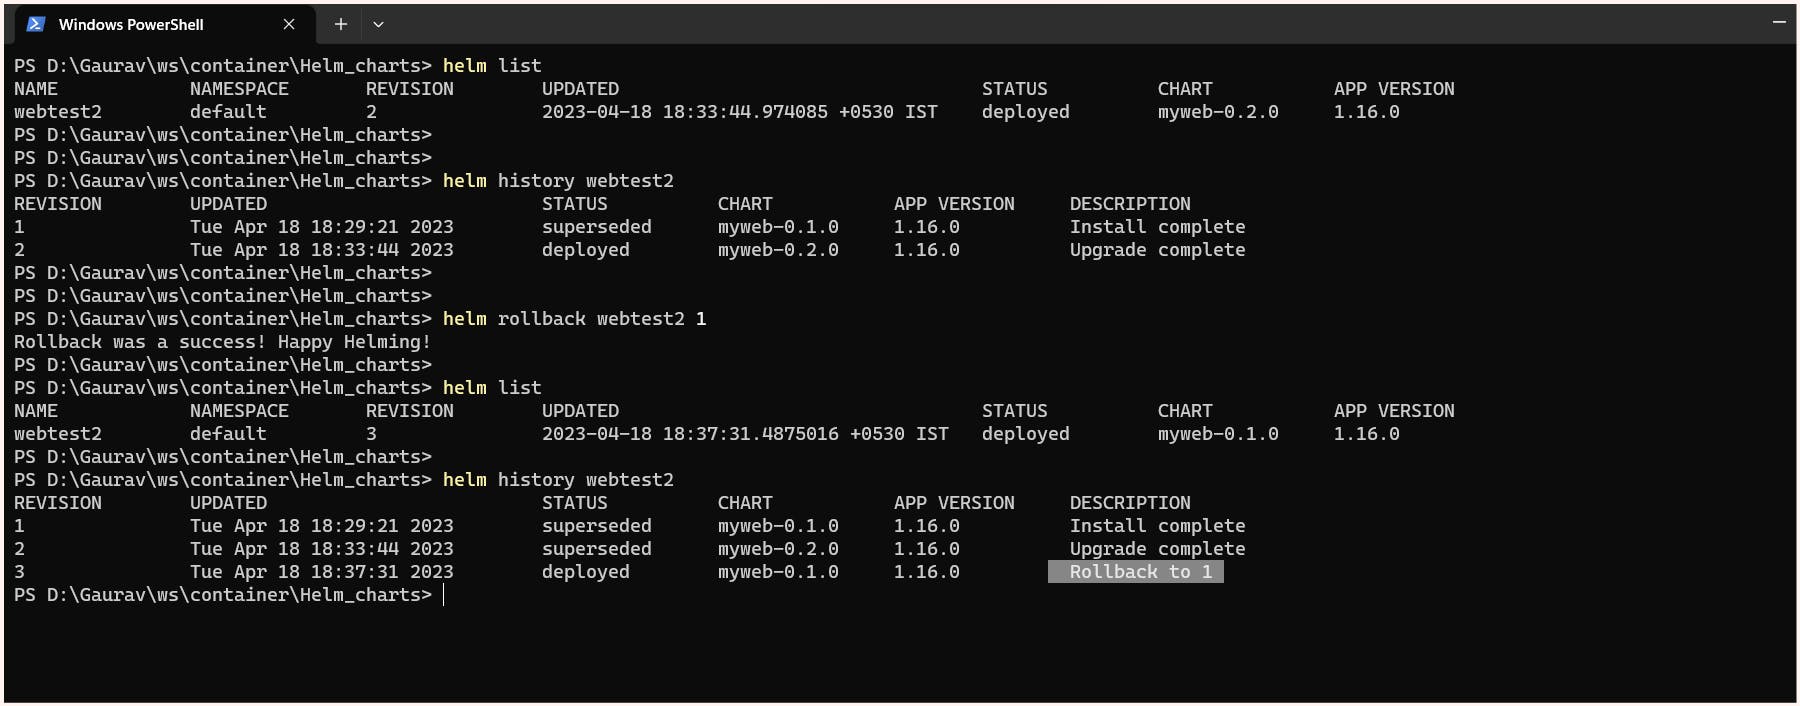
Now suppose we find some bug or error with this new deployment we can roll back to the earlier release easily using:
# for rollback we need to provide them with the software name and the revison over which rollback need to be done.
$ helm rollback <software_name> <revision_number>
# If we want to check the variable in the chart we can use the command
$ helm show values <chart path>

Installing and Using Charts from Public Repositories
Helm not only allows you to create and manage your own charts, but it also lets you search and install charts created by other members in public repositories like Artifact Hub. To understand how this works, you can think of Kubernetes as an operating system and Helm as its package manager. Just like how you need to configure a repository for Yum to look for software during installation on CentOS, with Helm, you first need to configure a repository before you can search and install charts from it.
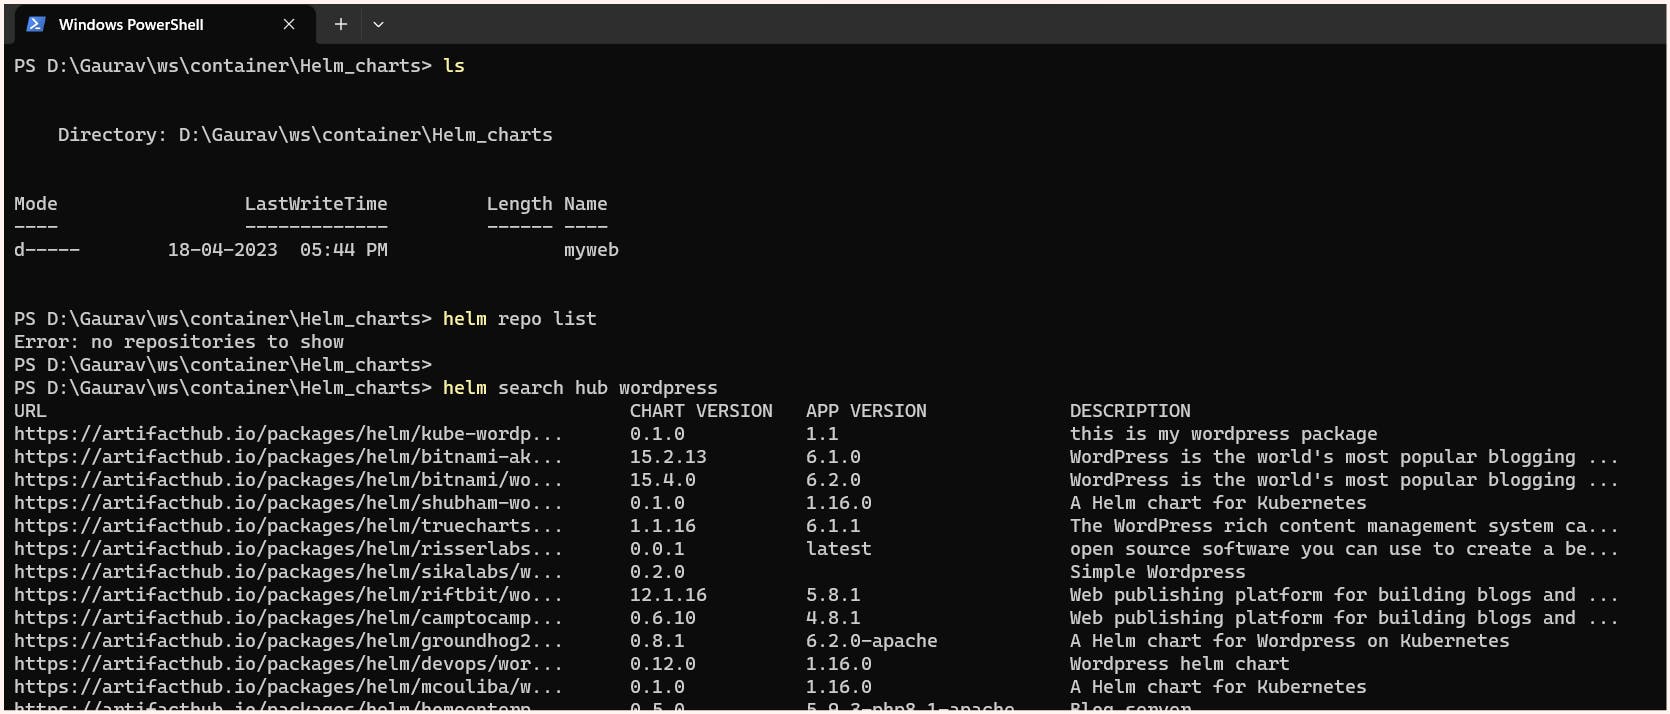
# check the existing repositories added
$ helm repo list

# Ask helm to search for the chart over public repositories
# hub : search for charts in the Artifact Hub or your own hub instance
# repo : search repositories for a keyword in charts

$ helm search hub wordpress
We can also look for the repo over https://artifacthub.io/
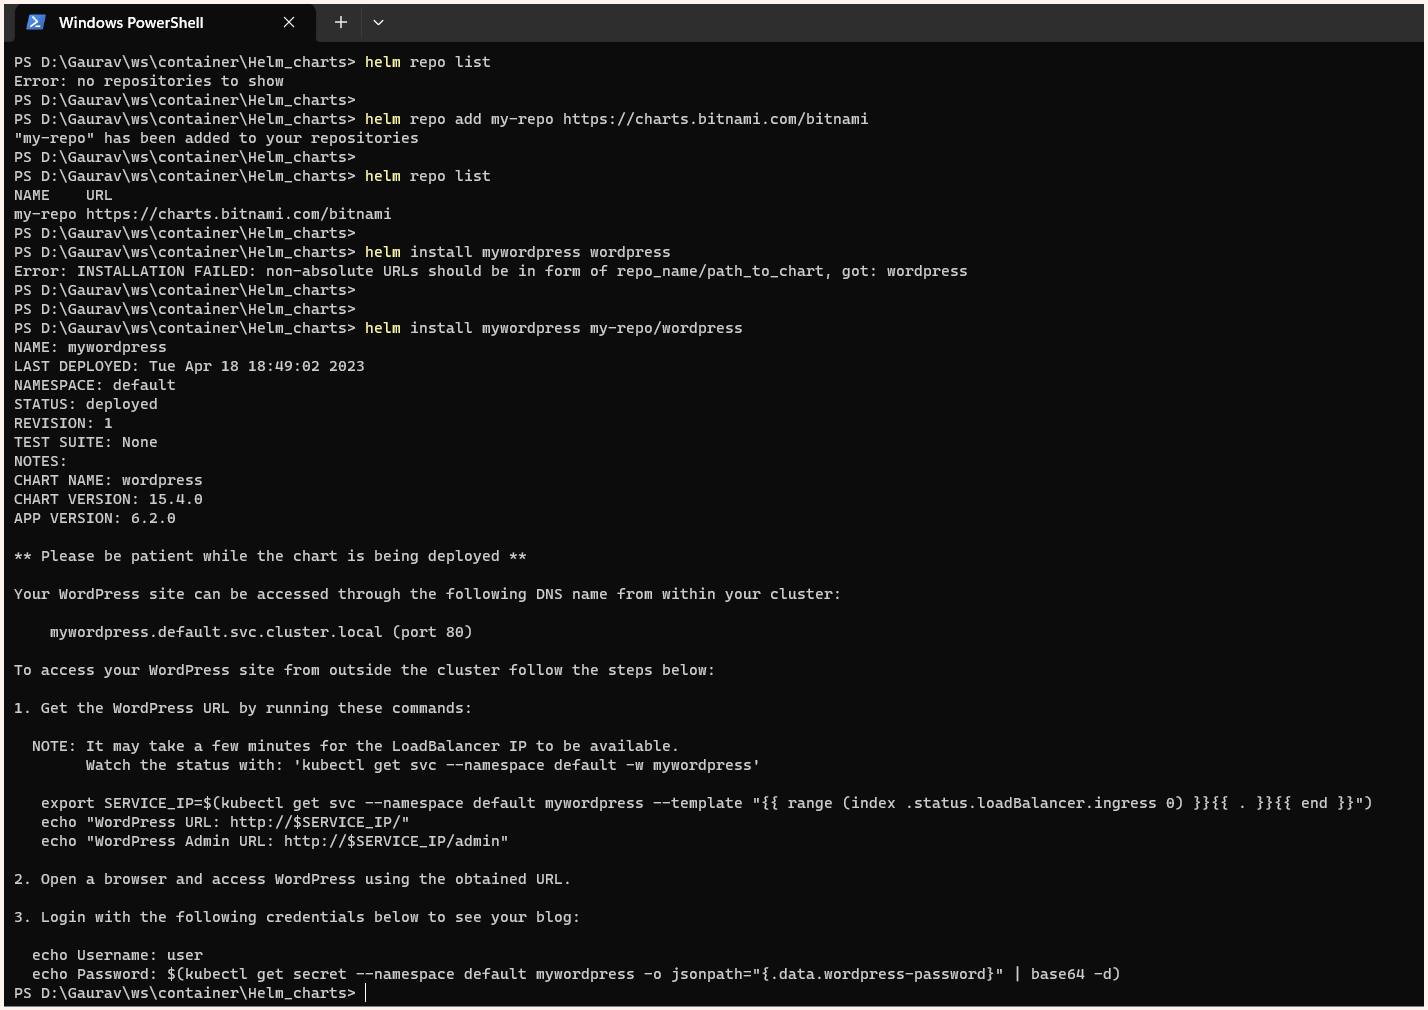
Once we find the repo we can ask to add it
# add repo

$helm repo add <repo_name> https://charts.bitnami.com/bitnami

# installation of packege/ software
$helm install <software_name> <repo_name>/<chart_name>
Resources
That's all for this blog, folks 🙌 Stay tuned for more amazing stuff on Kubernetes and more such tech. Make sure to subscribe to our newsletter. 📫
Thank you For Reading :) #HappyLearning
Any query and suggestion are always welcome- Gaurav Pagare