


Let's understand what is Ansible.
In today's world, organizations and businesses rely heavily on digital platforms to grow and succeed. Delivering applications faster is crucial for gaining a competitive advantage, but achieving this goal requires tons of manual effort and complex coordination. As an example, consider an organization that runs a business application and requires the injection of new security functionalities. This means that all servers hosting the application must be visited and updated, which could potentially involve hundreds of servers. This is not only a time-consuming and tedious task, but it also increases the risk of human error and inconsistency across the servers. Fortunately, there is a savior Ansible the simple, yet powerful IT automation engine that thousands of companies are using to drive complexity out of their environments and accelerate DevOps initiatives.
Ansible is an open-source all-in-one automation platform that seamlessly combines workflow orchestration with configuration management, provisioning, and application deployment. With Ansible we can eliminate the complexity and hassle of managing multiple tools and systems.

Time before Ansible
Automation was and is the need of the market. For instance, if an organization needs to configure simple web servers across all its servers, the challenge arises due to the fact that not all servers have the same operating system configured. There may be multiple different OSs such as Windows, RHEL, Ubuntu, and CentOS, each with its own set of commands. One approach to achieve automation in such an environment is to create scripts where the developer specifies the task to be accomplished and the command to achieve it. However, this approach is imperative and can be time-consuming and error-prone.
However, Ansible uses a declarative approach which in turn makes automation much simpler. Instead of specifying each task and command, simply tell Ansible what your requirement is, and it will handle the rest. In the above example, with a single playbook (file), all the necessary automation can be completed, regardless of the number or type of servers/OSs present. Ansible's approach is fast, reliable, accurate, less complex, and hassle-free, making it an ideal solution for automating tasks across multiple systems with different configurations.
Key Features of Ansible
Free and Open-source*: Ansible is a completely free, open-source tool, giving you access to its powerful features without having to pay a cent.*
User-Friendly*: Ansible is designed to be easily setup and used, without requiring any special coding skills.*
High-Level of Flexibility: Ansible is a highly flexible tool that can model even the most complex IT workflows, making it ideal for use across a wide range of applications.
Deployment Agnostic: with ansible, we can orchestrate the entire application environment no matter where it’s deployed. we can also customize it based on our needs.
Agentless: Unlike any other automation tool in ansible we don’t need to install any other software or agent program on the client systems you want to automate. Also, we don’t have to set up a separate management structure. This simplifies the process and makes it more secure.
Resource Efficient: Because Ansible doesn't require any extra software, your server has more resources available for your applications, ensuring efficient use of your system's capabilities.
How Ansible works?
To better understand how Ansible works, let's consider an example. Imagine you have five computers/servers and you want to configure a web server on each of them. This involves three main steps: downloading and installing the software, starting the services, and deploying custom web pages. While an imperative approach would require creating scripts like shell or bash scripts to perform these tasks, with Ansible you can accomplish them more easily and efficiently.
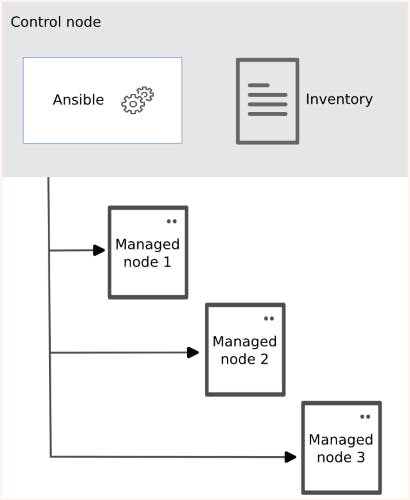
Ansible can be divided into two major components: the Controller node and the Target or Managed node. The Target or Managed nodes are the ones on which you want to perform configurations, such as setting up a web server (In our case the 5 computers are the managed nodes/ target nodes). The Controller node is the one where Ansible is running and from which you will control and manage the configuration of the Target nodes.
All the configurations that we want to apply to the Target nodes are stored on the Controller node. The Controller node is responsible for executing the configurations on the Target nodes. In order to connect to the Target nodes, Ansible uses an inventory file. This file contains a list of IP addresses for the Target nodes, as well as authentication details for each node. Additionally, in the inventory file, one can specify which protocol should be used for connecting to each managed node, with SSH being the default protocol.
Putting Concepts into Practice
Aim: In these practicals, our goal is to use Ansible to automate the configuration of an Apache web server running on an RHEL 8 operating system.
Ansible installation
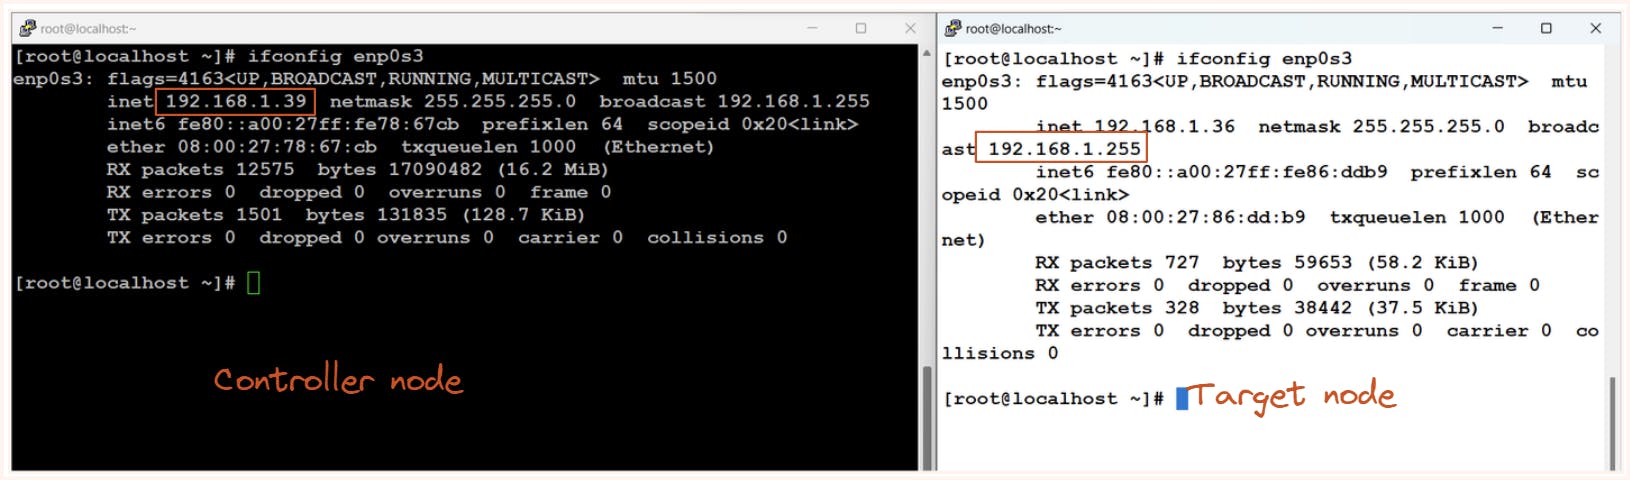
- Here for our practicals, we will be using 2 VMs launched with the help of oracle virtual box. one VM will be used as a controller node and the other as target node.
| VM IP | VM username | Purpose |
| 192.168.1.39 | root | controller node |
| 192.168.1.36 | root | target node/ managed node |
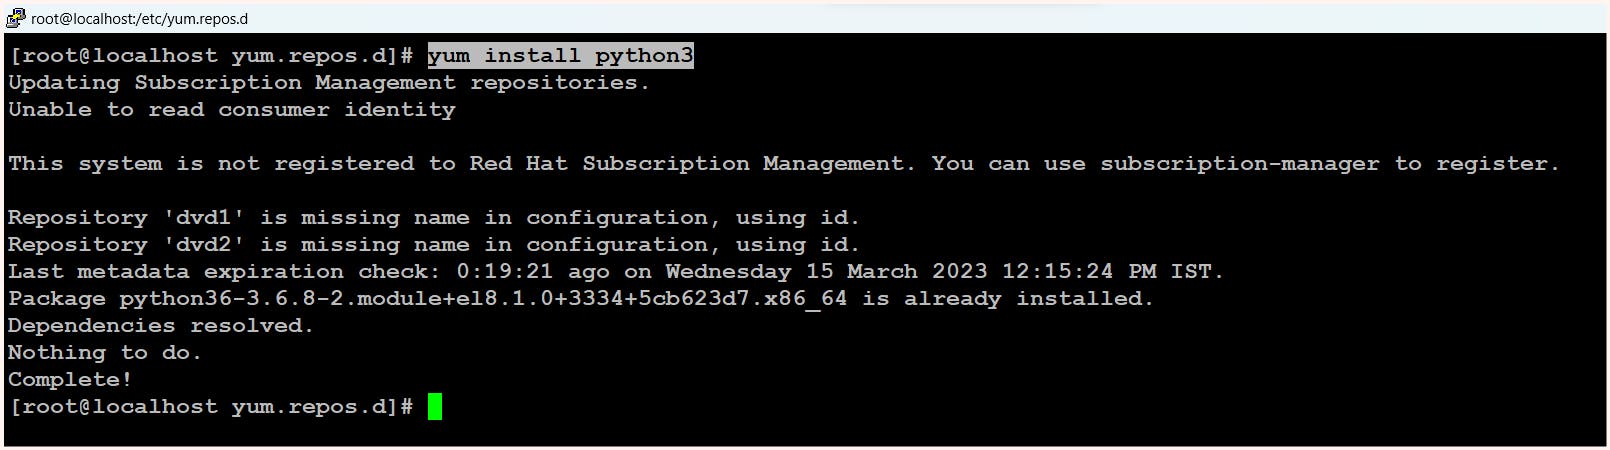
- Ansible is meant to be installed and downloaded only on the controller node, not on the target nodes. It is designed to work on top of Python, so at minimum, we need to have Python installed on the controller node. Additionally, since the controller node communicates with the managed or target nodes using SSH by default, we also need to have the sshpass utility installed.
$ yum install python3
$ pip3 install --upgrade pip
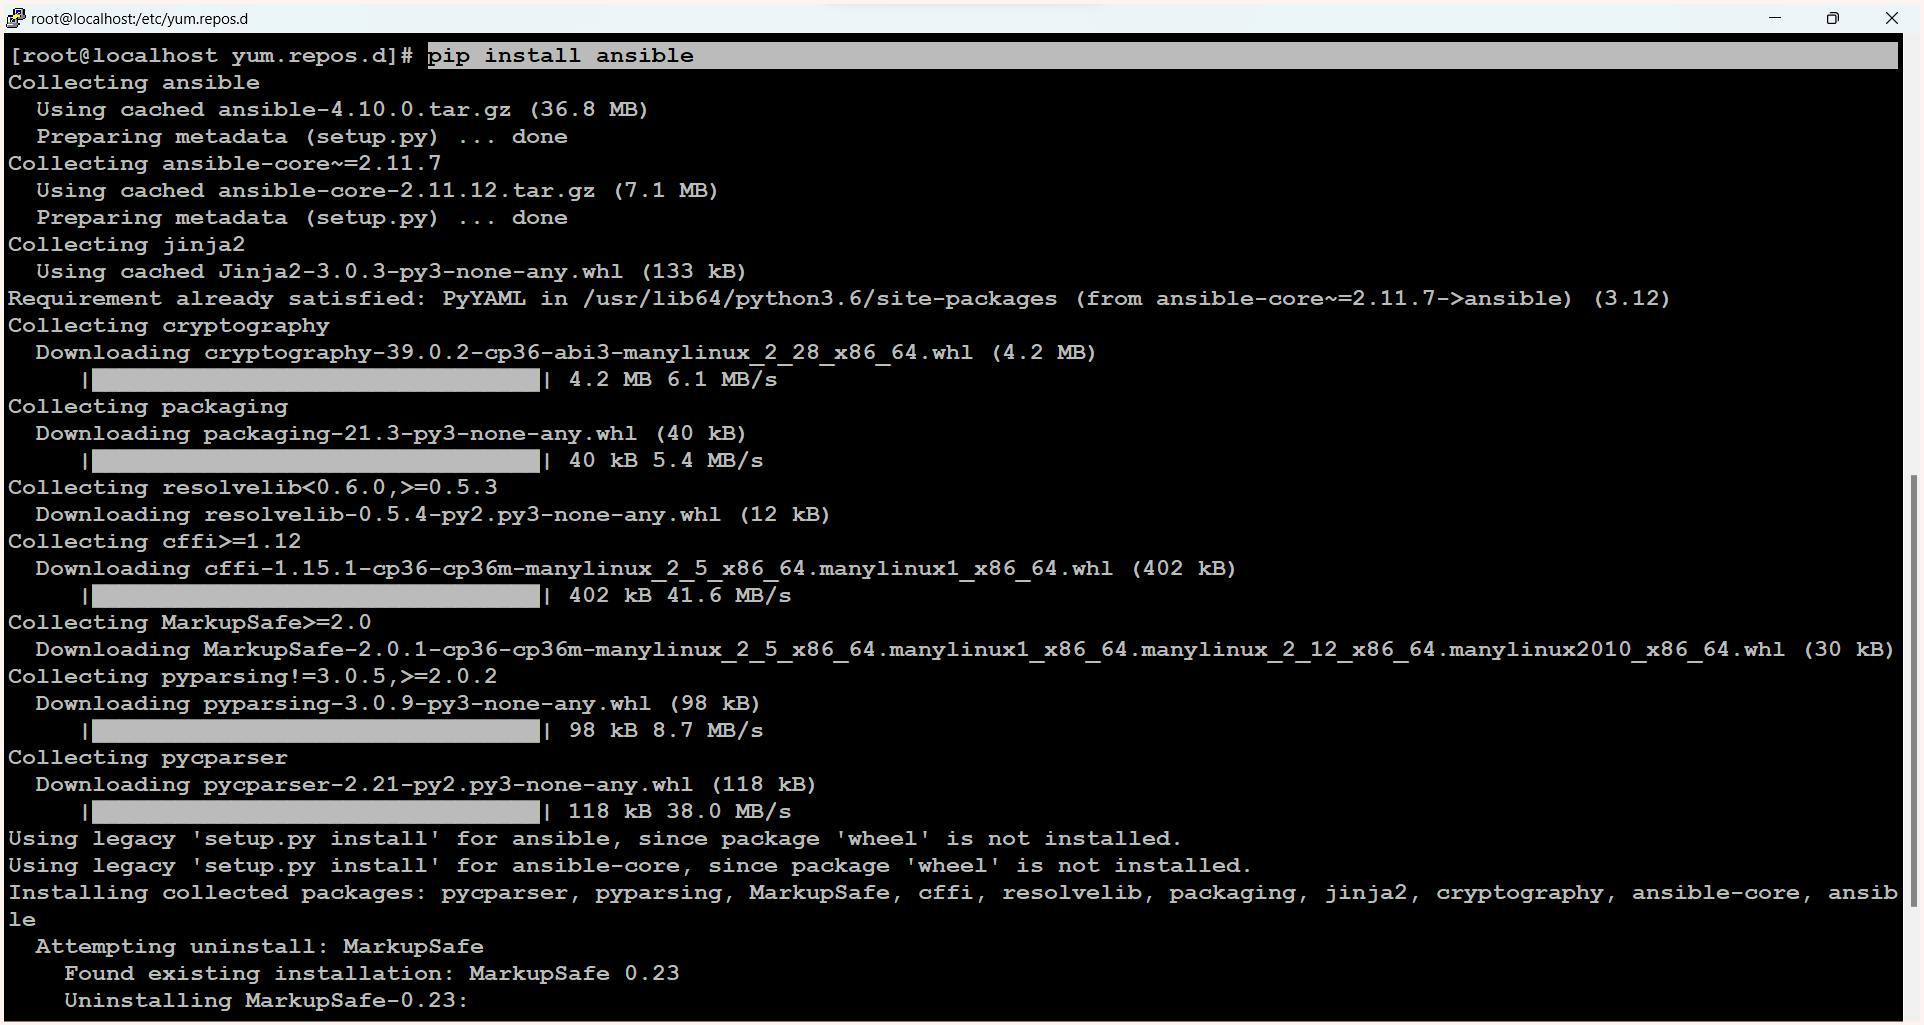
$ pip install ansible
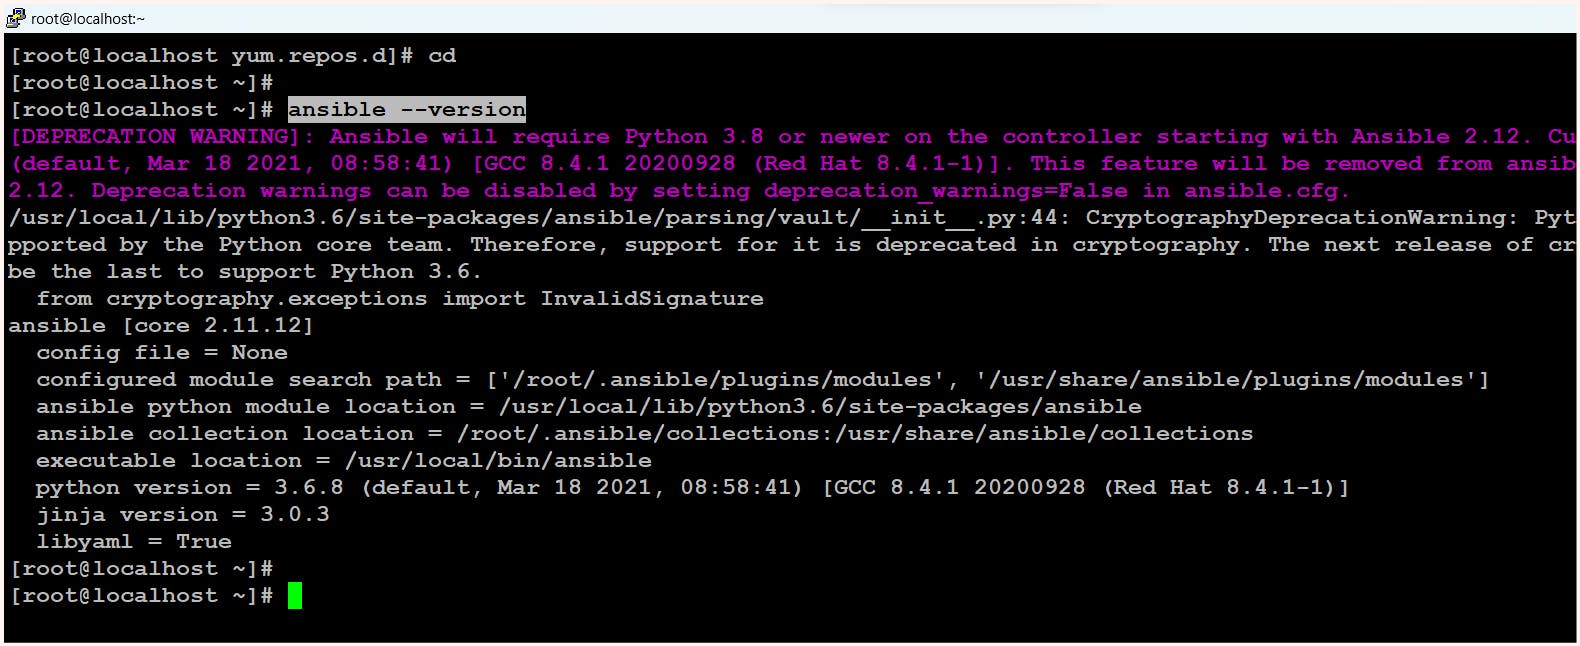
$ ansible --version
- We will be using pip for installing the ansible package.

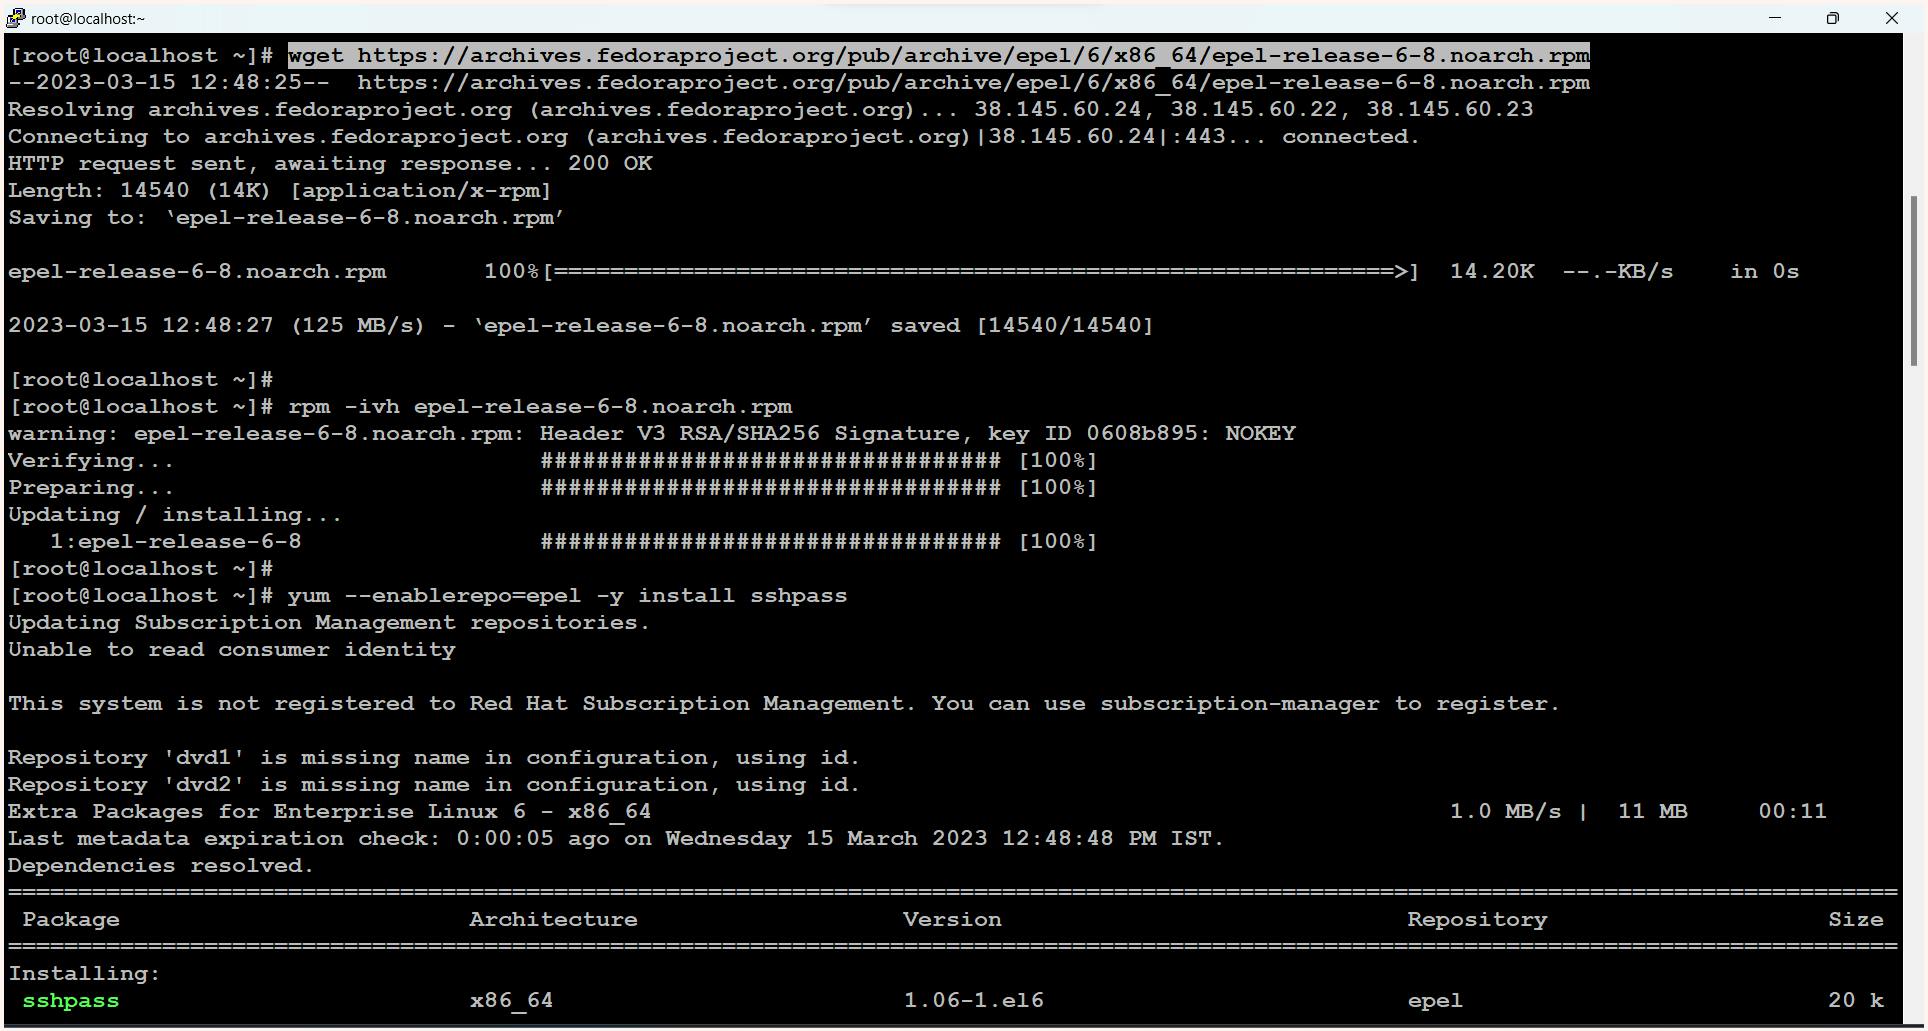
# we need to get the sshpass utility for this we first configure our repositoy and then install it
# note: these are centos 8 or rhel 8 respective commands

$ wget https://archives.fedoraproject.org/pub/archive/epel/6/x86_64/epel-release-6-8.noarch.rpm

$ rpm -ivh epel-release-6-8.noarch.rpm

$ yum --enablerepo=epel -y install sshpass
Creating Inventory
As mentioned earlier, the Ansible inventory file is where we list the IPs of our target nodes and their authentication details along with the protocol to connect. However, we need to create this file on our own.
To create an inventory file, start by creating a new file with any name and at any location in your controller node. This file will serve as our inventory file. We will need to specify the location of this file to Ansible in its configuration file.
To set up the configuration file, create a folder named /etc/ansible and create a file named ansible.cfg inside it. This will be our Ansible configuration file. Here, we can specify the details of our inventory file, such as its location.
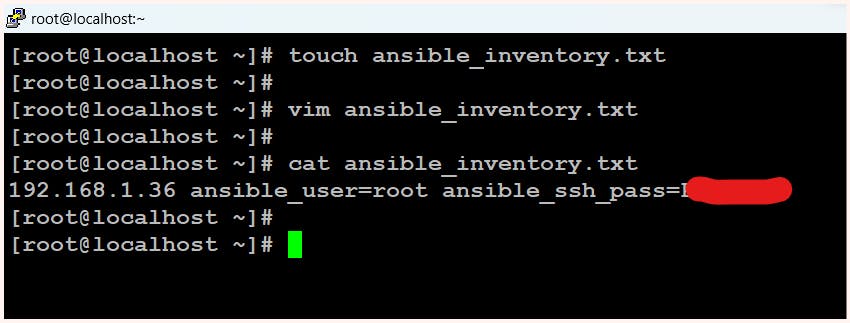
$ touch ansible_inventory.txt
$ vim ansible_inventory.txt
$ cat ansible_inventory.txt
192.168.1.36 ansible_user=root ansible_ssh_pass=<password of target node>
$ mkdir /etc/ansible
$ touch /etc/ansible/ansible.cfg
$ ls -l /etc/ansible/
$ vim /etc/ansible/ansible.cfg
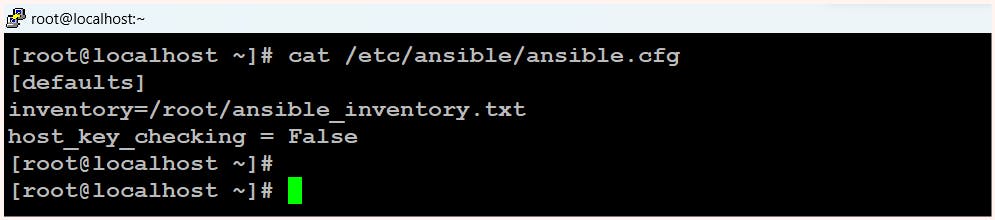
$ cat /etc/ansible/ansible.cfg
[defaults]
inventory=/root/ansible_inventory.txt
host_key_checking = False

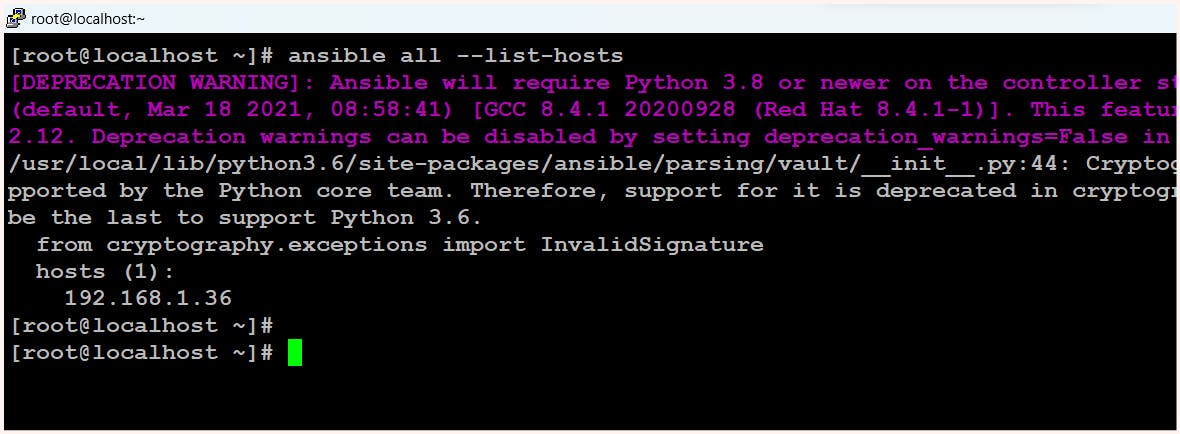
To validate the configuration now run the command
$ ansible all --list-hoststhis will list IP's all the target nodes
Ansible Ad hoc commands and playbooks
Now comes the most important part, where we provide Ansible with our requirements. There are two ways to do this: ad hoc commands and Ansible playbooks. First, we'll try with ad hoc commands and then with a playbook.
Before moving ahead we need to understand about ansible module and its idempotence Nature
Ansible Modules
Ansible modules are more like pre-written pieces of code that can be used by ansible to perform specific tasks. With hundreds of modules available, developers can easily customize and streamline their workflows to meet their specific needs.
Ansible Idempotence Nature
Ansible ensures that the desired state matches the current state before executing any operation to fulfill the requirements. If the desired state and the current state match, Ansible will not execute any operation. However, if they do not match, Ansible will perform the necessary operations to achieve the desired state. This feature is called idempotence, and it is present in almost all modules of Ansible. Some modules like command and shell do not have this nature and may execute the operation each time the playbook is run, regardless of the current state.
Syntex for ad hoc commands:
$ ansible [pattern/ group] -m [module] -a "[module options]"

# here pattern/ group indicates the name of the group of target nodes on which opration need to be performed. if needed we can specify the IP of target node directly here also.
# here module means module name
# modules needs few attributes which we can specify with -a option
Now, let's move toward our practicals:
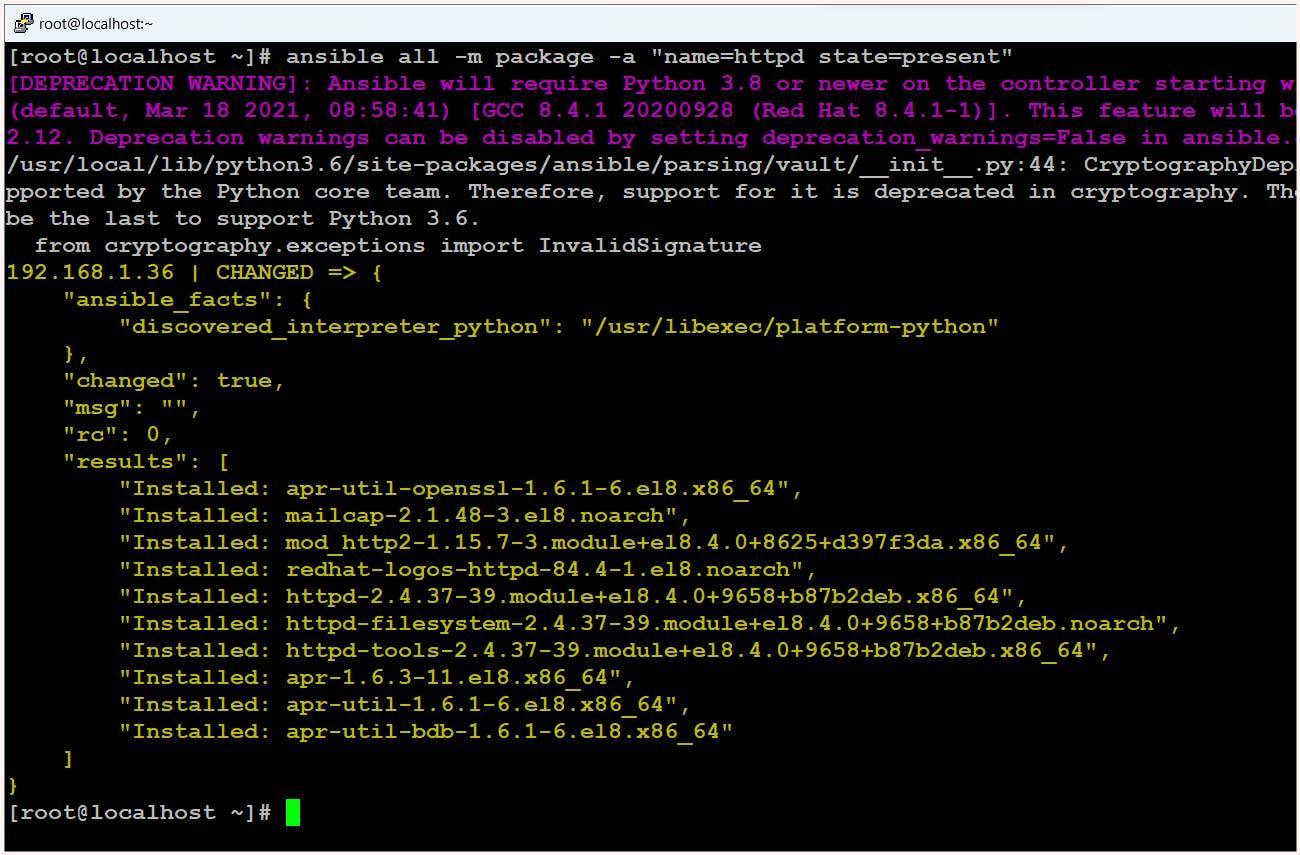
First We need to install the software
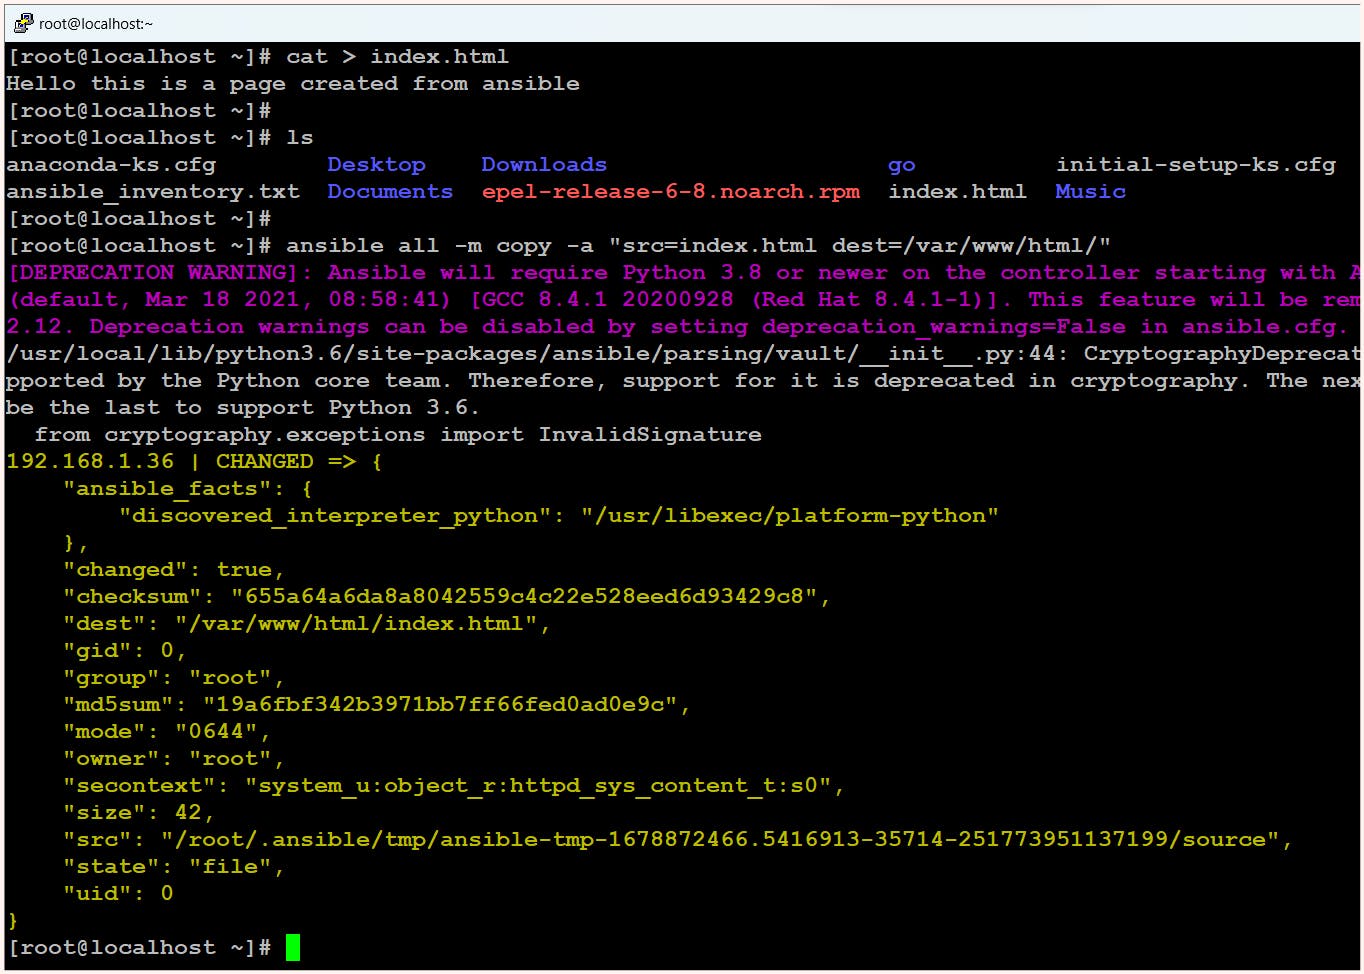
$ ansible all -m package -a "name=httpd state=present"Now we need to add our web pages in the webroot directory (/var/www/html/)
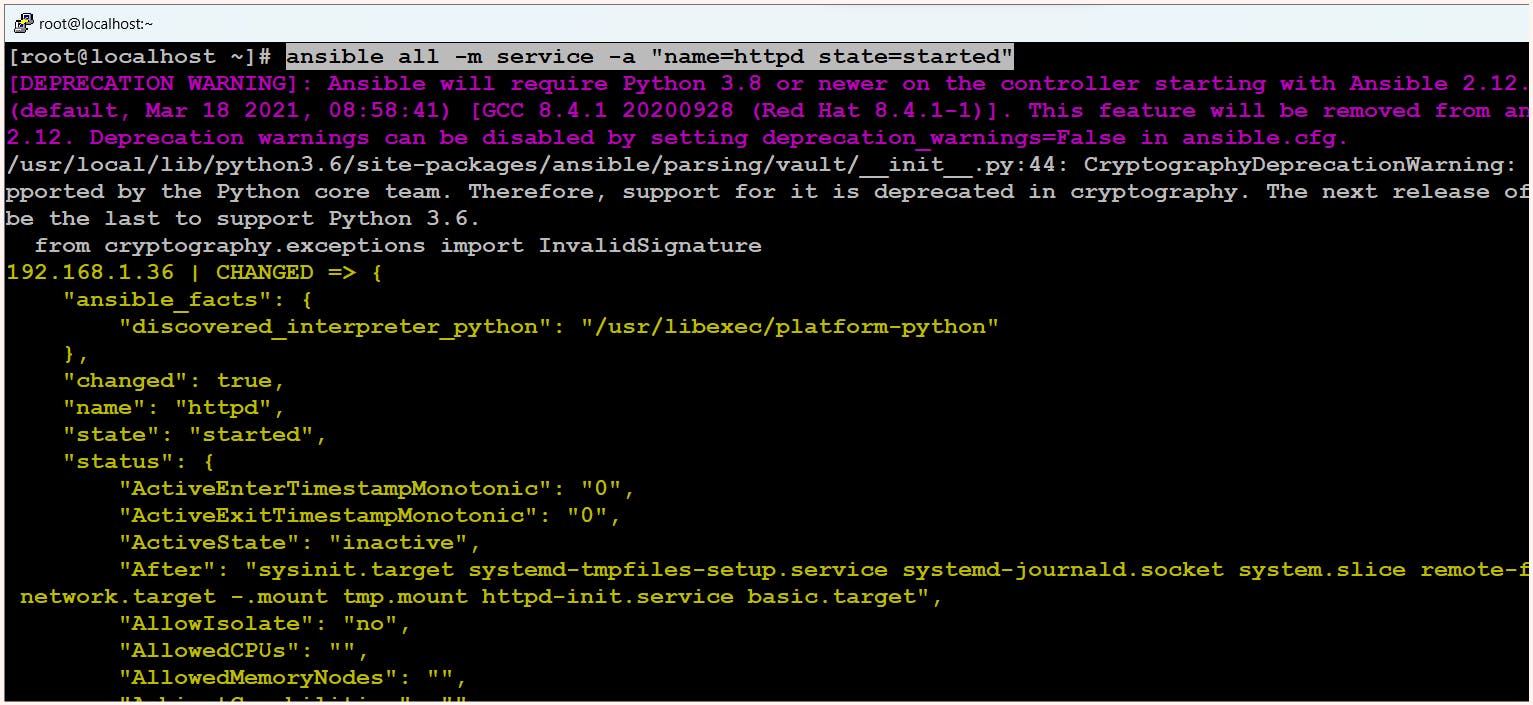
$ ansible all -m copy -a "src=index.html dest=/var/www/html/"We need to then start the services
$ ansible all -m service -a "name=httpd state=started"
Note: Here, we are utilizing modules provided by the Ansible community, which can be found in the Ansible documentation. The documentation provides comprehensive information on each module, including its purpose, required parameters, and examples of usage. It is essential to have a good understanding of the modules to effectively utilize Ansible and automate tasks efficiently.
If we carefully observe the output, we can see that the output is colored, with yellow indicating that the desired state and current state were not the same, so changes were made. Similarly, red indicates that changes were not made due to errors, and green indicates that the desired state and current state are the same, so no changes are required.
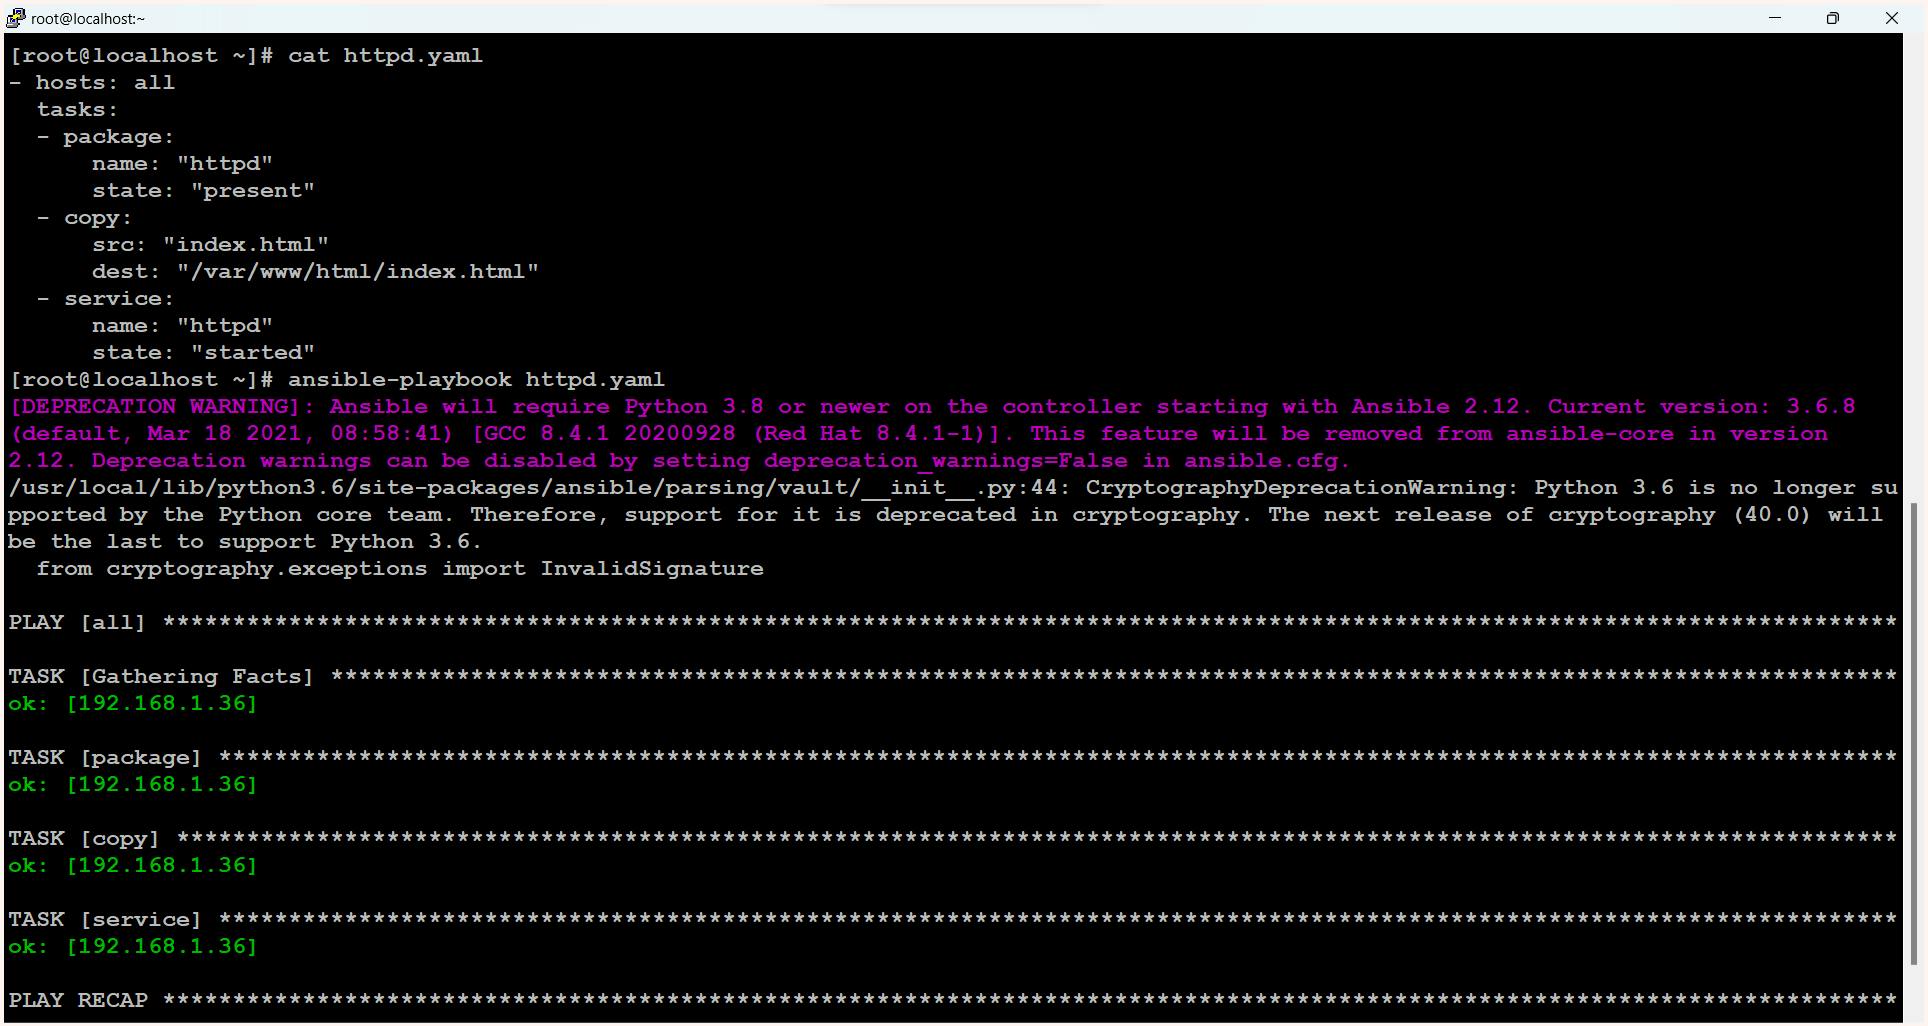
Now let's convert these sets of commands into one single file in YAML format:
$ cat httpd.yaml
- hosts: all
  tasks:
  - package:
      name: "httpd"
      state: "present"
  - copy:
      src: "index.html"
      dest: "/var/www/html/index.html"
  - service:
      name: "httpd"
      state: "present"

#command to check syntex of playbook
$ ansible-playbook --syntex-check httpd.yaml
$ ansible-playbook httpd.yaml
This file created is known as the ansible playbook.
Now, let's test the configuration let's hit http://192.168.1.36 and we must get our webpage

Good to know stuff 🥑
NASA Case Study
Business Challenges
NASA's initial objective was to quickly move around 65 applications from a traditional hardware-based data center to a cloud-based environment, resulting in significant cost savings from the infrastructure change. However, due to the tight timeline, many applications were migrated "as is" to the cloud without immediate optimization. Consequently, NASA ended up with an environment spanning multiple virtual private clouds (VPCs) and AWS accounts that was difficult to manage. This led to situations where basic tasks, such as providing every system administrator with access to each server or implementing simple patches, became extremely challenging.
Solution
In order to achieve better management as well as deal with a diverse environment, a decision has been taken to go with ansible tower. By utilizing this tool, they were able to organize and schedule their operations in a more effective manner.
Since implementing Ansible Tower, NASA has experienced significant improvements in its management capabilities. The tool has allowed them to provide better operations and security for their clients, resulting in increased trust and confidence in their services.
Numbers
nasa.gov update window went from over 1 hour to 5 minutes or less
Patching updates went from a multi-day process to a 45-minute process
Near real-time RAM and Disk monitoring accomplished without agents
OS Account provisioning across the entire environment in less than 10 minutes
Application Stacks went from 1–2 hours to set up, to about 10 minutes per stack
“ As a result of implementing Ansible we are better equipped to manage our environment. Ansible has allowed us to provide better operations and security to our clients. It has also increased our efficiency as a team.” — Jonathan Davila DevOps Lead, InfoZen (InfoZen is the prime contractor for NASA which used ansible)
Source:

Additional Resources
https://docs.ansible.com/ansible/latest/getting_started/index.html
https://docs.ansible.com/archive/ansible/2.3/intro_inventory.html
That's all for this blog we will be discussing more such services of AWS so stay tuned 🙌
Thank you For Reading :) #HappyLearning
Any query and suggestion are always welcome- Gaurav Pagare