Hello Techies👋! Hope you all are doing amazing stuff. As per the discussion in the Full-stack project article. I'm going to discuss today, how to setup mlflow on your system, in-depth understanding about mlflow, Model experimentation, Model tracking, Mlflow SDK usage with a simple demonstration on iris dataset.
This article is for everyone who wants to learn model experimentation, model tracking, model deployment/Productionize, model monitoring and model serving.
Note: Follow this article end-to-end sharing some useful resources regarding mlflow, model experimentation with a Practical example.
Without further ado, let's get started!!
wait wait.. Bonus!! At the End will discuss how to do Model serving and different approaches to deploy the model.
Excited!! Let's see Our Agenda first.
What is MLflow? Importance and Industry Use-cases.
Model experimentation to productionize your ML model
All about Model Registry.
Sample Model experimentation from Building to Deployment using Mlflow SDK
What is Model serving? Various ways to deploy your ML model.
Pros and Cons of MLflow
Let's get Started!!🥳
1.What is MLflow?
MLflow is an open source platform for managing the end-to-end machine learning lifecycle. In More simpler terms When we are building any machine learning model or during training phase, so as to improve the model we do a lot iterations to get more optimised and best model for our data, in such process it becomes difficult to keep track of all changes and choose best among all iterations. hence mlflow helps us to manage and track the experiments, Save model artifacts like model metrics visualisations, pkl file, related csv file or any data etc. Compare all models and register the best model in model registry. Model registry is like a Storage system for ML models where we can save the model versions after continous improvement in production and it helps to manage the staging and Production of models.. Sounds Interesting right?
There are two other key concepts in MLflow:
A run is a collection of parameters, metrics, labels, and artifacts related to the training process of a machine learning model.
An experiment is the basic unit of MLflow organization. All MLflow runs belong to an experiment. For each experiment, you can analyze and compare the results of different runs, and easily retrieve metadata artifacts for analysis using downstream tools. Experiments are maintained on an MLflow tracking server hosted on Azure Databricks.
Let's see each component of mLflow in-detail and it's use:
It has the following primary components:
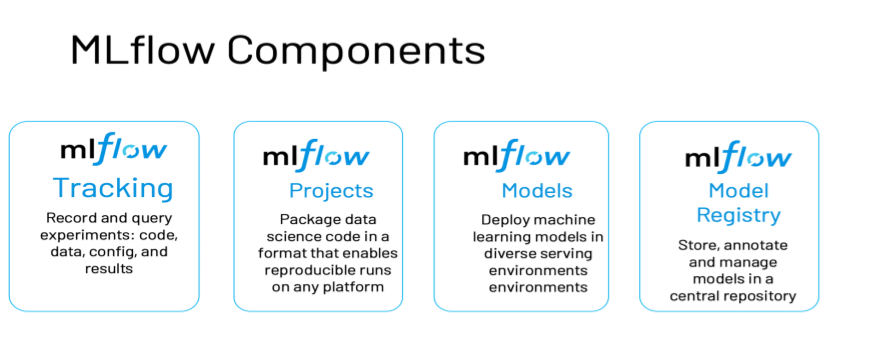
Tracking: Allows you to track experiments to record and compare parameters and results. as discussed above
Models: Allow you to manage and deploy models from a variety of ML libraries to a variety of model serving and inference platforms.
Projects: Allow you to package ML code in a reusable, reproducible form to share with other data scientists or transfer to production.
Model Registry: Allows you to centralize a model store for managing models’ full lifecycle stage transitions: from staging to production, with capabilities for versioning and annotating. as discussed above
Model Serving: Allows you to host MLflow models as REST endpoints. It's not just building robust models, it's about Using the models for Business applications or Used by end-users.
MLflow is a handy and day-to-day tool for ML engineers & data scientists to track the model and model experiments. it's model serving capability acts as a bigger shot-maker in the Deployment game.
2. Model Experimentation and Tracking
Model Experimentation means experimenting your model.
Experiment tracking is a unique set of APIs and UI for logging parameters, metrics, code versions, and output files for diagnosing purposes. MLflow experiment tracking has Python, Java, REST, and R APIs.
Now, look at the code example of MLflow experiment tracking using Python programming.
import mlflow
import mlflow.sklearn
from sklearn.ensemble import RandomForestClassifier
from sklearn.metrics import accuracy_score
from sklearn.model_selection import train_test_split
from mlflow.models.signature import infer_signature

# Load and preprocess your dataset
data = load_dataset()
X_train, X_test, y_train, y_test = train_test_split(data["features"], data["labels"], test_size=0.2)

# Start an MLflow experiment
mlflow.set_experiment("First-exp")
mlflow.start_run():
      # Log parameters
      mlflow.log_param("n_estimators", 100)
      mlflow.log_param("max_depth", 5)

      # Create and train the model
      model = RandomForestClassifier(n_estimators=100, max_depth=5)
      model.fit(X_train, y_train)

      # Make predictions on the test set
      y_pred = model.predict(X_test)
      signature = infer_signature(X_test, y_pred)

      # Log metrics
      accuracy = accuracy_score(y_test, y_pred)
      mlflow.log_metric("accuracy", accuracy)

      # Save the model
      mlflow.sklearn.save_model(model, "model")

# Close the MLflow run
mlflow.end_run()
In the above code, we import the modules from MLflow and the sklearn library to perform a model experiment tracking. After that, we load the sample dataset to proceed with mlflow experiment APIs. We are using start_run(), log_param(), log_metric(), and save_model() classes to run the experiments and save them in an experiment called “First-exp.”
Apart from this, MLflow also supports automatic logging of the parameters and metrics without explicitly calling each tracking function. You can use mlflow.autolog() before training code to log all the parameters and artifacts.
3. MLflow - Model Registry

The model registry is a centralized model register that stores model artifacts using a set of APIs and a UI to collaborate effectively with the complete MLOps workflow.
It provides a complete lineage of machine learning model saving with model saving, model registration, model versioning, and staging within a single UI or using a set of APIs.
Let’s look at the MLflow model registry UI below.

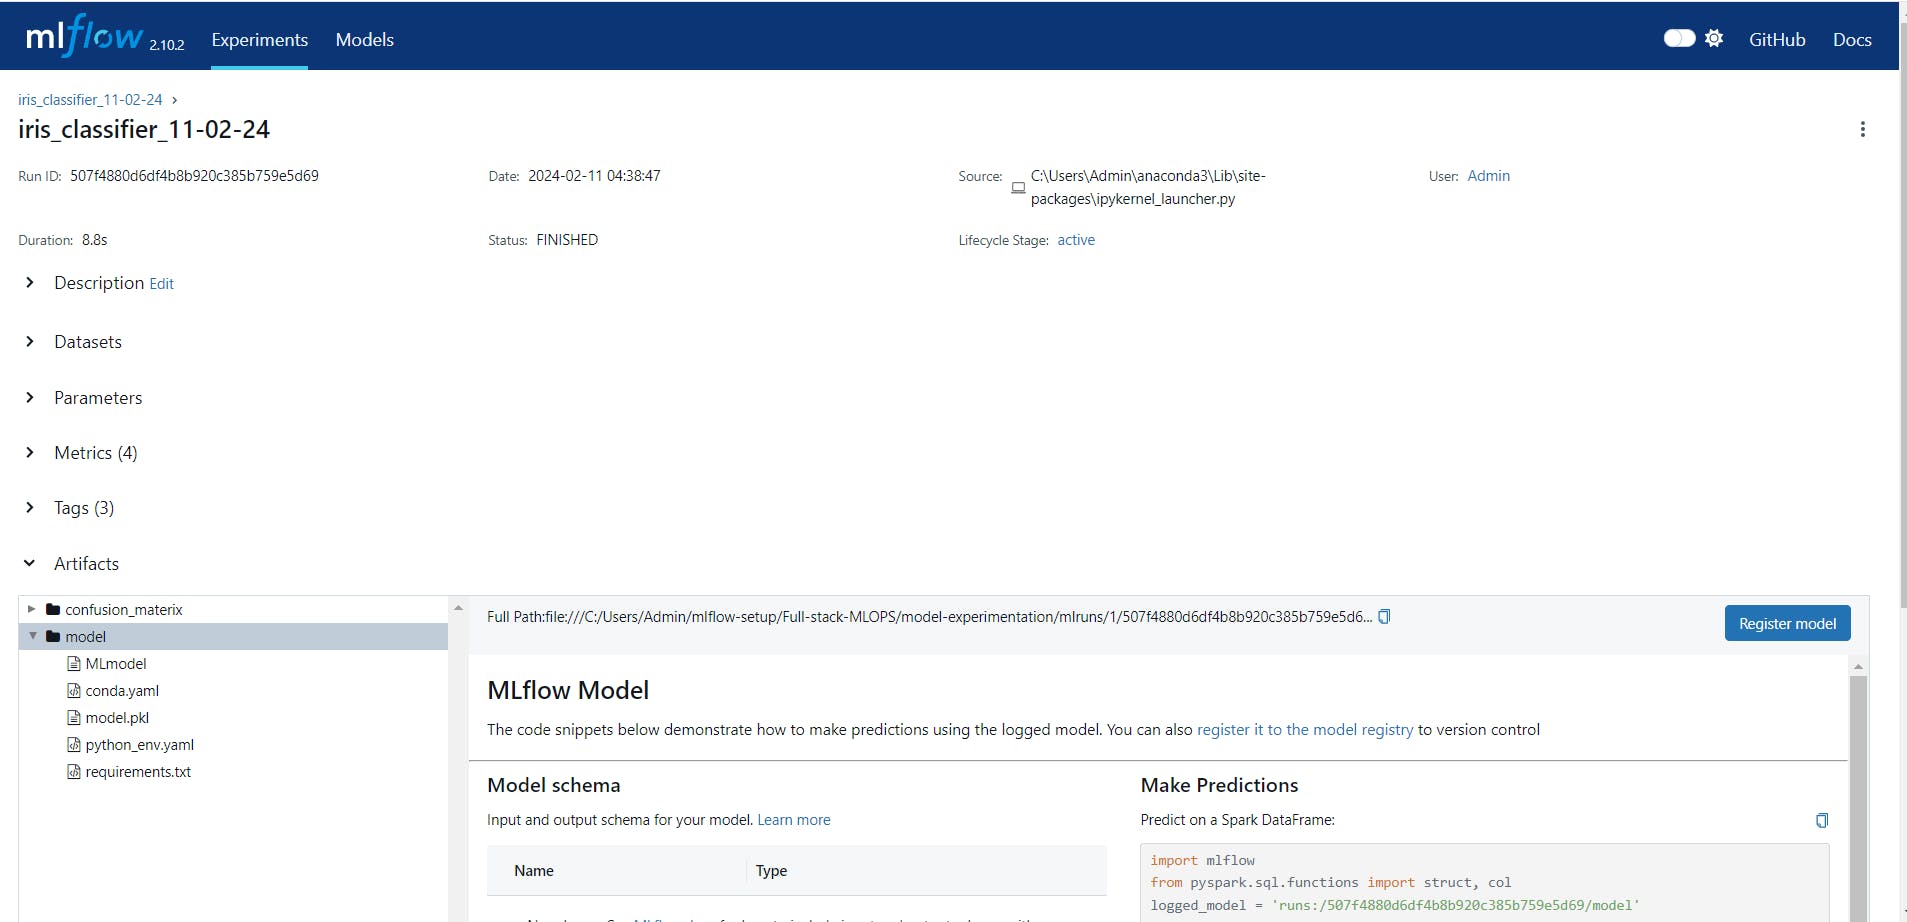
The above screenshot shows saved model artifacts on MLflow UI with the ‘Register Model’ button, which can be used to register models on a model registry. Once the model is registered, it will be shown with its version, time stamp, and stage on the model registry UI page. (Refer to the below screenshot for more information.)

As discussed earlier apart from UI workflow, MLflow supports API workflow to store models on the model registry and update the stage and version of the models.
# Log the sklearn model and register as version 1
mlflow.sklearn.log_model(
        sk_model=model,
        artifact_path="sklearn-model",
        signature=signature,
        registered_model_name="sk-learn-random-forest-reg-model",
   )
The above code logs the model and registers the model if it already doesn’t exist. If the model name exists, it creates a new version of the model. There are many other alternatives to register models in the MLflow library. I highly recommend reading official documentation for the same.
MLflow — Projects
Another component of MLflow is MLflow projects, which are used to pack data science code in a reusable and reproducible way for any team member in a data team.
The project code consists of the project name, entry point, and environment information, which specifies the dependencies and other project code configurations to run the project. MLflow supports environments such as Conda, virtual environments, and Docker images.
In a nutshell, the MLflow project file contains the following elements:
Project name
Environment file
Entry points
Let’s look at the example of the MLflow project file.
# name of the project
name: My Project

python_env: python_env.yaml

# write the entry points
entry_points:
  main:
    parameters:
      data_file: path
      regularization: {type: float, default: 0.1}
    command: "python train.py -r {regularization} {data_file}"
  validate:
    parameters:
      data_file: path
    command: "python validate.py {data_file}"
The above file shows the project name, the environment config file’s name, and the project code’s entry points for the project to run during runtime.
Here’s the example of Python python_env.yaml environment file:
# Python version required to run the project.
python: "3.8.15"
# Dependencies required to build packages. This field is optional.
build_dependencies:
  - pip
  - setuptools
  - wheel==0.37.1
# Dependencies required to run the project.
dependencies:
  - mlflow==2.3
  - scikit-learn==1.0.2
Mlflow-LLM tracking:
As world is moving towards generative AI. If we consider the LLM use-cases like RAG or Prompting it's really iterative and requires a lot much tracking of the steps for model performance improvement.
As we have seen, LLMs are taking over the technology industry like nothing in recent times. With the rise in LLM-powered applications, developers are increasingly adopting LLMs into their workflows, creating the need for tracking and managing such models during the development workflow.
What are the LLMs?
Large language models are a type of neural network model developed using transformer architecture with training parameters in billions. Such models can perform a wide range of natural language processing tasks, such as text generation, translation, and question-answering, with high levels of fluency and coherence.
Why do we need LLM Tracking?
Unlike classical machine learning models, LLMs must monitor prompts to evaluate performance and find the best production model. LLMs have many parameters like top_k, top_n, temperature, etc., and multiple evaluation metrics. Different models under different parameters produce various results for certain queries. Hence, It is important to monitor them to identify the best-performing LLM.
MLflow LLM tracking APIs are used to log and monitor the behavior of LLMs. It logs inputs, outputs, and prompts submitted and returned from LLM. It also provides a comprehensive UI to view and analyze the results of the process. To learn more about the LLM tracking APIs, I recommend visiting their official documentation for a more detailed understanding.
4. Practical: Sample Model experimentation from Building to Deployment using Mlflow SDK
Below is the launch guide of mlflow UI using Jupyter Notebooks. use below code to launch standalone MLflow using Jupyter notebooks.
Note: The code is available on github here, you can start experimenting on it right away!! or If you wanted to learn in-depth concepts and code then let's follow me;)
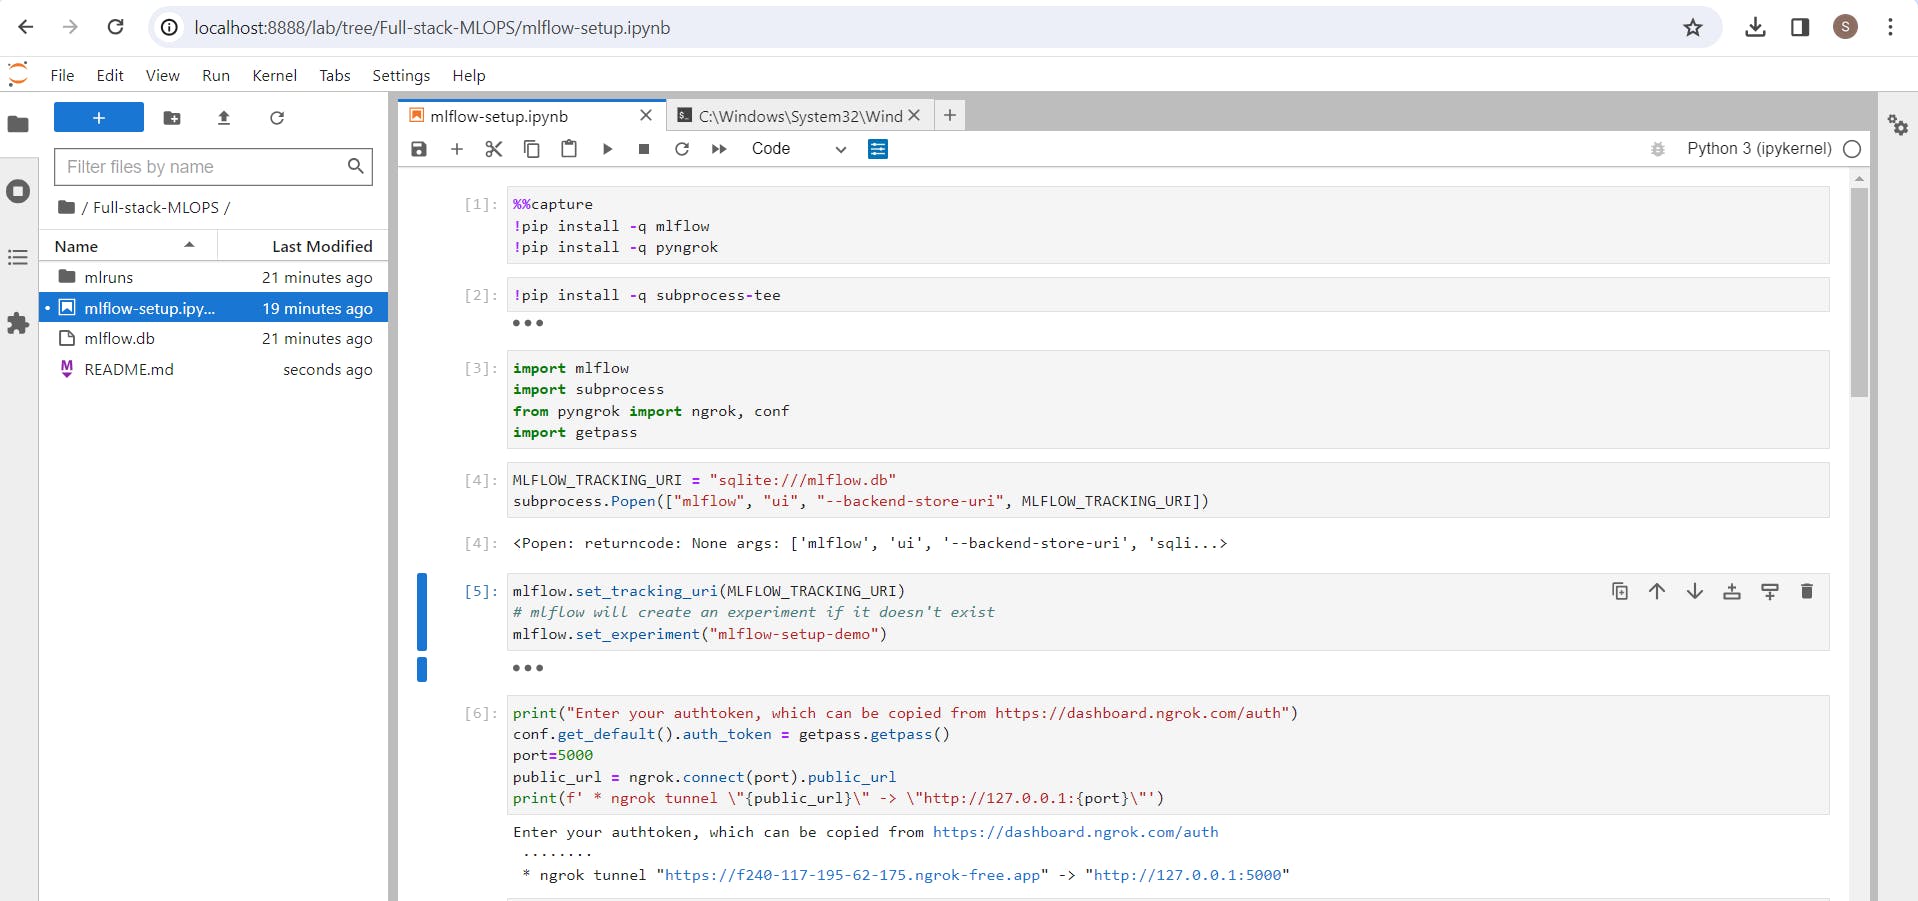
In the above code i setup Local mlflow_tracking_uri. Mlflow_tracking_URI is essential if we wanted to use model-registry or to store the model artifacts.
here I Initialsed a Sqlite_db which is compatible to your local file system and it'll store your model and related artifacts.
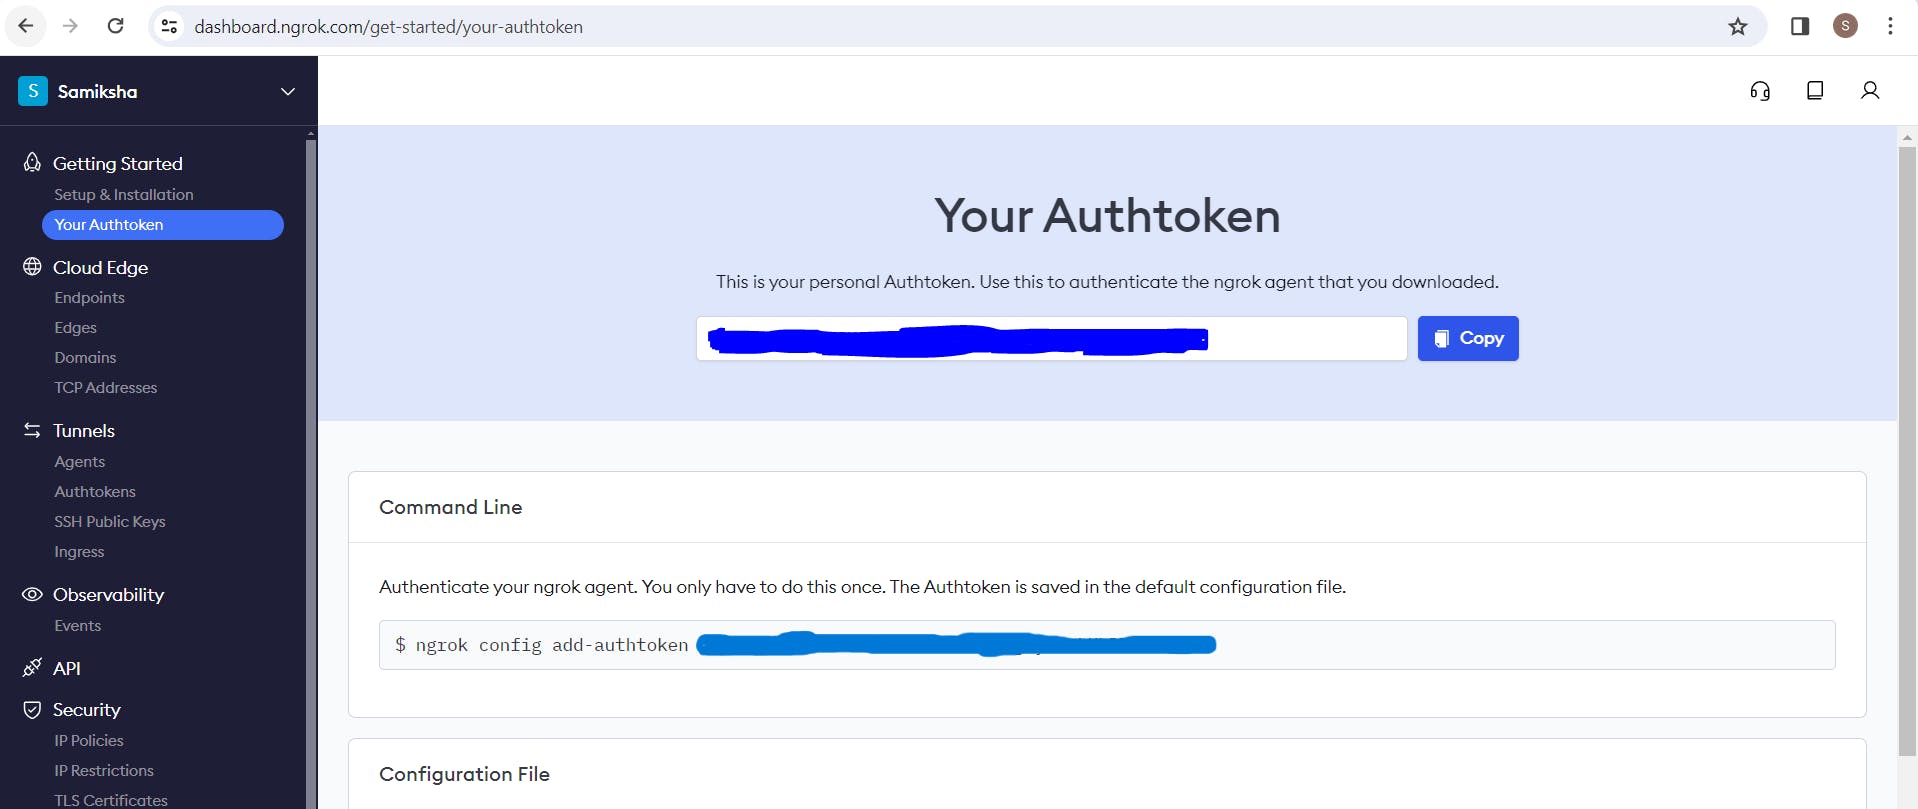
Okay! while running the code as we're using ngrok to manage our http traffic and redirect to mlflow server within our system, we need authentication from ngrok. There login to ngrok platform and get your authentication token from that platform.
Ta Da!! Your Mlflow UI is ready.. you can start experimenting on it now:)
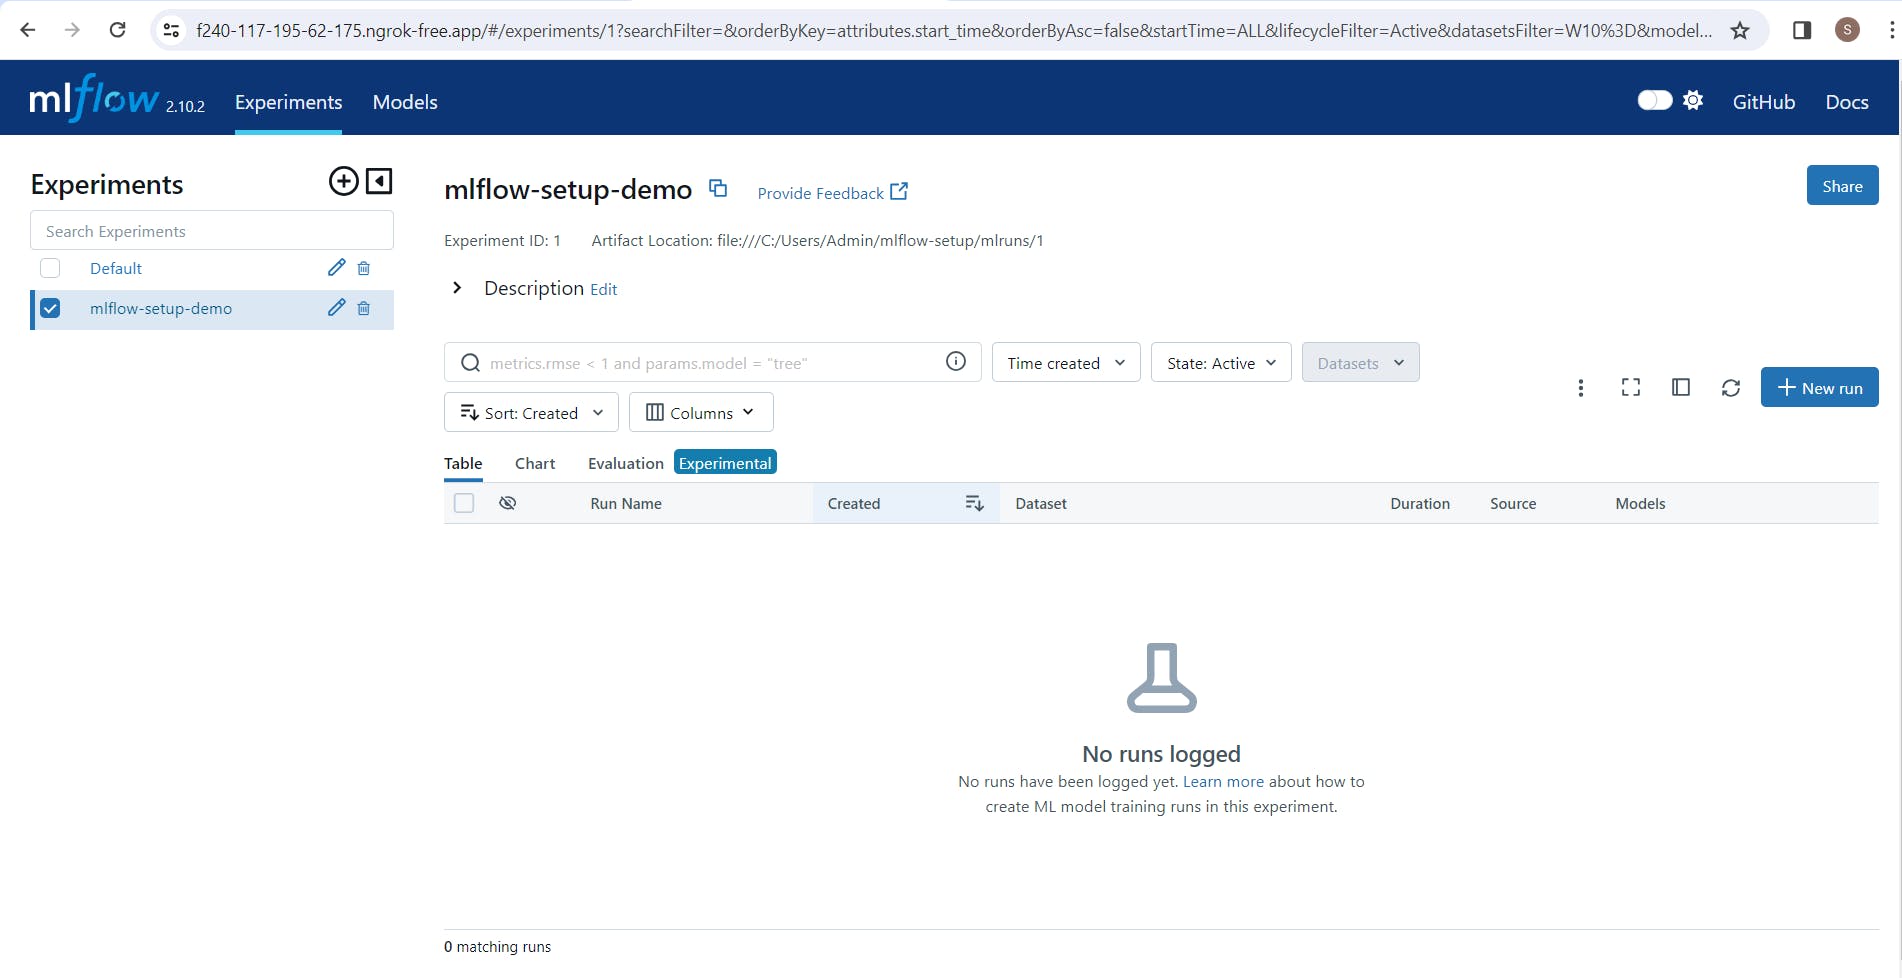
Model tracking and experimentation - create experiment, log_metrics, log_params, set_tags, log_model.

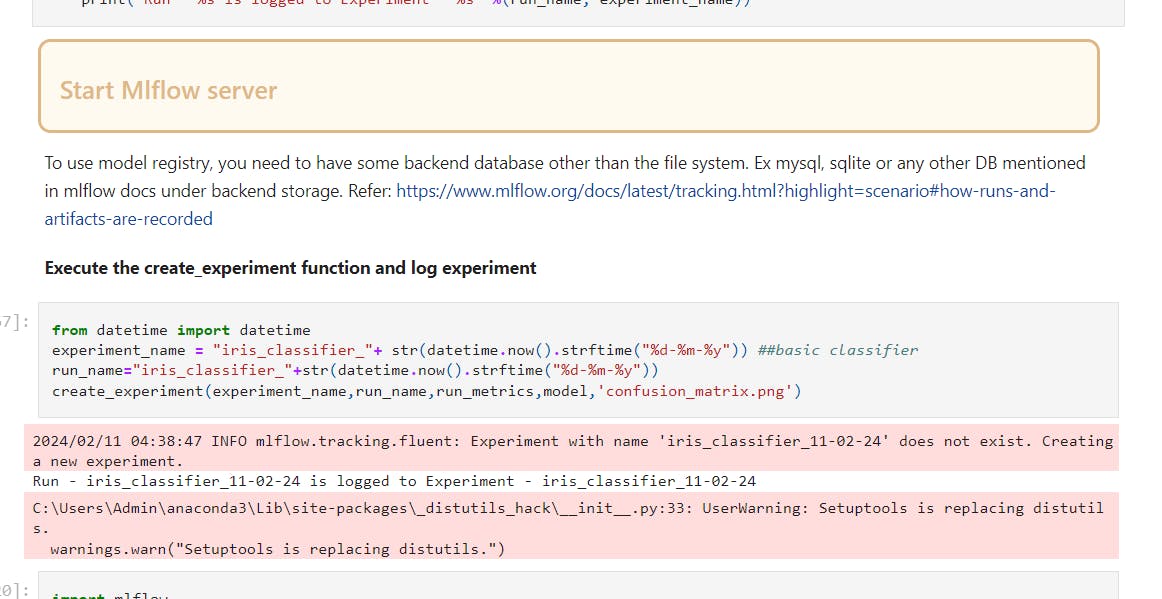
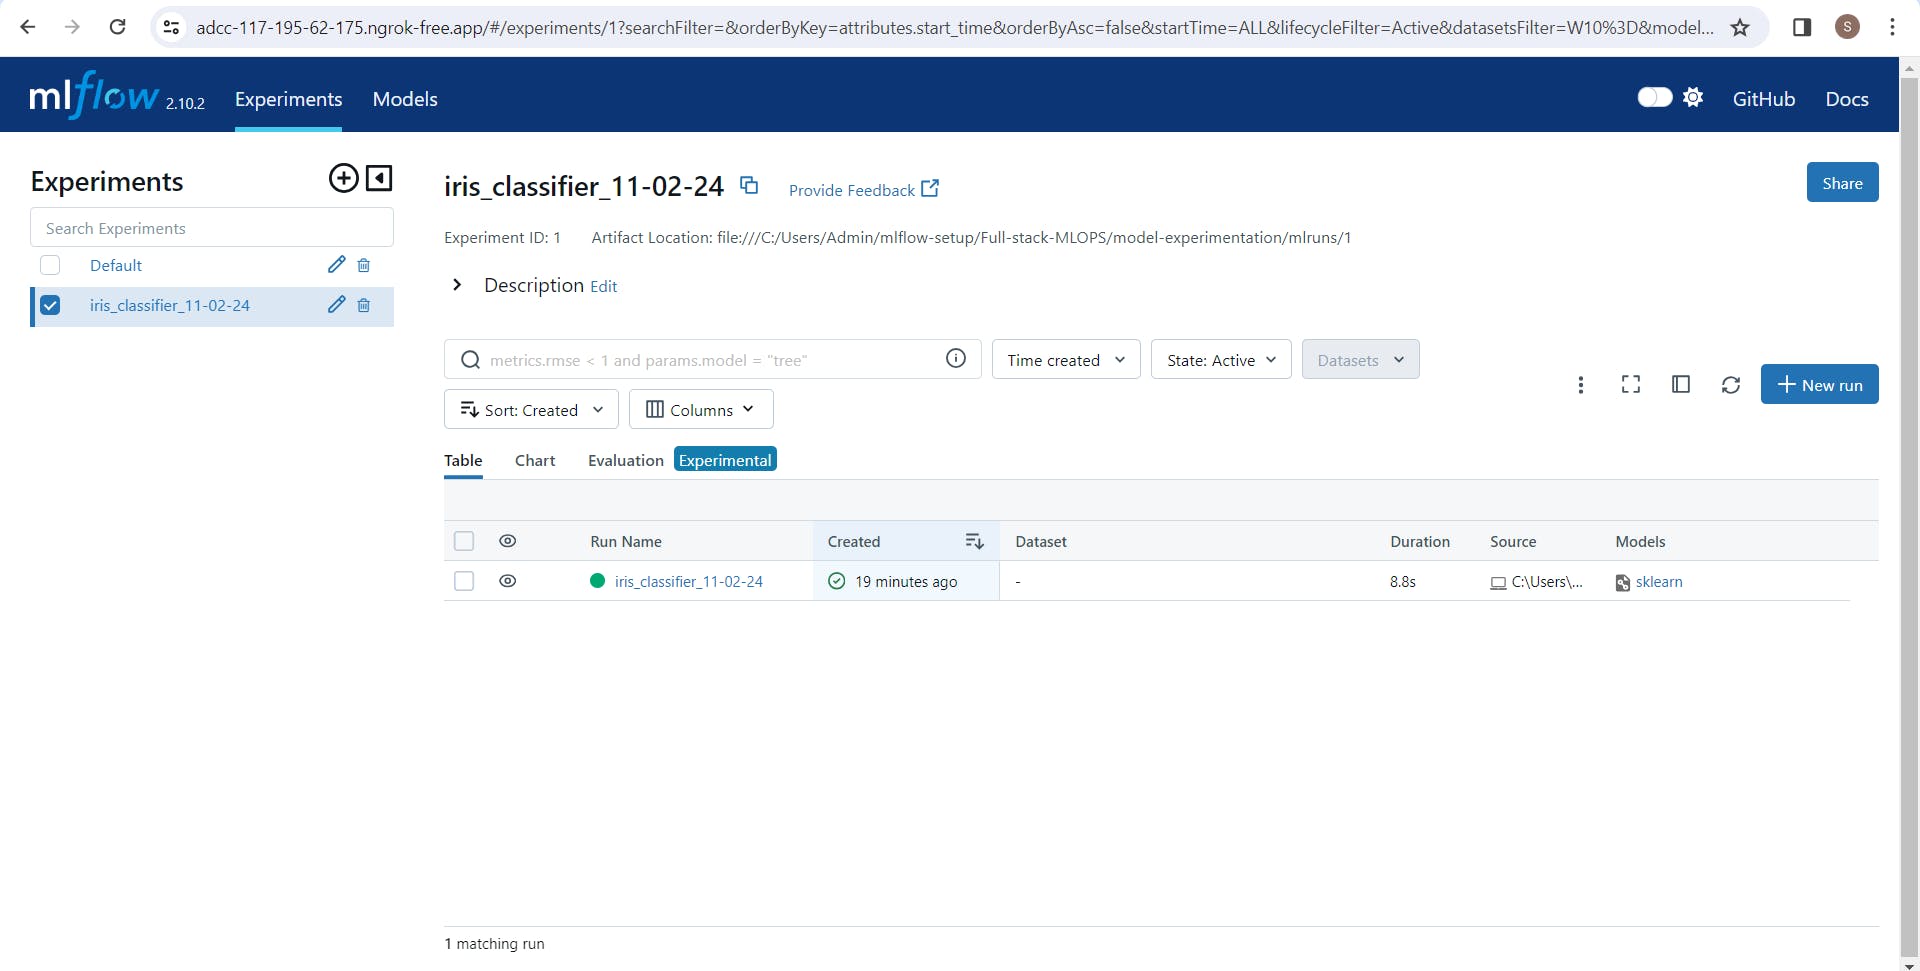
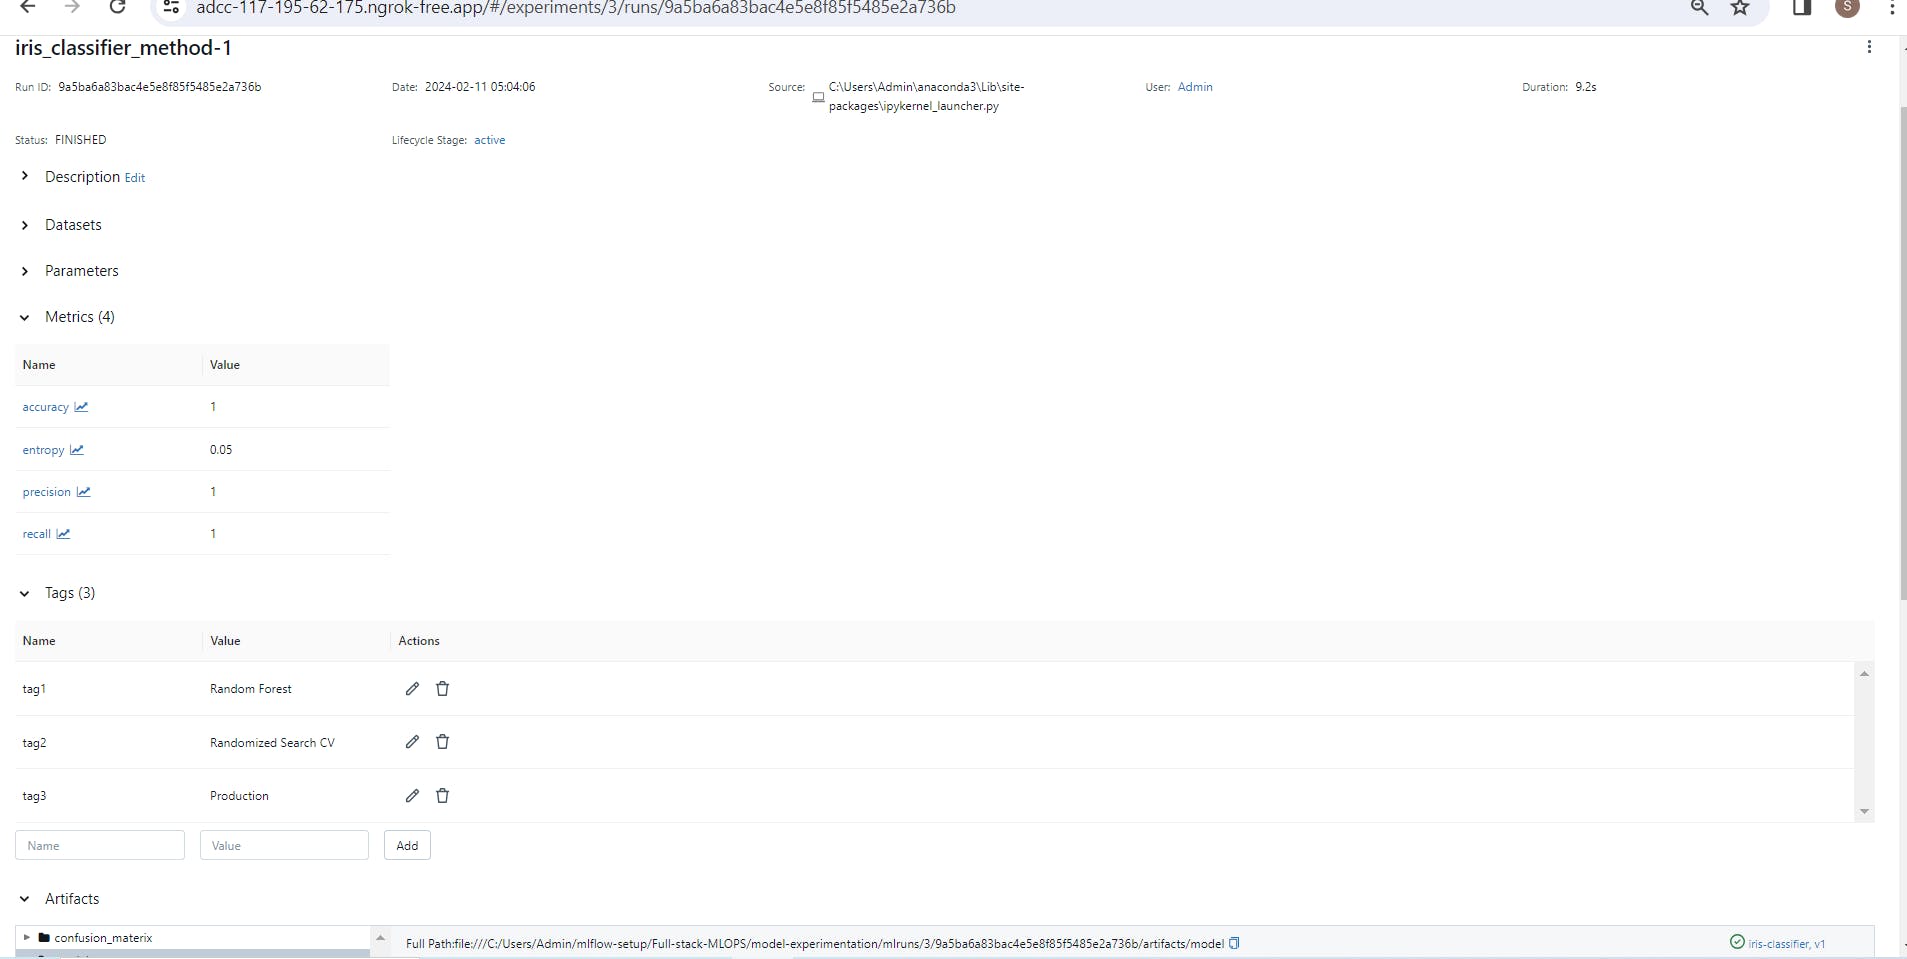
Below you can see the logged model name "iris_classifier_11-02-24"
Go inside of your logged experiment, you can see the model metrics, parameters or tags you added during running of that experiment.
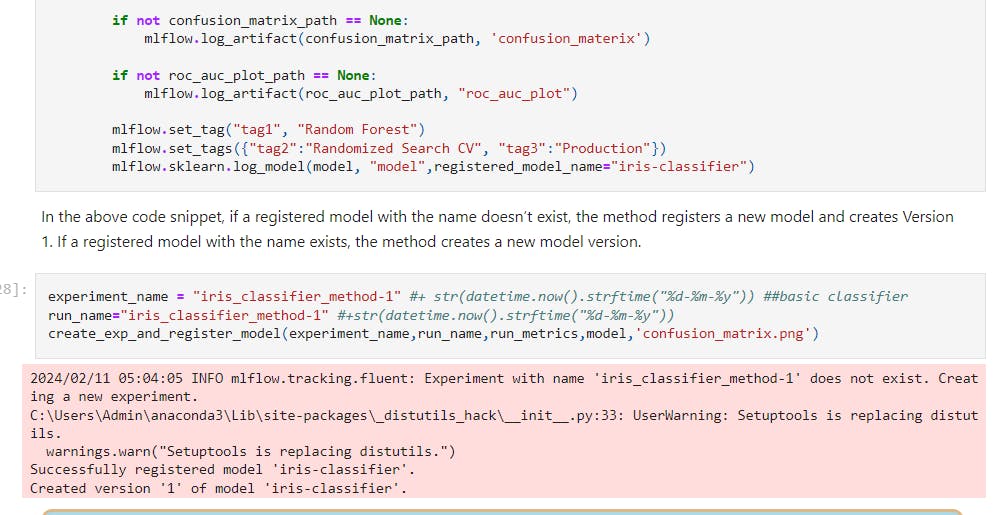
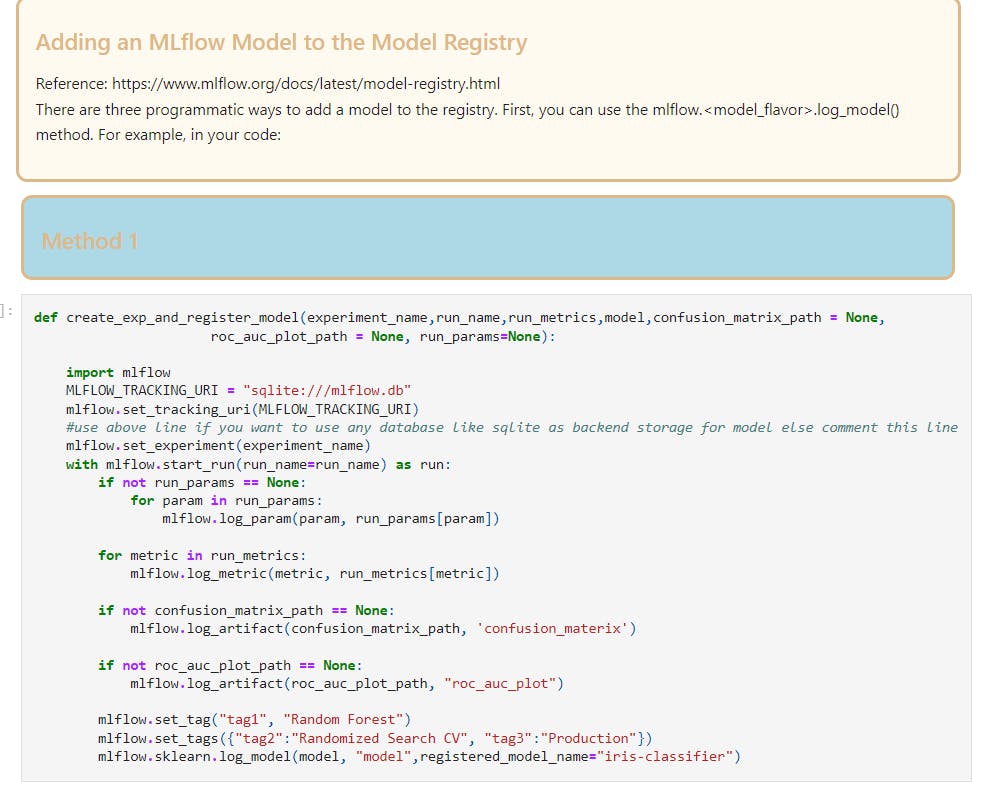
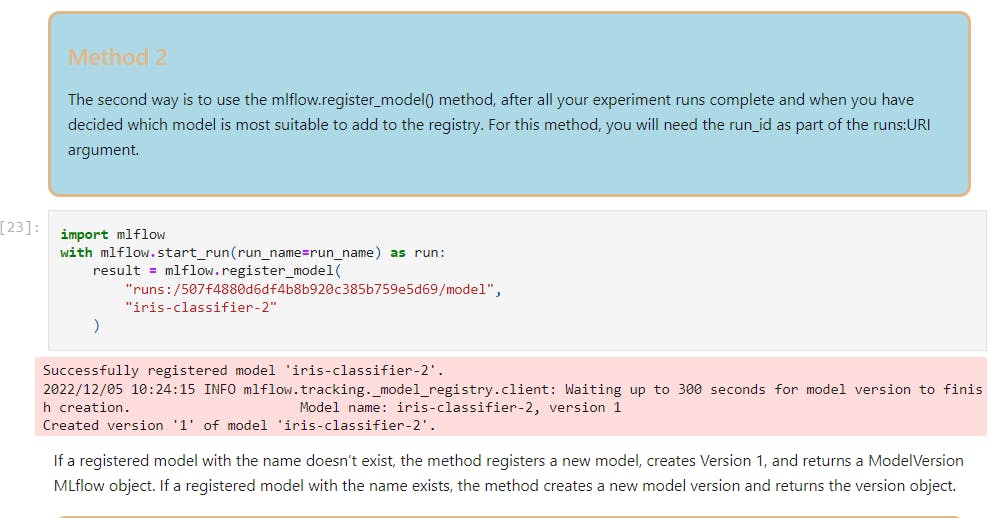
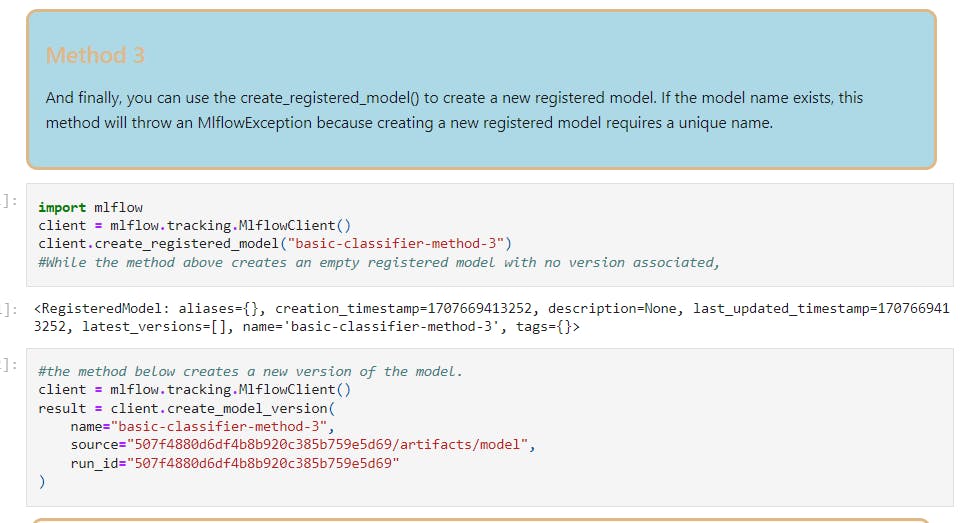
Now you know how to experiment with model, let's see if you want to register the model and save the model version what are the different types of methods one by one below.
Register the model method-1:
Method2:
Method3:

To fetch a specific model from the model registry using pufunc or sklearn.load_model
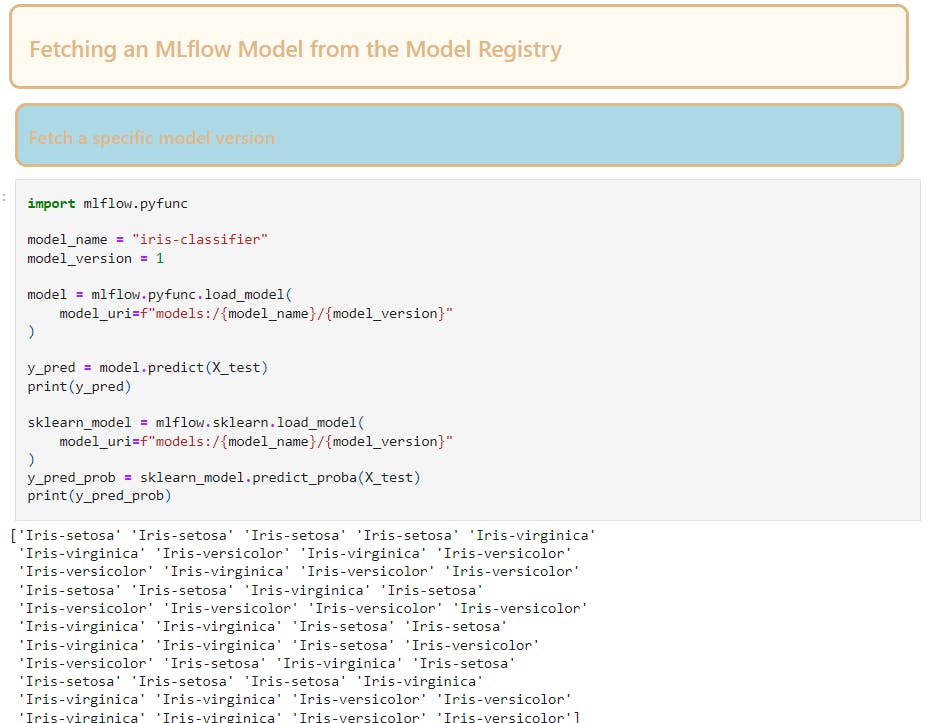
In model deployment to transition our model after testing from staging to production

Yeahhh!! You're all set to start your own model experimentation with the help of mlflow to make your task easier.
As per the promise i'm going to discuss the model serving.
5. What's Model Serving
In simple terms, model serving means to host machine-learning models (on the cloud or on premises) and to make their functions available via API so that applications can incorporate AI into their systems and anyone can use our models to solve their day to day tasks.
below I'm exposing a register model which is in Production to port 1234 as an API using model serve command.
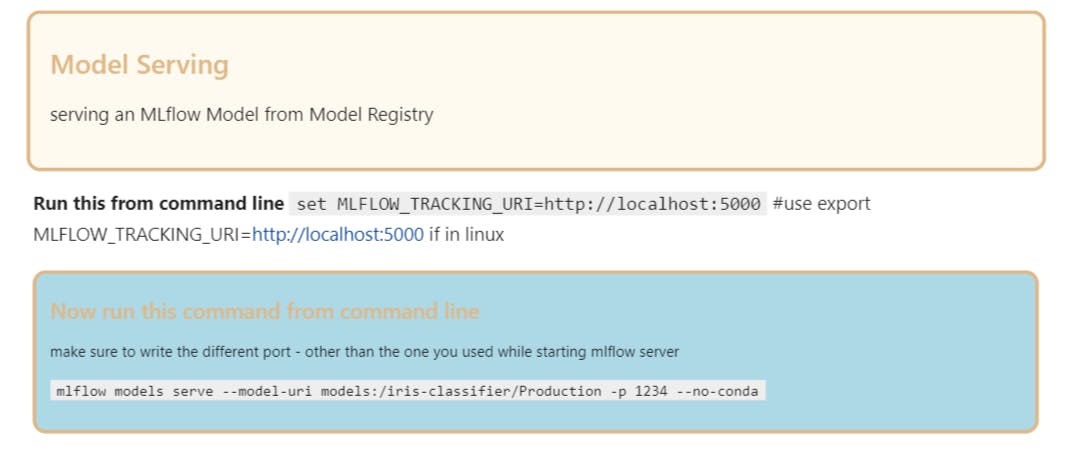
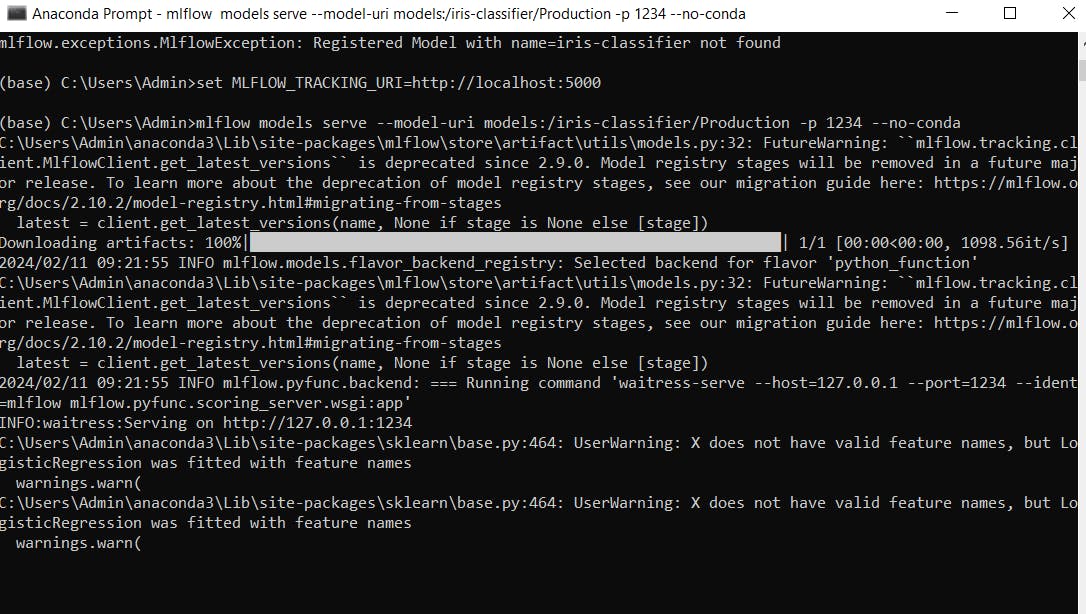
After successfully exposing the model, you can do real-time prediction or Batch-prediction based on client/System requirement.'
On a single test-example

Batch-Prediction


If you wanted to convert the production ready-model to the dedicated and scalable API's the below are the ways by which you can convert the model into an API.

6. Pros and Cons of MLflow
Every project and team has distinctive requirements for managing the machine learning lifecycle. While MLflow is a great tool and often the first option that comes to mind, it’s by no means the best tool for every scenario.
To break down why MLflow may not be a good fit for you, we’ll look at the most common challenges users encounter.
The concerns with MLflow often raised by users can be divided into the following categories:
Security and compliance
User, group, and access management
Lack of collaborative features
UI limitations
Lack of code and dataset versioning
Scalability and performance
Further, open source MLflow comes with all the drawbacks of a self-hosted tool not backed by a company:
Configuration and maintenance overhead
Integration and compatibility challenges
Lack of dedicated support
There are many alternatives to opensouce Mlflow given below and becoming very popular day-by-day. you can learn more about them from here.

For a student and enthusiast it's good to use standalone and opensource mlflow as it's good for experimentation and study purpose.
Amazing!! Now you can productionize your model faster using mlflow.
In-next article I'm going to explain what are feature stores, best feature-stores in the market, sample example using opensource feature store hopswork. So follow me to not miss any articles on teckbakers, connect with me on linkedin, github, kaggle.
Let's Learn and grow together:) Stay Healthy stay Happy✨. Happy Learning!!

