

Practical Guide: Git and GitHub for Data Science

Hey I'm Samiksha Kolhe. a Data Enthusiast and aspiring Data Scientist. One day Fascinated by a fact that "We can built Time machines and predict future using AI". That hit my dream to explore the Vector space and find out what the dark matter is about. World and Technology every day brings new challenges, and new learnings. Technology fascinated me, I'm constantly seeking out new challenges and opportunities to learn and grow. A born-ready girl with deep expertise in ML, Data Science, and Deep Learning, generative AI. Curious & Self-learner with a go-getter attitude that pushes me to build things. My passion lies in solving business problems with the help of Data. Love to solve customer-centric problems. Retail, fintech, e-commerce businesses to solve the customer problems using Data/AI. Currently learning MLops to build robust Data/ML systems for production-ready applications. exploring GenAI. As a strong collaborator and communicator, I believe in the power of teamwork and diversity of thoughts to solve a problem. I'm always willing to lend a helping hand to my colleagues and juniors. Through my Hashnode blog, I share my insights, experiences, and ideas with the world. I love to writing about latest trends in AI and help students/freshers to start in their AI journey. Outside technology I'm a spiritual & Yoga person. Help arrange Yoga and mediation campaigns, Volunteering to contribute for better society. Love Travelling, Reading and Learn from world.
Hello guys, in this article I've added all the necessary commands and guide for developing any project on git. all information mentioned in this article is from scratch so, prior knowledge is not required to kickstart.
This article is beginner-friendly and anyone who wants to kickstart the development of their data science projects on git can follow this.
So without further ado, let’s get onto it:)
Let’s first understand what the git is ?? 🤔
What is Git??
Git is an open-source distributed version control software to track the changes made in any set of files. In a simple scenario, if you and me working on a project from different machines and both made changes in the files… again when the manager checks that and says to not make any changes, make it as before then it becomes brainstorming to work on that code again. so, By using git whatever changes we made we can save that as a commit and get back to that version of the file again… interesting right🤩
Git also makes collaboration easier, allowing changes by multiple people to all be merged in a single source.
Now I’ll directly go through the practicals on how to use it as a developer.
On Local Machine
I’m using GitBash to work on git, you can use your Command Line as well.
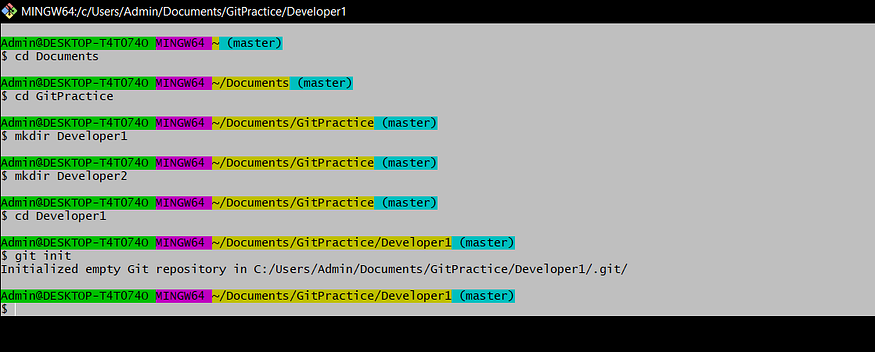
create folders for different projects to work on e.g. in my case created Developer1 and Developer 2. and go inside the Developer1 folder and initialize git using the git init command.
The significance of git init is, that it initializes the .git environment for our project as environment setup. it makes folders empty repositories, .git file has all the things that any folder should have for tracking the system/version control on local machine. it’s like a container of git i.e. folder can work same on any os.
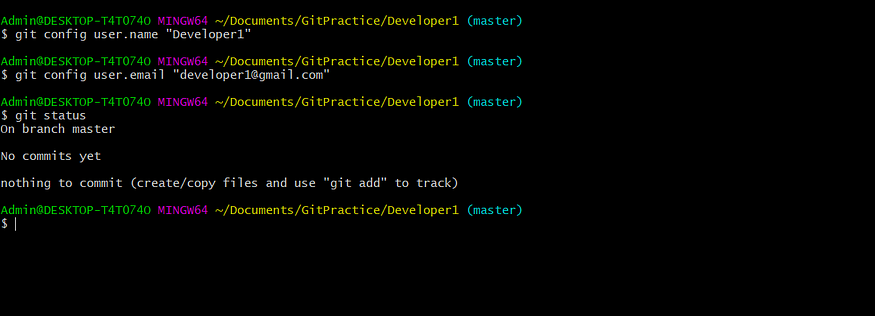
Now configure the folder using the username — git config user. name “developer1” and git config user.email “developer1@gmail.com”.
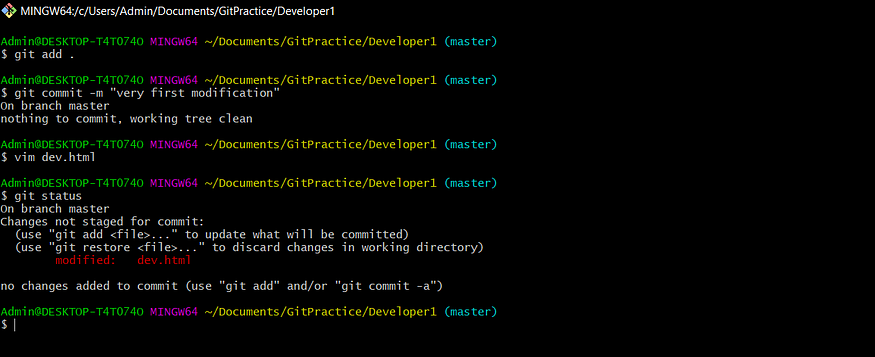
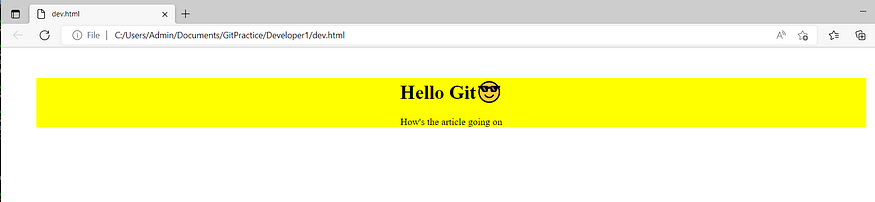
Now create a file inside the folder to track e.g. git_developer using touch dev.html and modify it using vim dev.html as below.

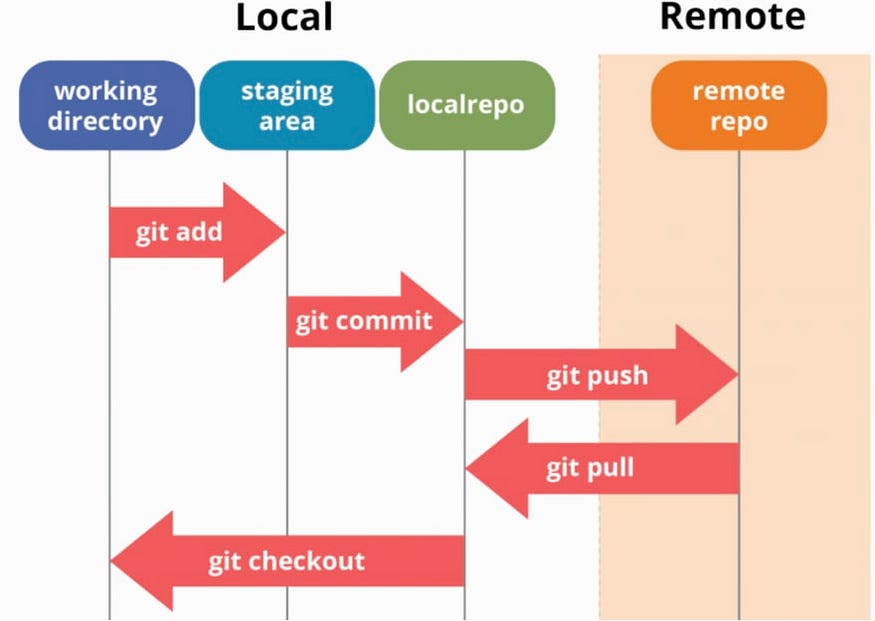
Now to add files to the git environment use git add filename or simply git add . and then use git commit -m “message” to save the version or modification details.
Now try over different modifications and each time after commit we get a unique version id so that if required we can go to that version of the file as well.
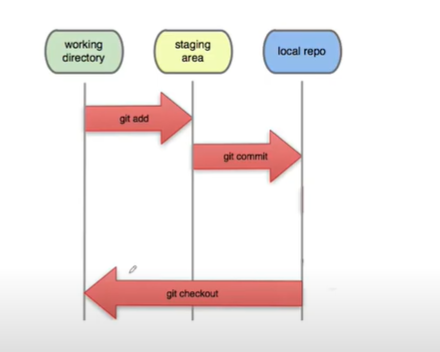
Here’s what happened internally under the above commands.
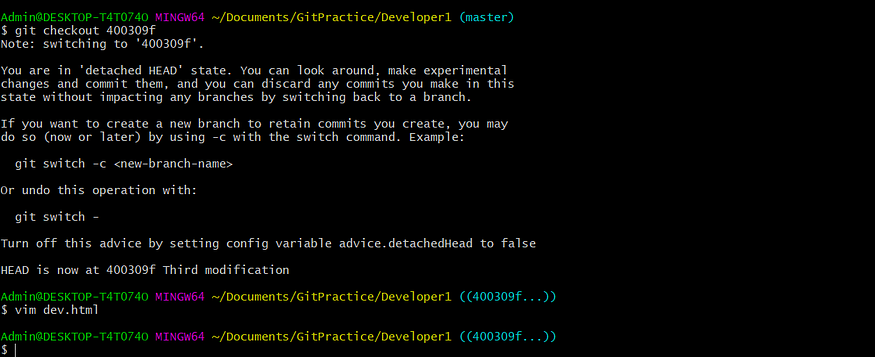
Now let’s do the Time Travel🚀 . below is the dev.html file after third commit. using git Checkout “version_id” we go back to previous versions as per the version_id.
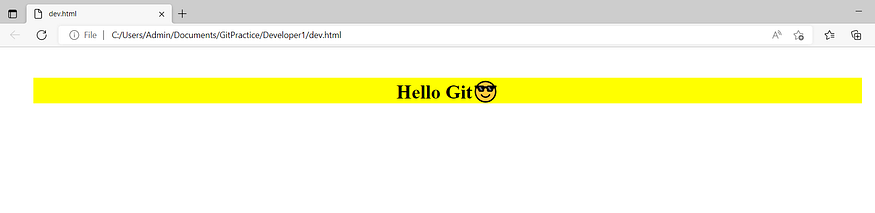
Before Checkout
After Checkout directly to the first version.
As before we worked over the local machine now let’s see how it worked on Github
On GitHub
Now the git folder that we created GitPractice/Developer1 if that folder to be push on github repo then use the below commands.
Note: You should have a GitHub account and create a new repository to copy the folder in.
Initially before copying the repo is empty.

git remote add origin github_repo_link: it connects my local repo to GitHub
git push origin master: to push local files on Github.
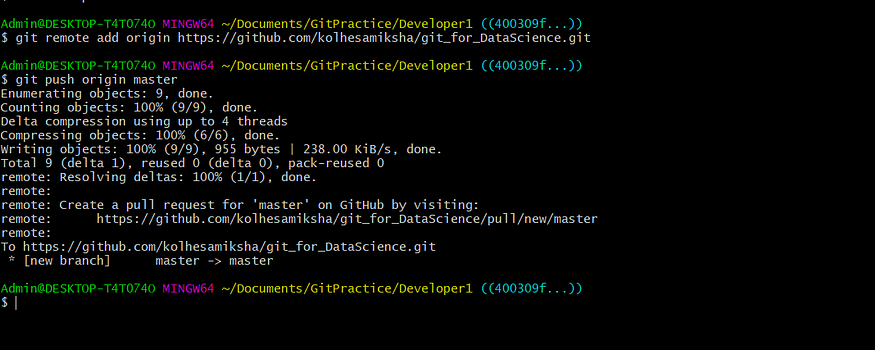
After Push

again if we want to convert github repo to local folder i.e. to clone github repo use the git clone “github_repo_url” so it’ll download all the files of github repository on your local machine.
Team Collaborating with Git
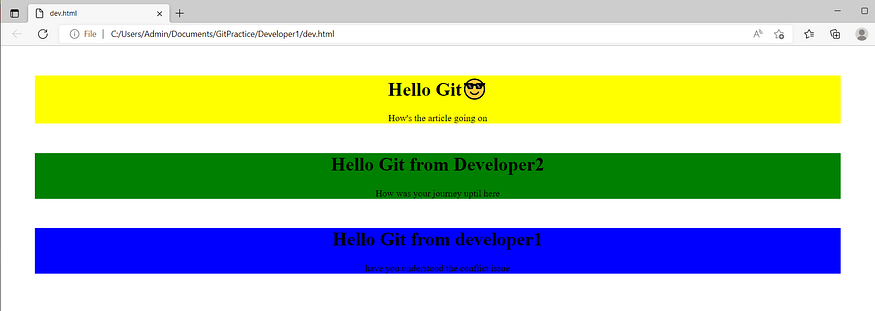
Now we’ve pushed our files on github and now developer2 want’s to make changes into that then developer2 will connect with repository by developer1 and pull the dev.html file. after doing some modification it pushes back to the github repository.

BAM😮!! push rejected why???
It happens in such in a scenario that as developer1 pushes all versions on github repository. when developer2 pull the dev.html file from that github repository and made changes then those will get reflected on github and new version got created but, if developer1 again commit the dev.html file and he want’s to push that to github repo… then we faced such issue… know an Conflict problem.
Hence to resolve the conflict problem… pull the developer2 version from github and resolve that locally… then push the developer1 version it’ll resolve the issue and conflict version commit got created.
Now it’s working🥳

And also modification have also successfully reflect on dev.html file
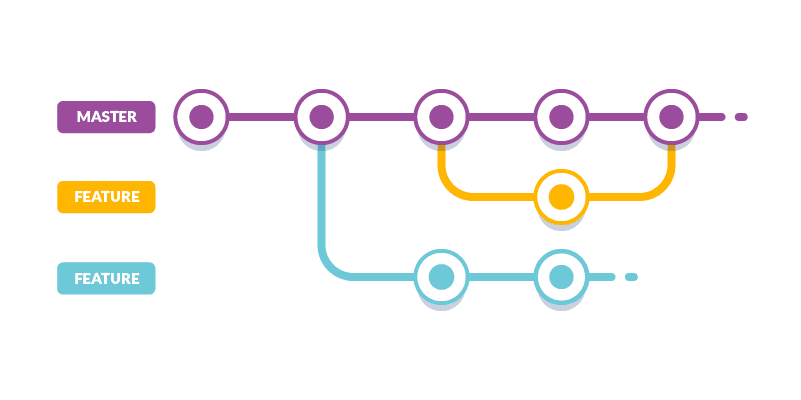
Git Branches
Branches allow you to develop features, fix bugs, or safely experiment with new ideas in a contained area of your repository.
Commands for git braches creation and merge
1. git branch <branch_name>    => to create branch.
2. git checkout <branch_name>  => to direct to another branch.
3. git branch                  => to get the current branch name.
4. git merge <branch_name>     => to reflect the changes into another branch from <branch_name> branch.
This is all about git and github… just try it once it’s really interesting and you’ll get it definitely:)
If you liked🤝 this article do comment and you can connect me on LinkedIn or follow me on github and kaggle .
Happy Learning:)


