Amazon Virtual Private Cloud
AWS has an extensive infrastructure that spans the entire globe, with multiple regions and availability zones. Now to make this infrastructure accessible to hundreds and thousands of AWS clients AWS offers a wide range of services. However, the challenge lies in providing each client with their own private space to locate, connect and manage these AWS services which they launched. This challenge is been solved by Amazon Virtual Private Cloud (AWS VPC).
AWS VPC lets you provision a logically isolated section on the AWS cloud. It enables you to launch AWS resources into a virtual network that you have defined. By using AWS VPC clients can create and manage their own IP address range, subnets, routing tables, and gateways. Because of AWS VPC clients' services remain completely separate and secure from other clients of AWS, while at the same time leveraging the vast AWS infrastructure via their services.
Before Moving Further it is highly recommended to go through our previous networking blog in order to get an deep level understanding of IP's, CIDR's and Subneting.
Setting up the stage
When we use our computer to search on google or access the internet we basically connect to a public IP address at the google end using our private IP address. But ...

In the networking world we know private IP addresses can only connect to other private IPs, and public IP addresses can only connect to other public IPs. So how is it made possible that... We having a private IP can connect to a public IP address? the answer is NAT (Network Address Translation)
NAT (Network Address Translation)
Network packets are the foundation of communication between machines over a network, the source and destination address are the two important parts of it. Now to enable communication between private IPs and public IPs NAT (Network Address Translation) is used via which we do the modification in the source or destination IP of the packets over the network, thus enabling the private IP's to communicate with public IPs
NAT is implemented using various devices like border routers, modems, hubs, etc. for instance routers have 2 interfaces LAN (for local network) and WAN (for global network). The LAN is associated with a private IP belonging to our local network range while the WAN interface is associated with public IP. When a packet travels outside the local network using NAT its private IP which is from a private network is converted to a public IP address. On the contrary when a packet enters the local network then the public IP is converted to private IP.

Source NAT (SNAT)
SNAT stands for Source network address translation. It is generally used when a machine from an internal/ private network wants to initiate a connection to a machine over external/ public network. Here the source IP which is private IP is modified into public IP by NAT devices.
Destination NAT (DNAT)
DNAT stands for destination network address translation. here the modification in the destination address is done. It redirects the incoming packets with a destination of a public address to a private IP address inside our network.
Putting Concepts into Practice
VPC and Subnets
Creating a Virtual Private Cloud (VPC) in AWS is similar to creating a large network range, which can then be divided into smaller subnets. These subnets are crucial for segregating and managing resources within the VPC, allowing for better control and security over the network.
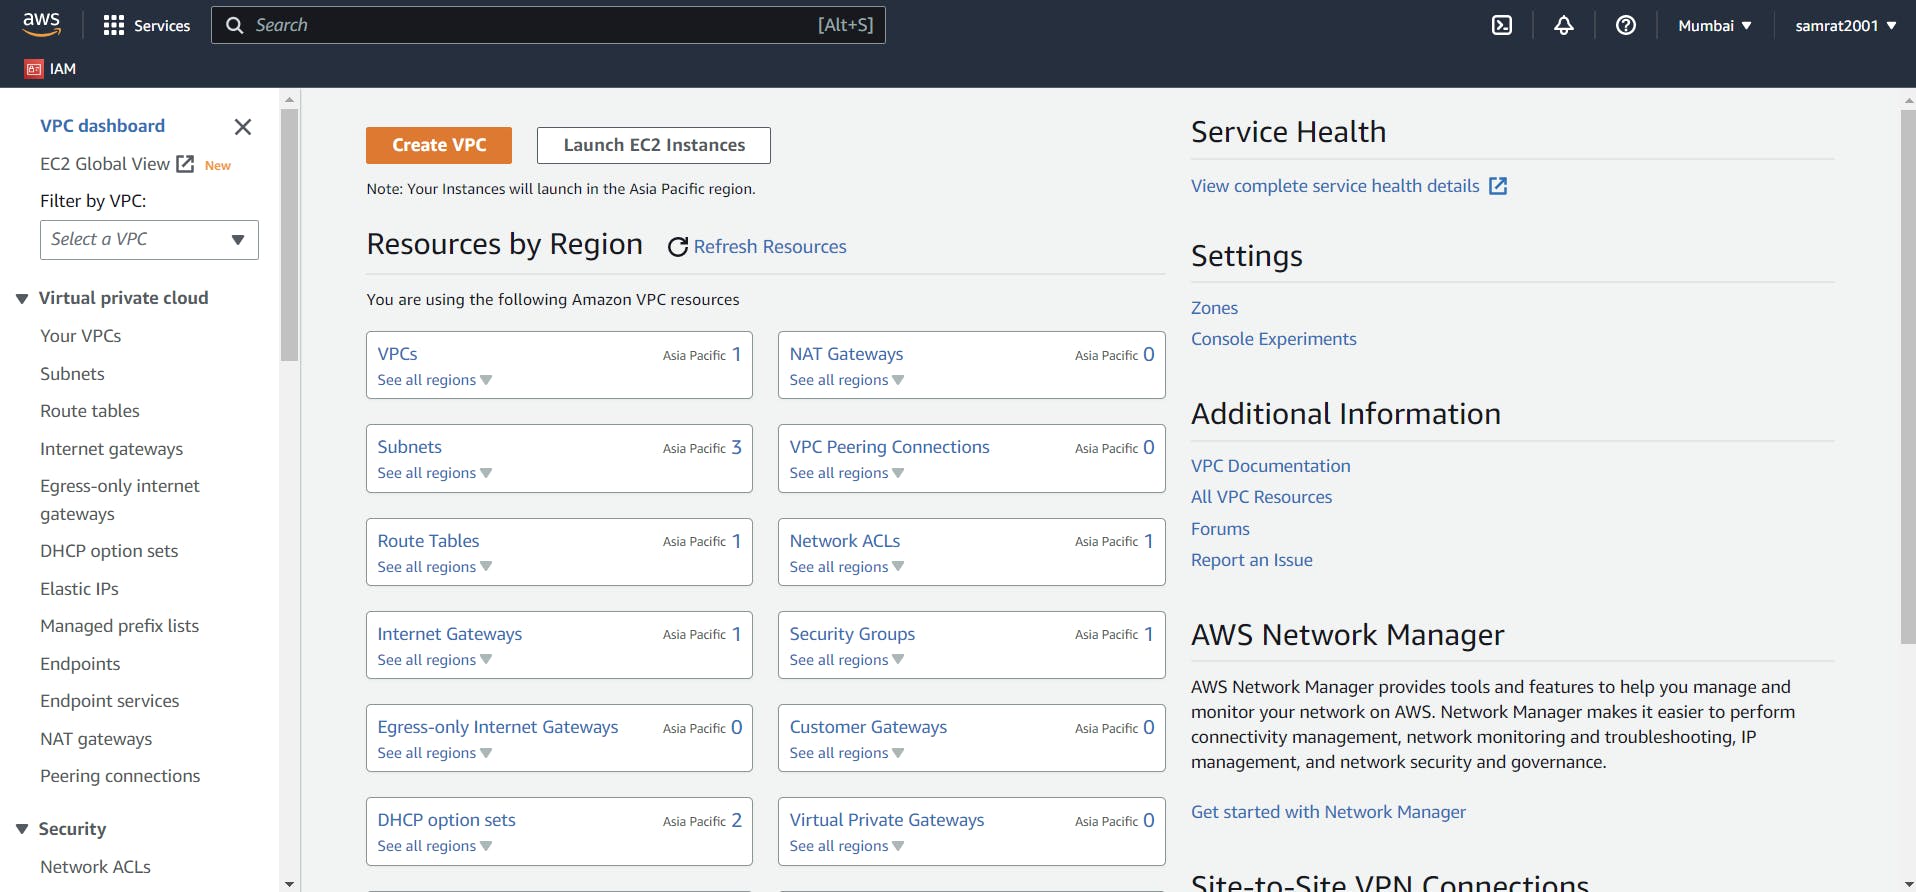
So in the VPC dashboard, we get the option for creating the VPC. Further for creating VPC, we are asked for 2 main things VPC name and IPv4 CIDR (network range). If we want we can also enable IPv6 but for now, we will not be using it. Also, we can select the tenancy (shared or dedicated) for instances in our VPC here I have kept it default.
Note:
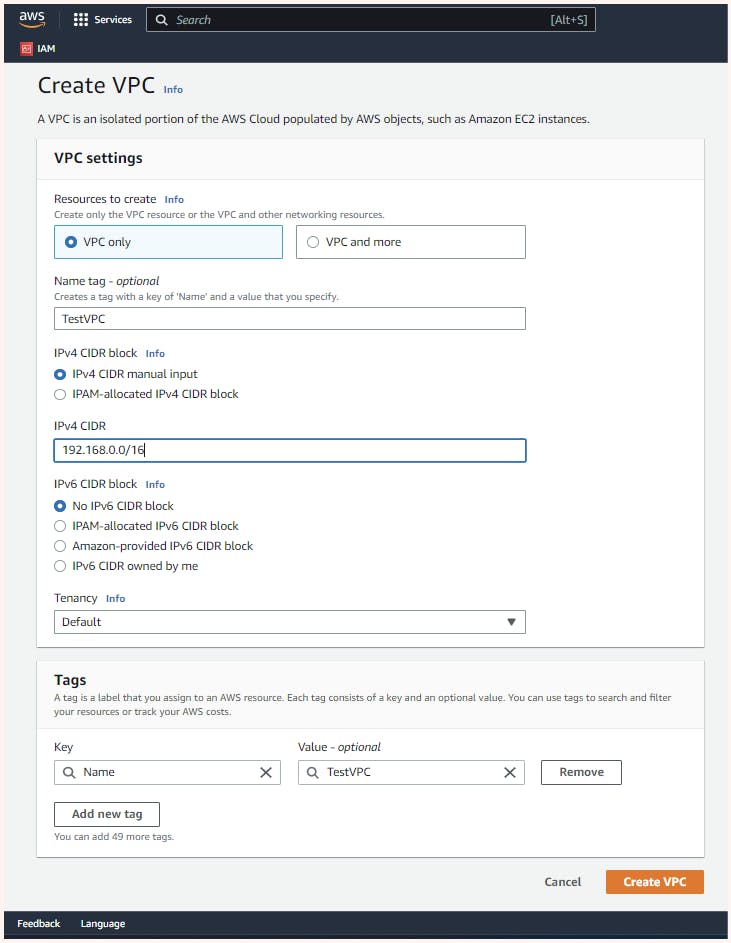
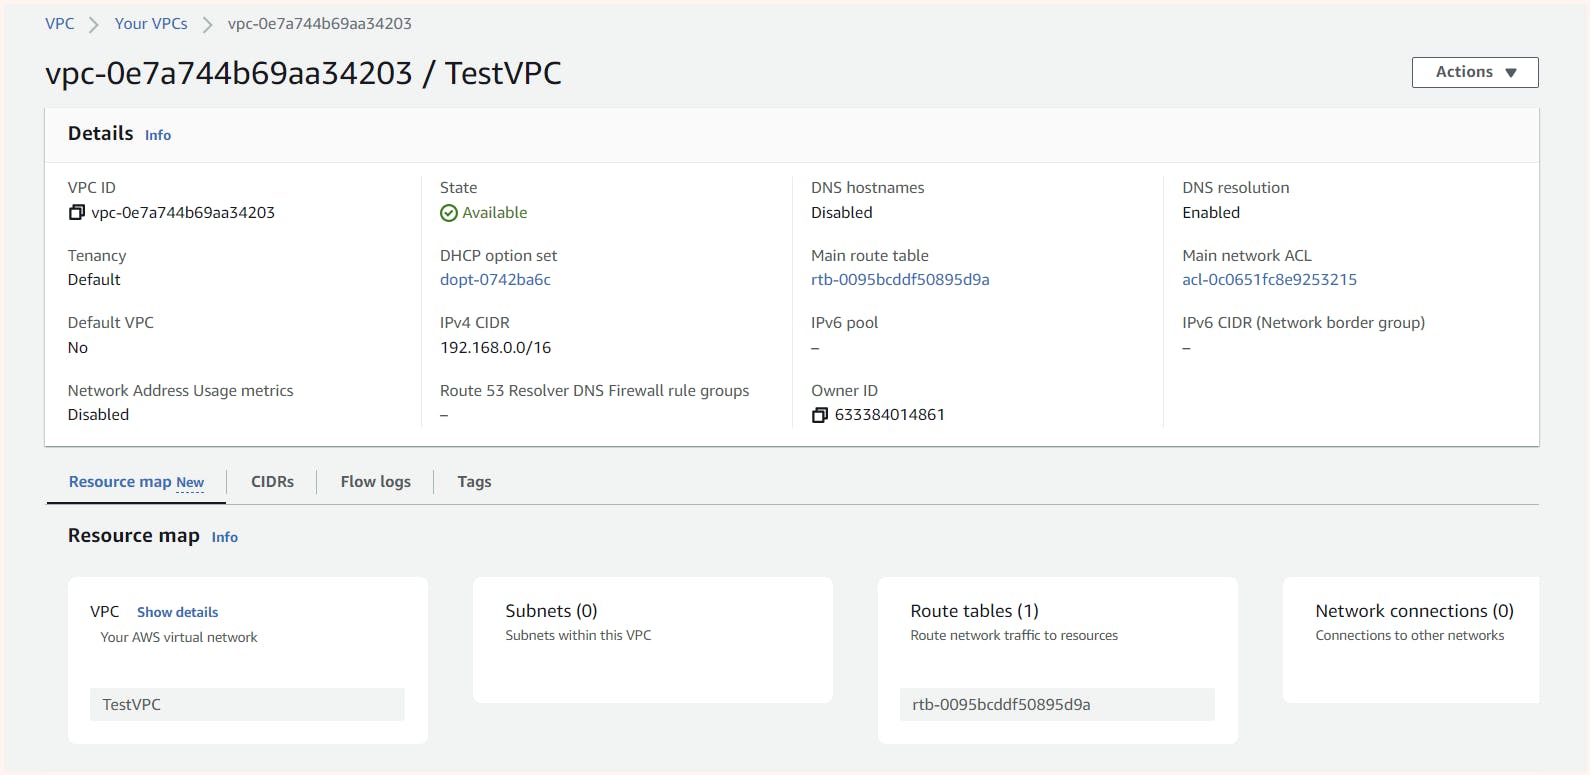
Here I have used 192.168.0.0/16 as my CIDR for "TestVPC".
Now we will be heading on to launch subnets in our VPC. Here there are three main things asked Subnet name, Availability Zone and IPv4 CIDR.
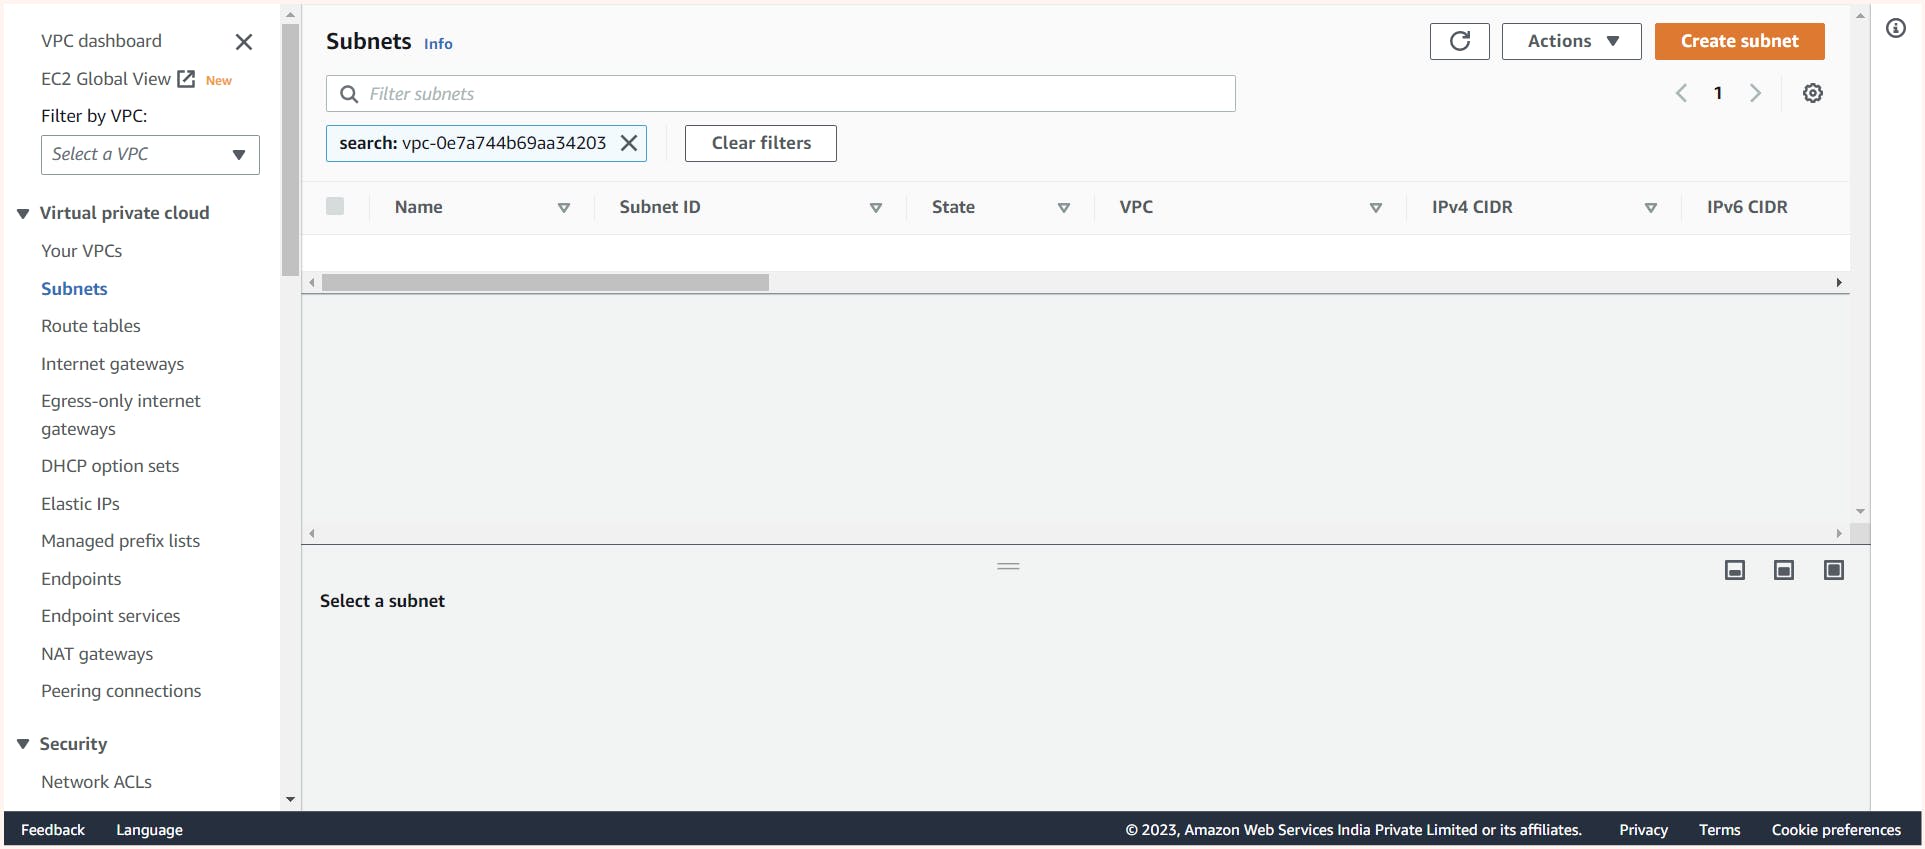


After creating a VPC with a specified CIDR block, we can move ahead with launching subnets inside it. The resources required by instances will be allocated from AWS servers located in the availability zone (AZ).
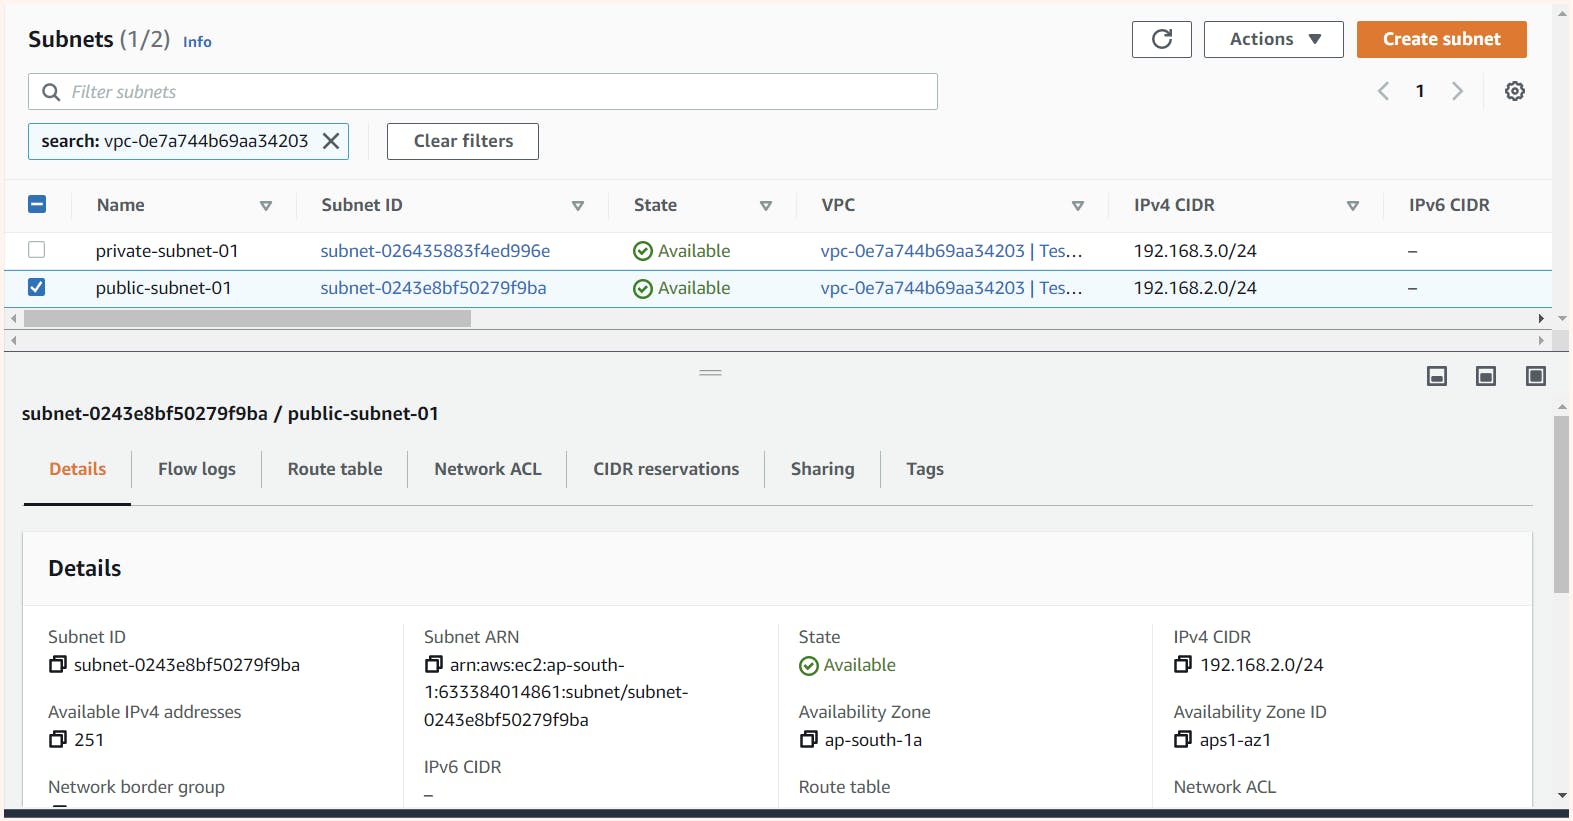
To start, I have launched two subnets - public-subnet-01 and private-subnet-01, each in a different AZ. These subnets can be used to launch instances with varying levels of accessibility and security based on their subnet placement.
Good to know Stuff 🥑
If we observe closely Available IP's in each subnet are 251 but we have gave CIDR block as 192.168.2.0/24 so we should get 256 IP.
The remaining 5 IP's are reserved IP's used by AWS for various use cases like:
192.168.2.0 : Network Address
192.168.2.1 : Reserved by AWS for the VPC router (internal router).
192.168.2.2 : Reserved for DNS server
192.168.2.3 : Reserved by AWS for future use.
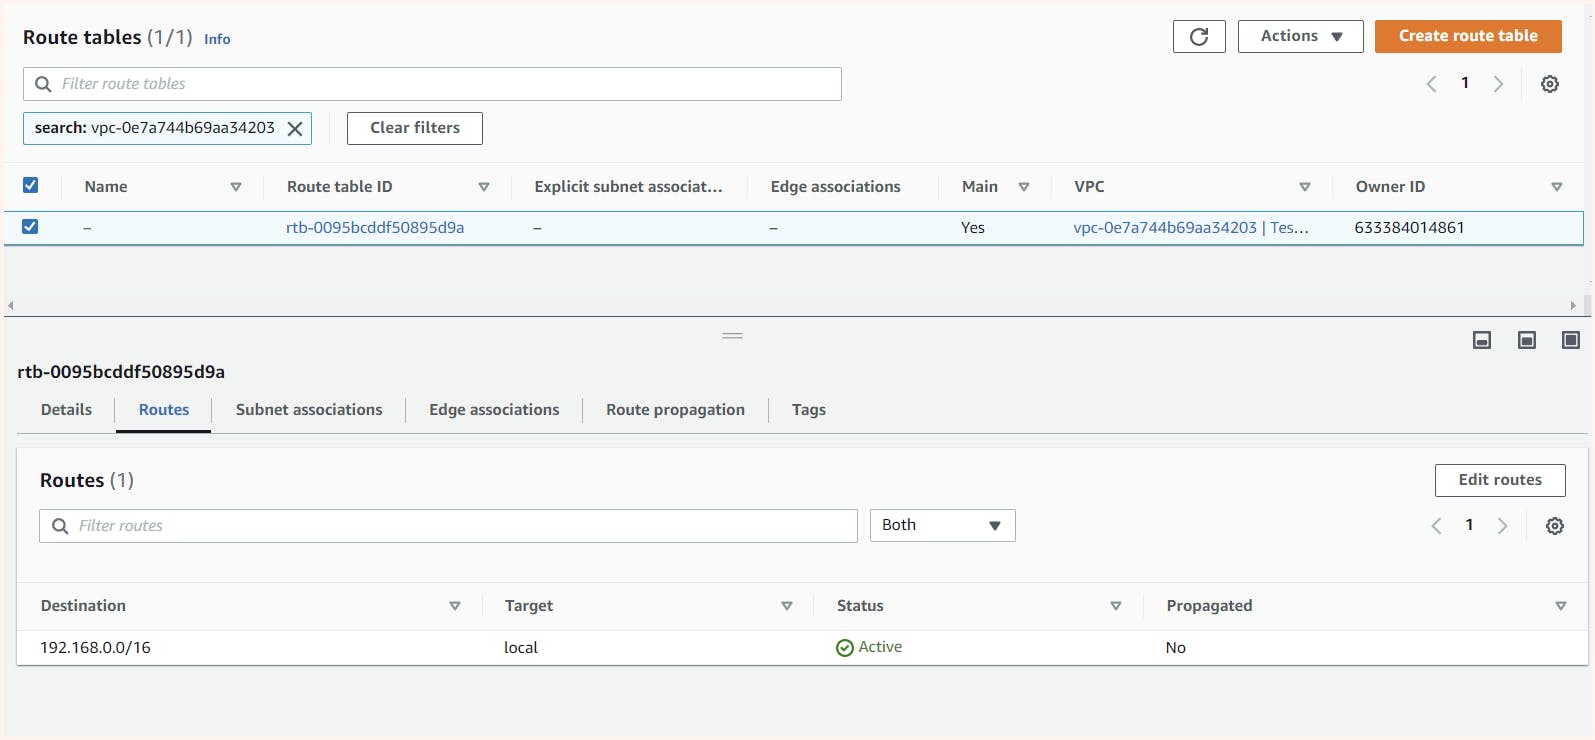
192.168.2.255 : Broadcast IPAfter creating the VPC and subnets, we can check the routing table tab in the VPC dashboard. We can see that a default route table for our VPC is automatically created, which has a rule allowing machines in all subnets of the VPC to communicate with each other by default.
Security Groups
In AWS, Security Groups (SG) act as firewalls for EC2 instances, allowing or blocking network traffic based on rules set in place. These rules, referred to as inbound and outbound rules, dictate which network traffic is allowed to enter and exit the network respectively. Think of it as a gatekeeper who only allows entry to clients who satisfy the specified conditions. Inbound rules verify incoming network traffic while outbound rules verify outgoing traffic.
To create a security group head to the EC2 dashboard and select the "security groups" option. From there, we can create new security groups, specify inbound and outbound rules, and assign them to as per our needs
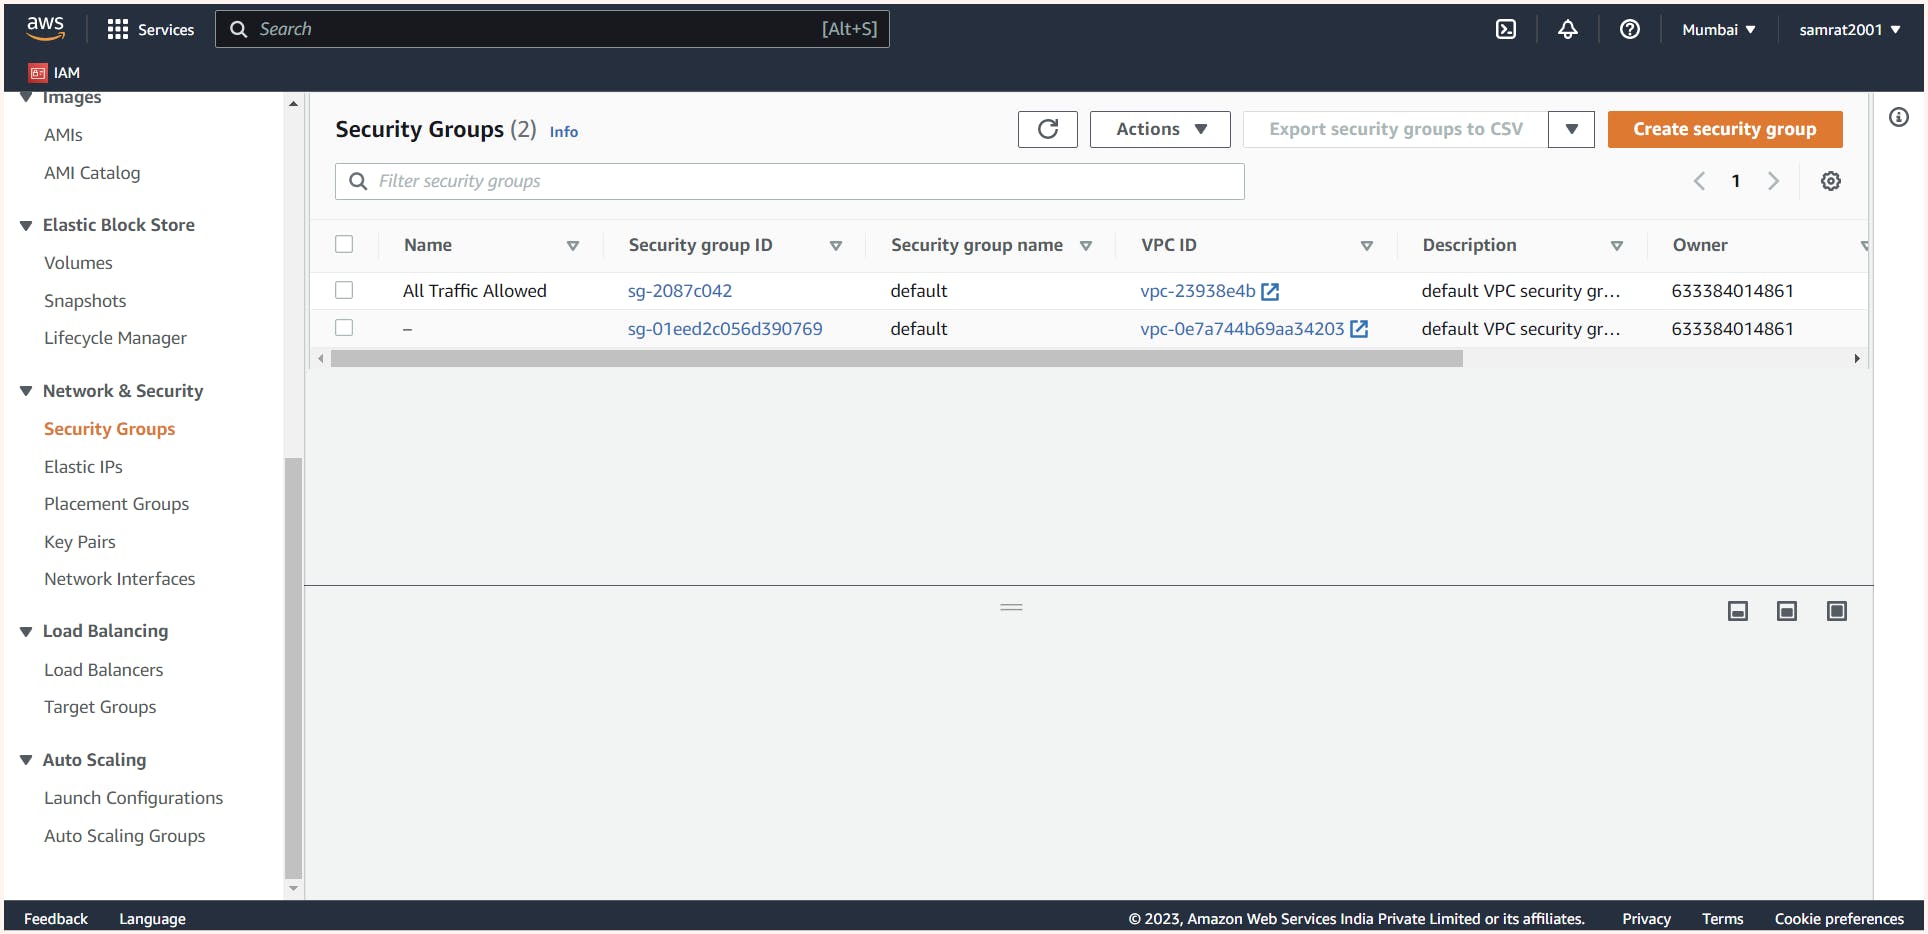
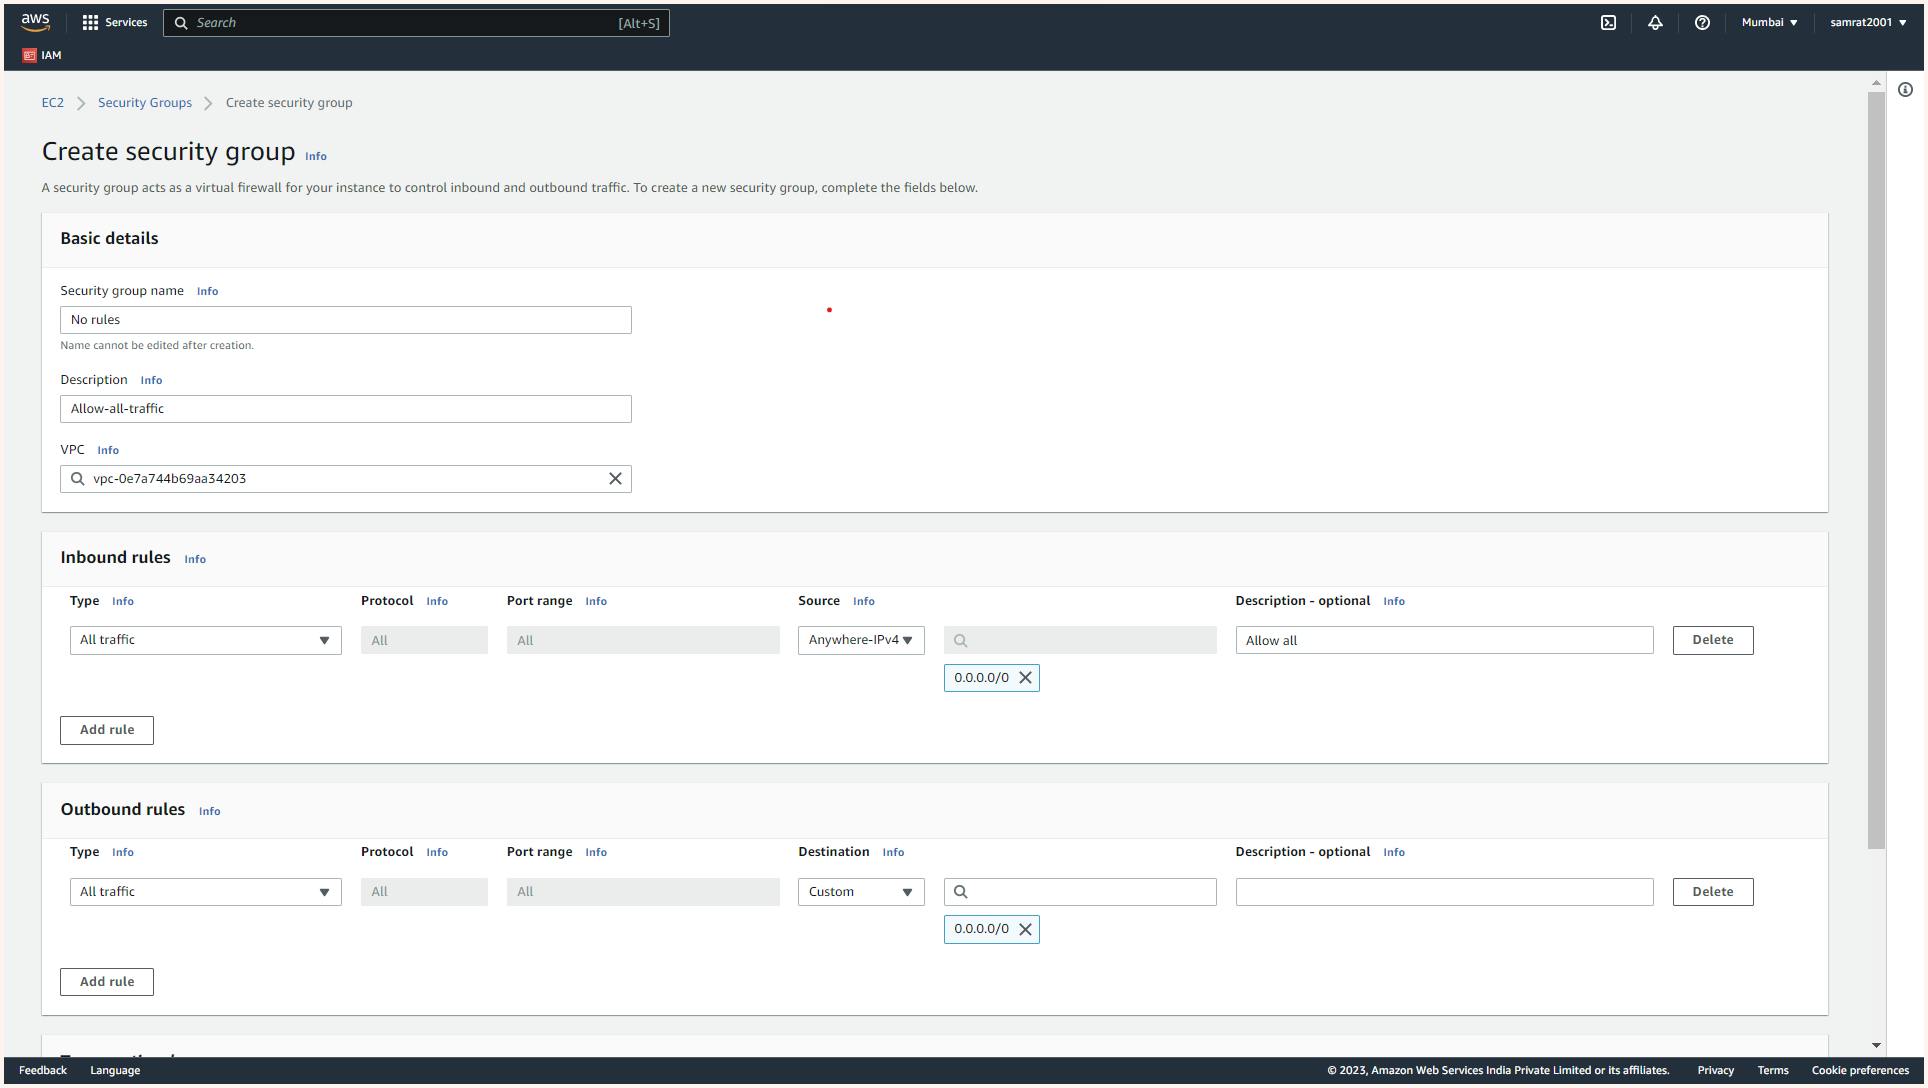
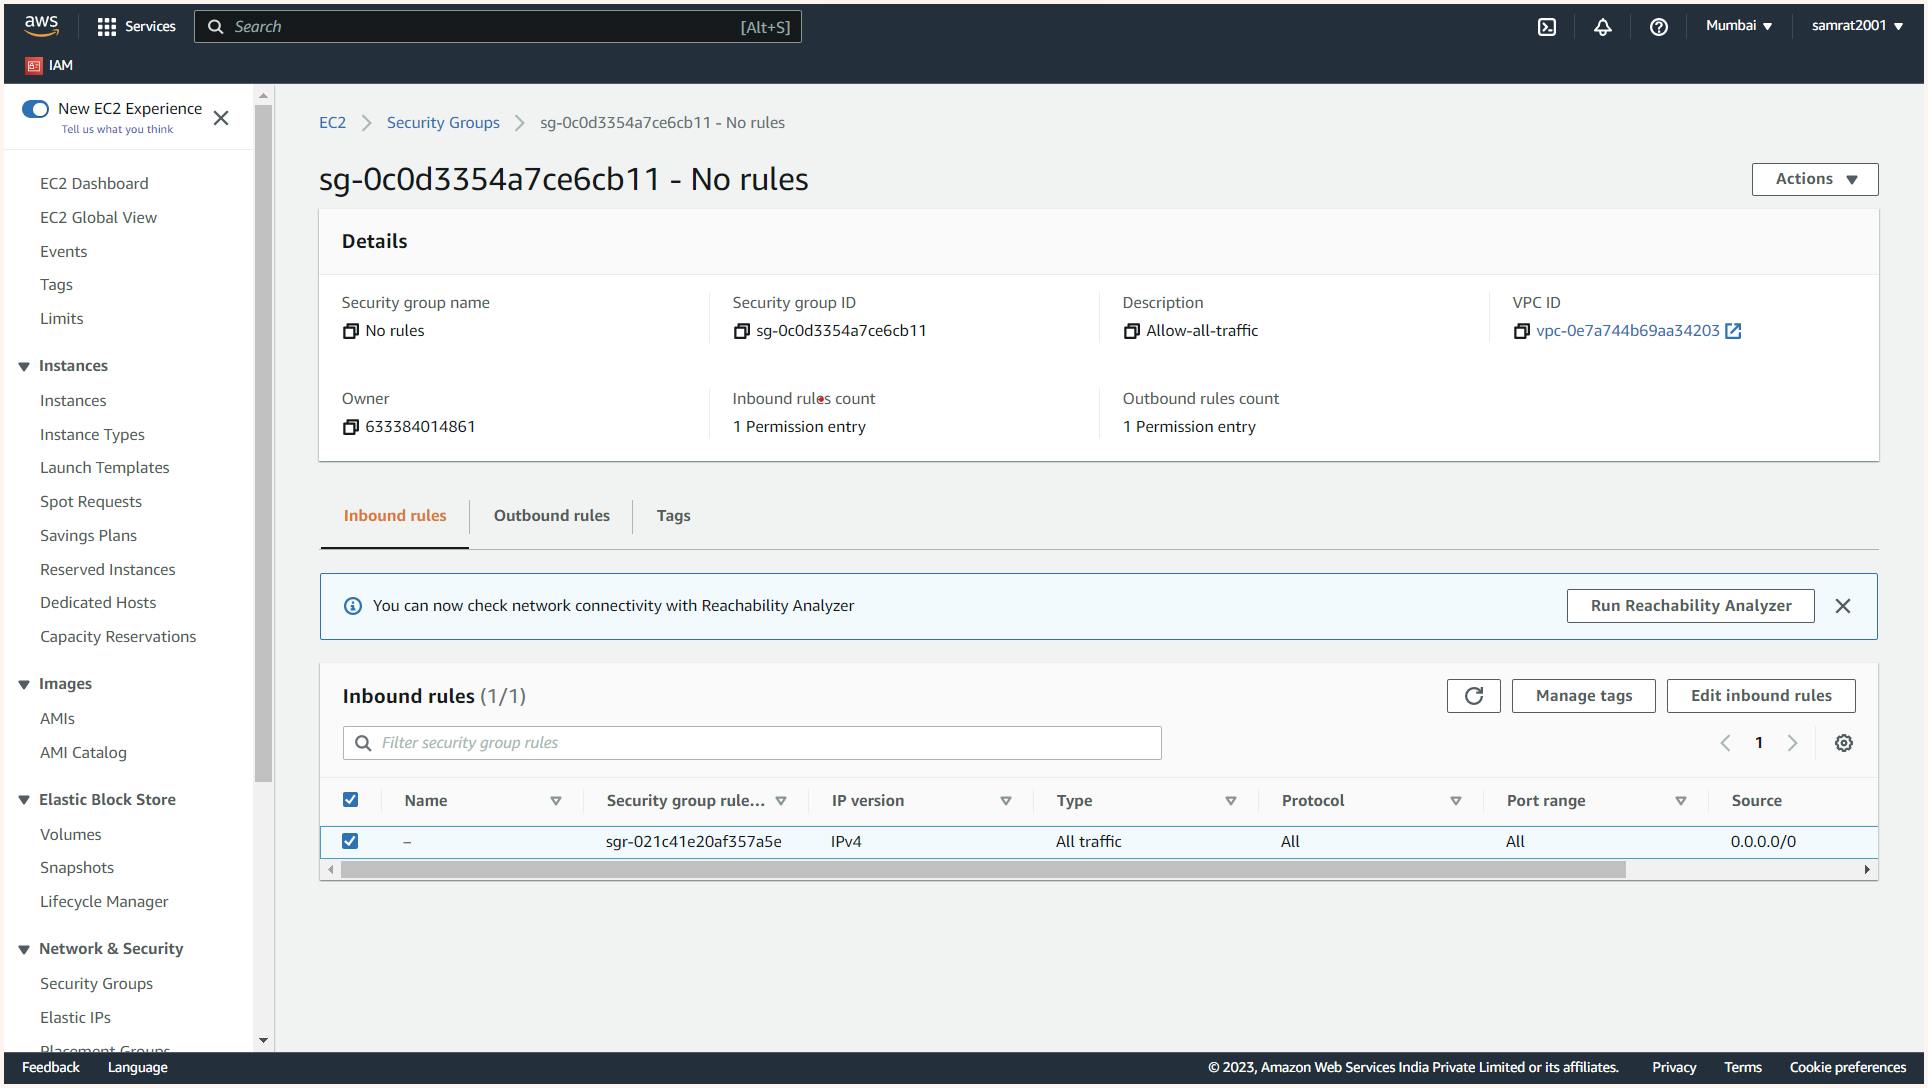
Here we have created an SG with the name "no rule" and in the inbound rules, we ask to allow all traffic from anywhere. This is not good security but for sake of reducing complexity in our further practical we will be allowing all traffic for now also we have allowed all outgoing traffic.
Internet Gateway (IGW) and Routing Table
Just like how we use a router at home or in offices to connect our devices to the internet, an Internet Gateway (IGW) serves as the gateway between our VPC and the outside world in AWS. Once we create a VPC, we need an IGW to enable communication between the devices in our network and the internet. The IGW provides Destination NAT and Source NAT capabilities, making it an essential component of a VPC. AWS ensures that the IGW is highly available by horizontally scaling and making it redundant.
Now At the most, we will be spinning up 2 ec2-instance in our VPC in subnet- public-subnet-01 and private-subnet-02
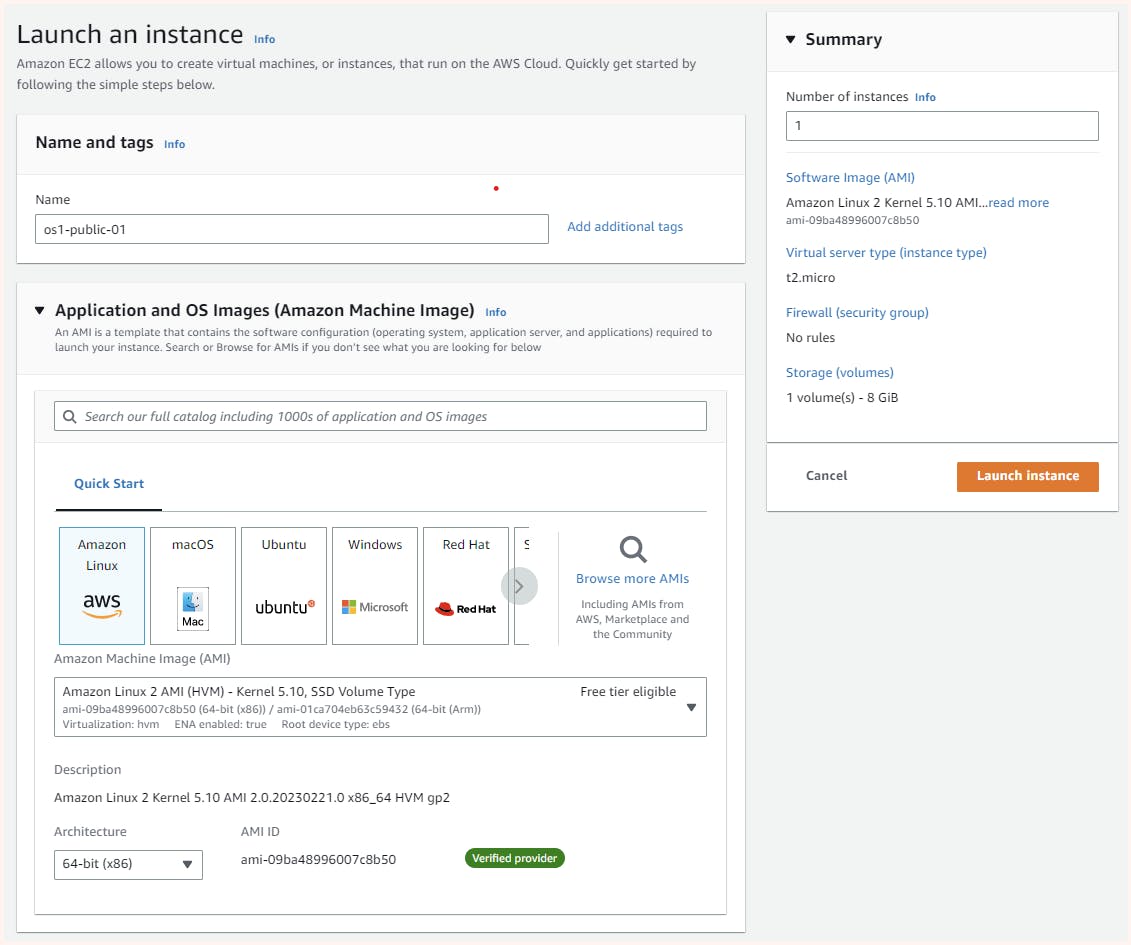
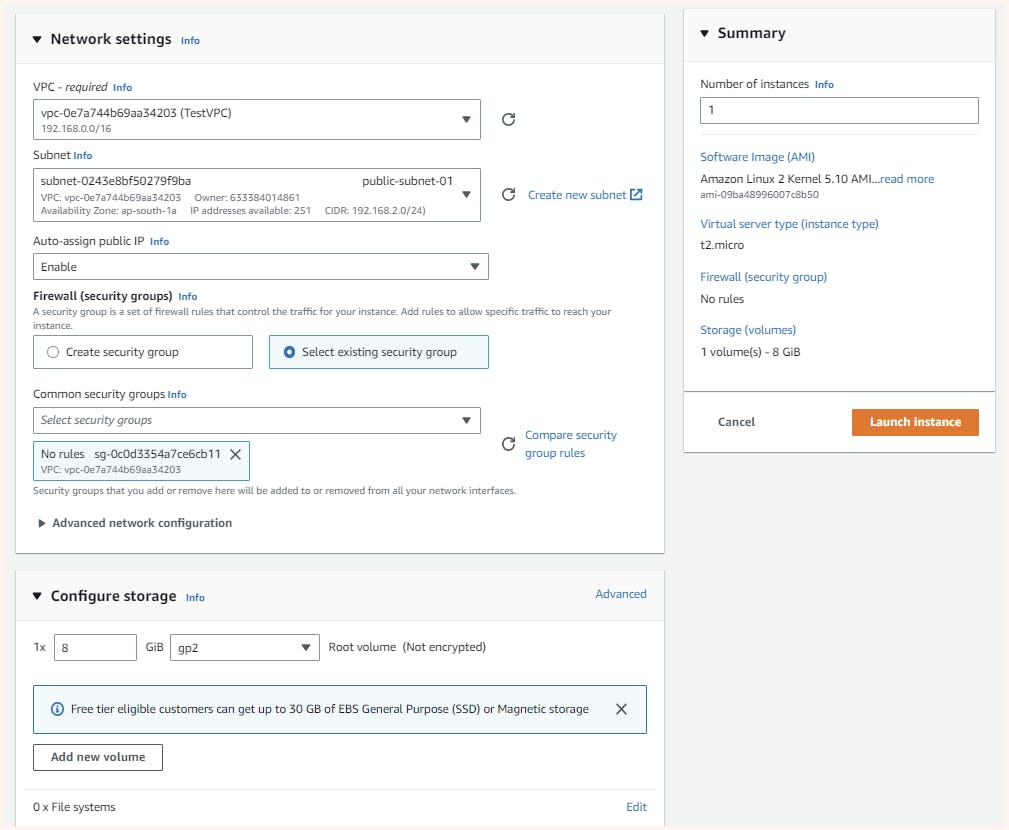
Now with the same configuration 2nd instance is launched but in private-subnet-01

| Subnet | Instance name | Private IP | Public IP |
| public-subnet-01 | os1-public-01 | 192.168.2.242 | 3.6.90.244 |
| private-subnet-01 | os2-private-01 | 192.168.3.90 | 13.126.5.67 |
Now let us get an Internet gateway for our VPC. In the VPC dashboard, we can find the Internet gateway tab where we get the option to create one for our VPC.
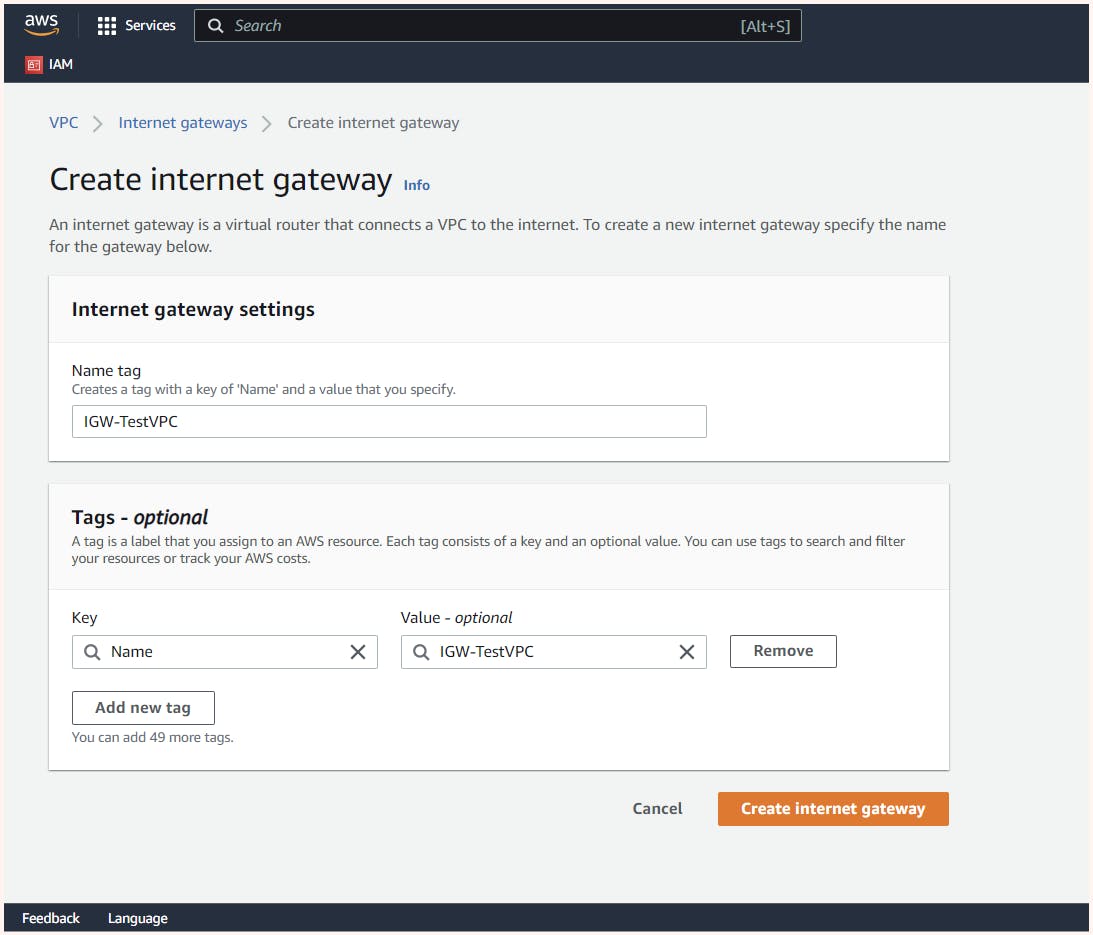
Next, we need to attach our IGW to VPC.
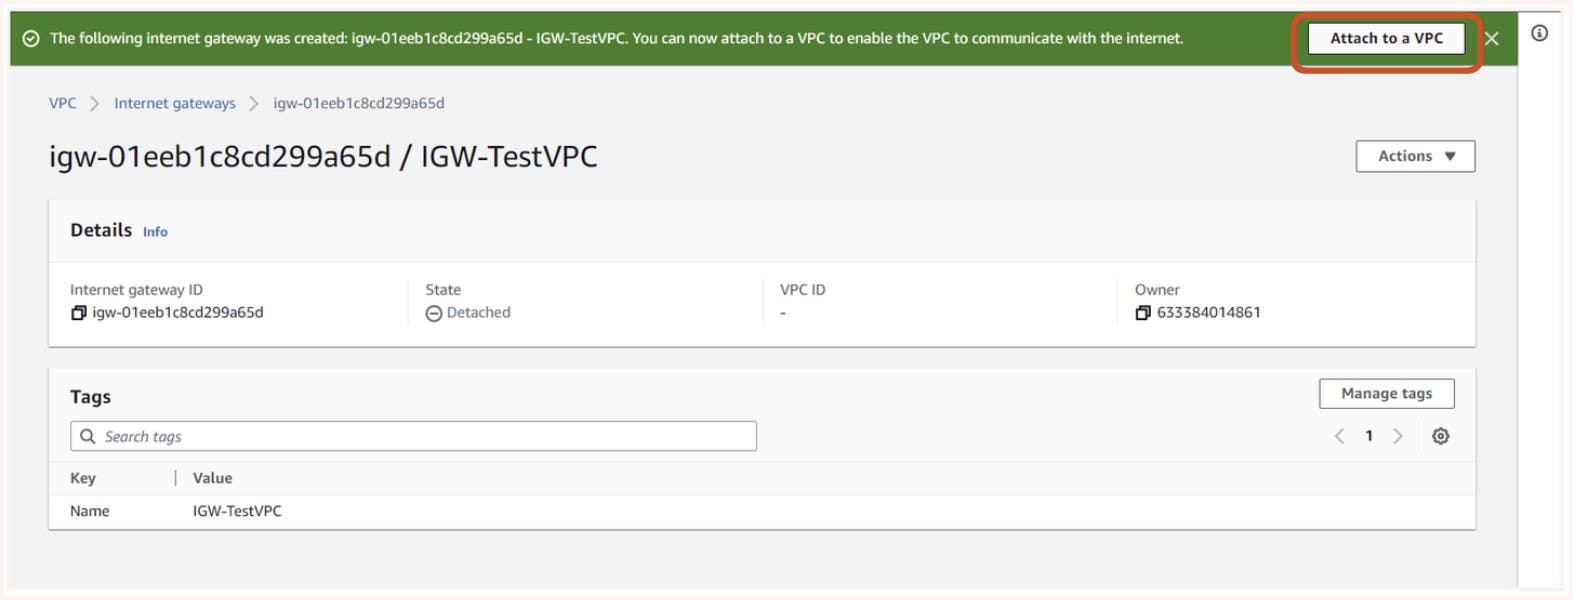
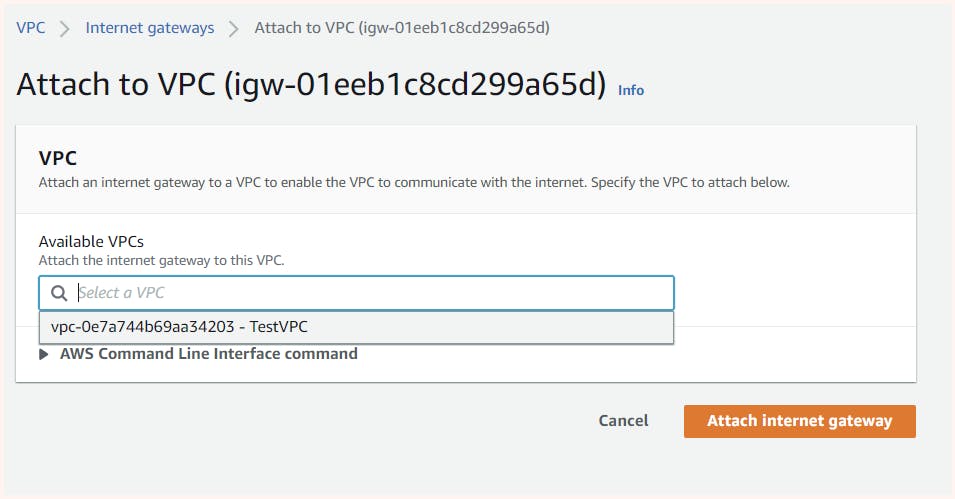
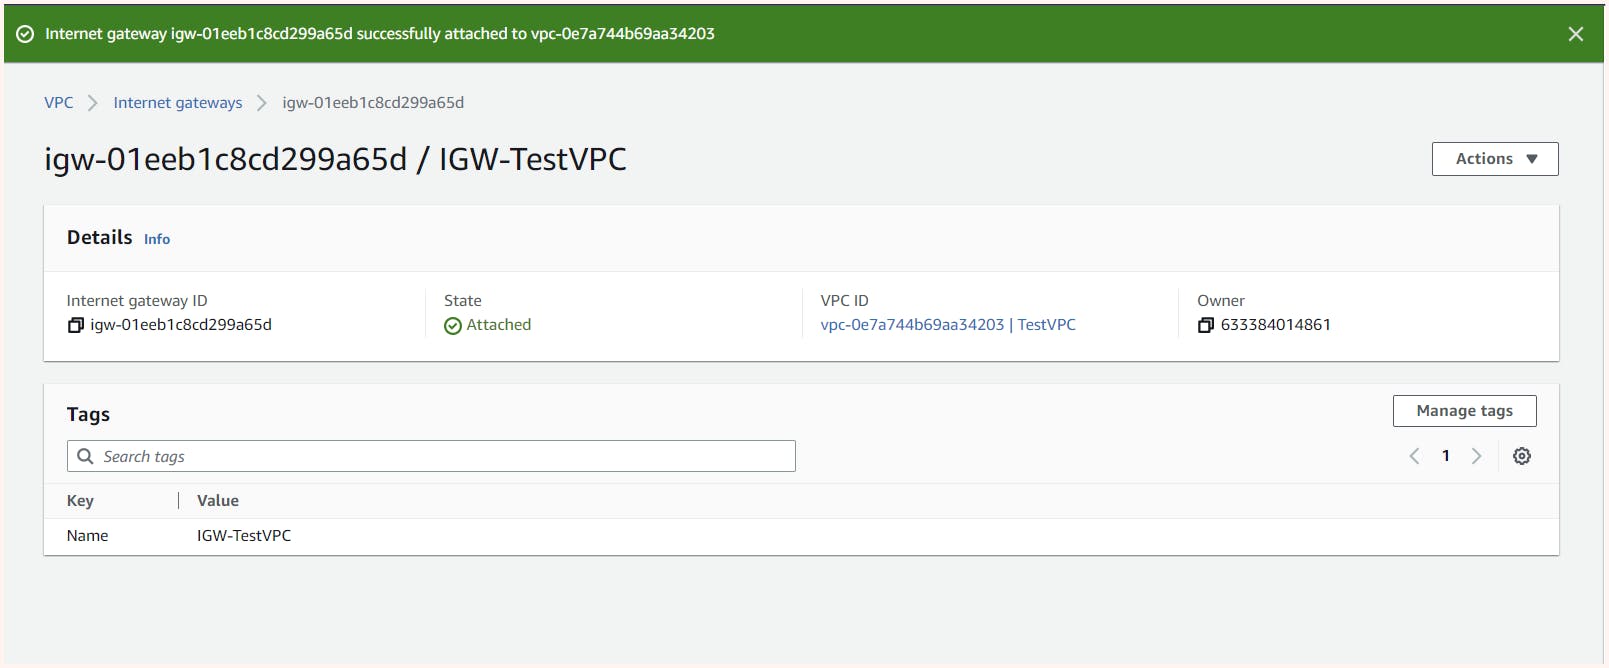
Now the question is can our instance in public-subnet-01 connect with the outside world or the outside world for it i.e we can connect to it let's try.

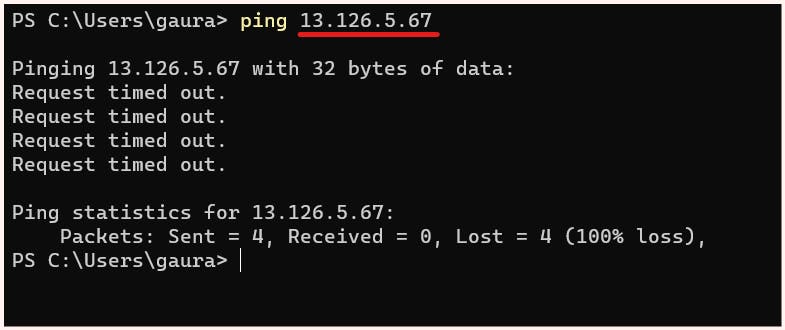
Here, I attempted to ping the public IP of the "os1-public-01" instance in "public-subnet-01" but it failed to connect. This is because my subnet and instance are not aware that an Internet Gateway (IGW) exists, and we need to inform them of this via a routing table. To do this, we will create a new routing table with a rule that states that if we want to go anywhere outside the VPC, we should connect to the IGW. Finally, we need to associate this routing table with the public-subnet-01 so that it can access the outside world.
In the VPC dashboard from the route table tab, we can create a new route table here we have named it IGW-route

Once created we get the option for editing its route where we can add our new rule for IGW
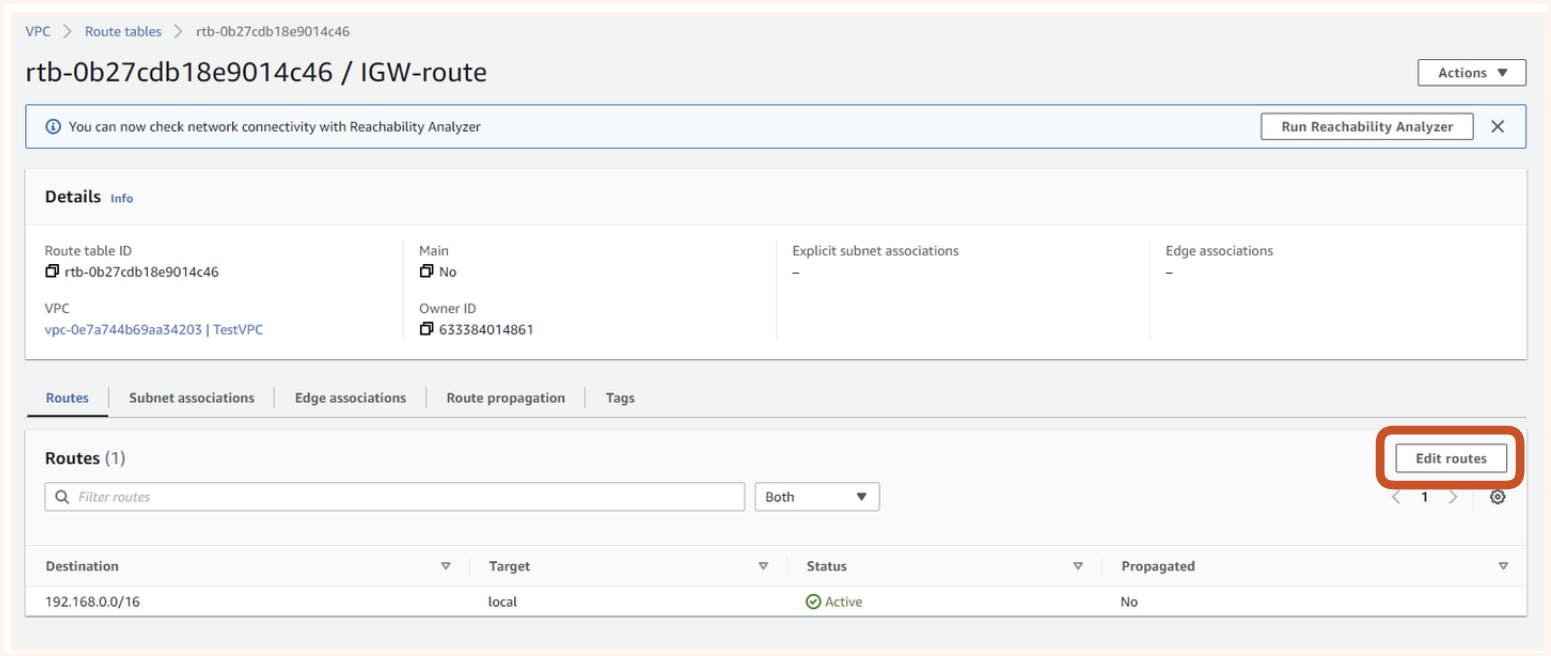

We also need to associate the subnet we can get this option from the action tab in the IGW-route info page
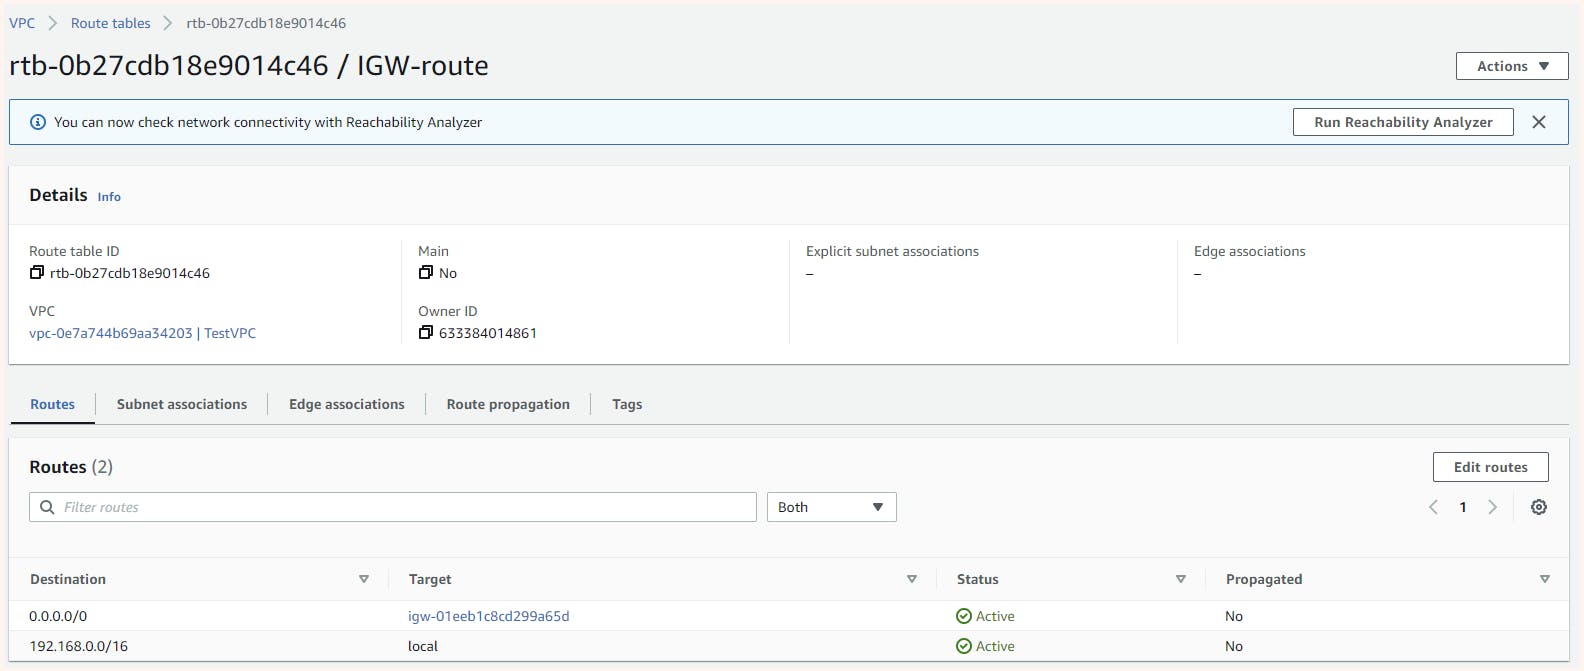

Now let's try to ping our "os1-public-01" instance in "public-subnet-01" once again
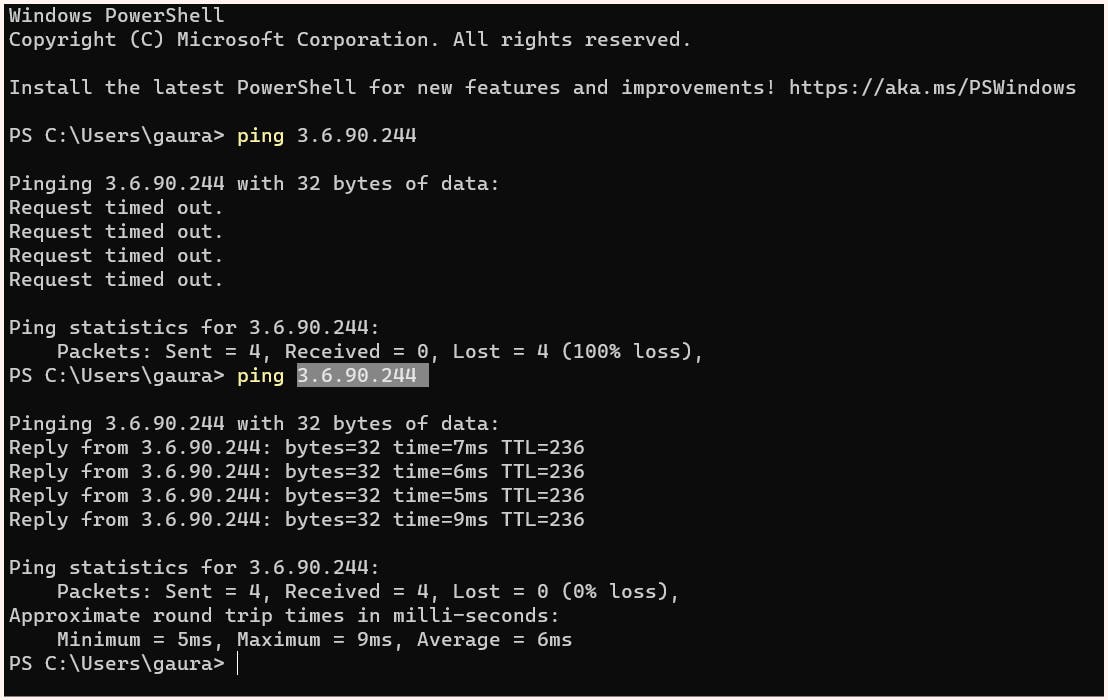
This time connection was done successfully. Let's go into the instance via ssh and check whether the instance is able to go to the outside world.
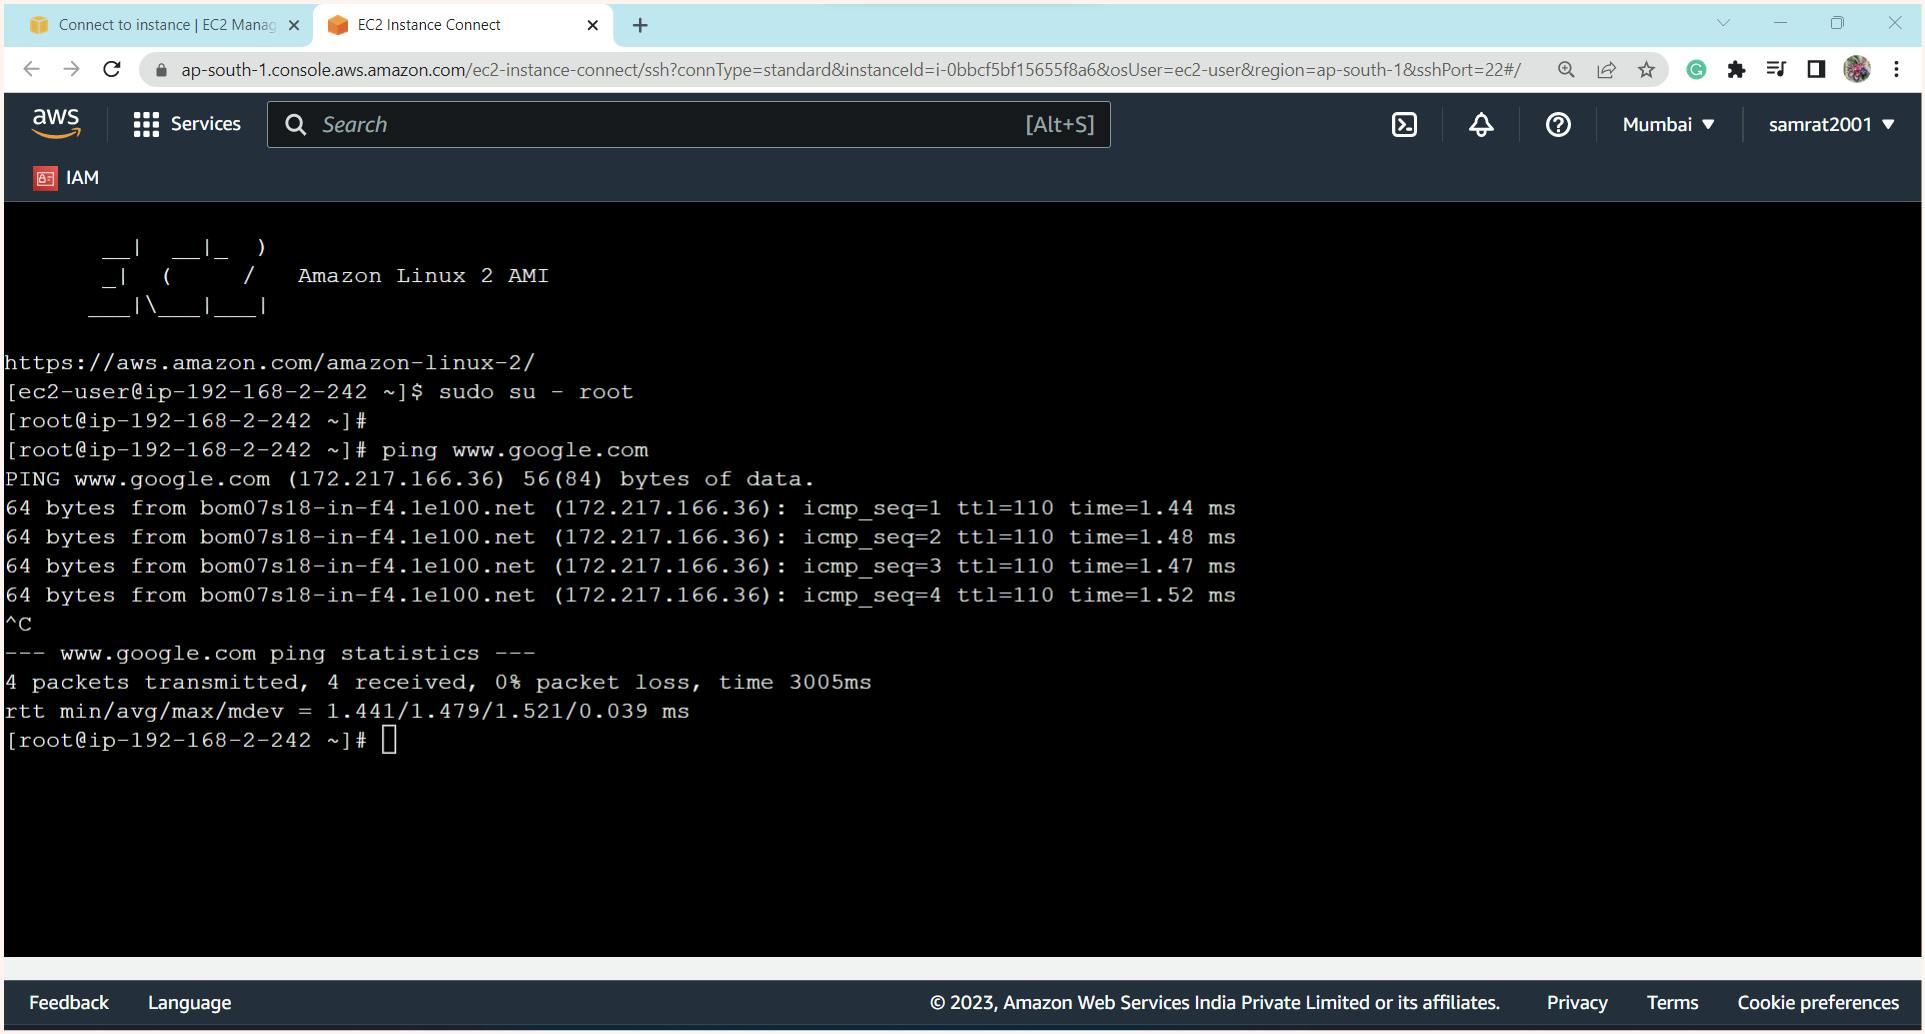
Note:
Since the "IGW-route" route table has not been associated with the "private-subnet-01", instances within it cannot connect to the outside world or initiate outbound connections. However, the instances in the "private-subnet-01" are associated with the default route table of the VPC, which allows them to communicate with other instances within the VPC.
Hence if I try to ping using public IP of "os2-private-01" instance in "private-subnet-01 "from my local machine it will fail.
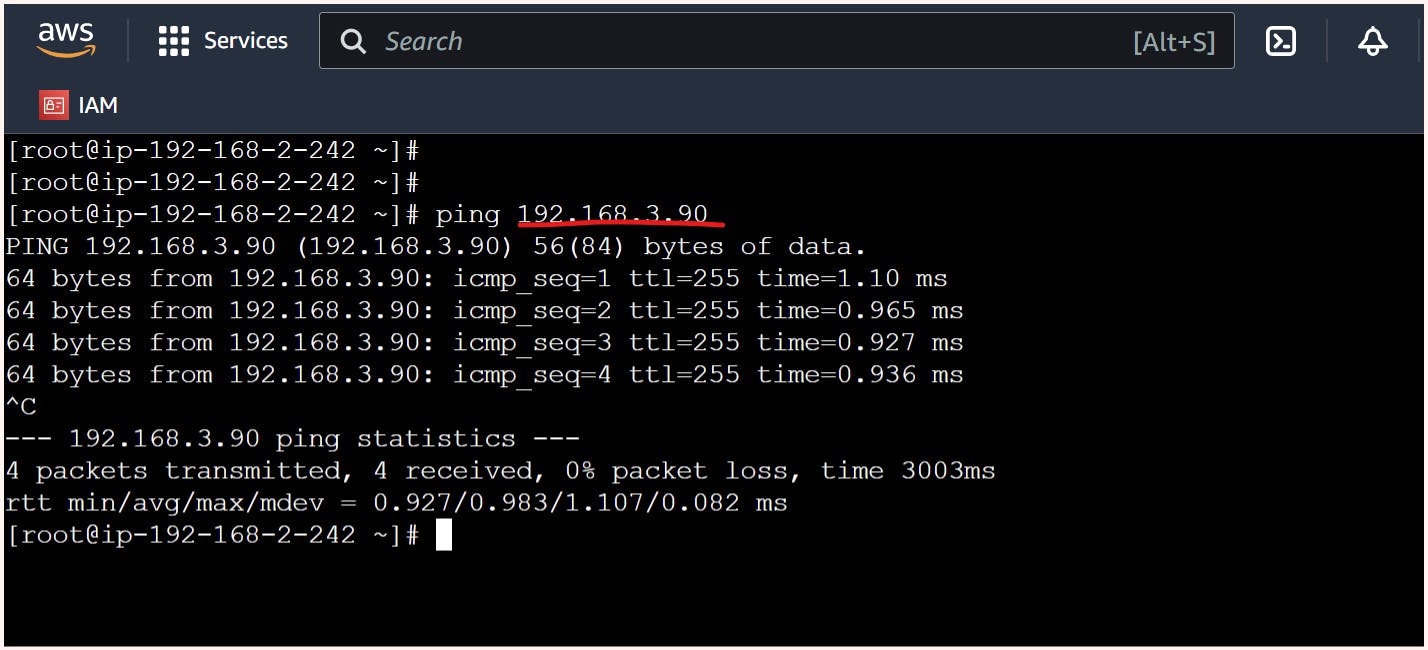
But if I try to ping using private IP of "os2-private-01" in "private-subnet-01" from "os1-public-01" instance in "public-subnet-01" it works absolutly fine.
Here in the "os1-public-01" instance we have also copied the "AWS_common_key" which we use to login via ssh to the instance we launched so now lets try to ssh the "os2-private-01 " and from there try to go to outside world
Here we can see the instance is not able to connect to outside world it is isolated. No inbound and outbound connectivity to the instance.
Type of Subnets:
Public Subnets:
When we have our resources in the subnet connected to the Internet, it is called a public subnet. This kind of subnet is typically used to host resources that need to be publicly accessible, such as web servers, load balancers, and Bastion hosts.
Private Subnets:
When a subnet has resources that are not directly accessible from the internet or outside world, it is considered a private subnet. This kind of subnets is used where we need security like for database servers.
Setup Done till now:
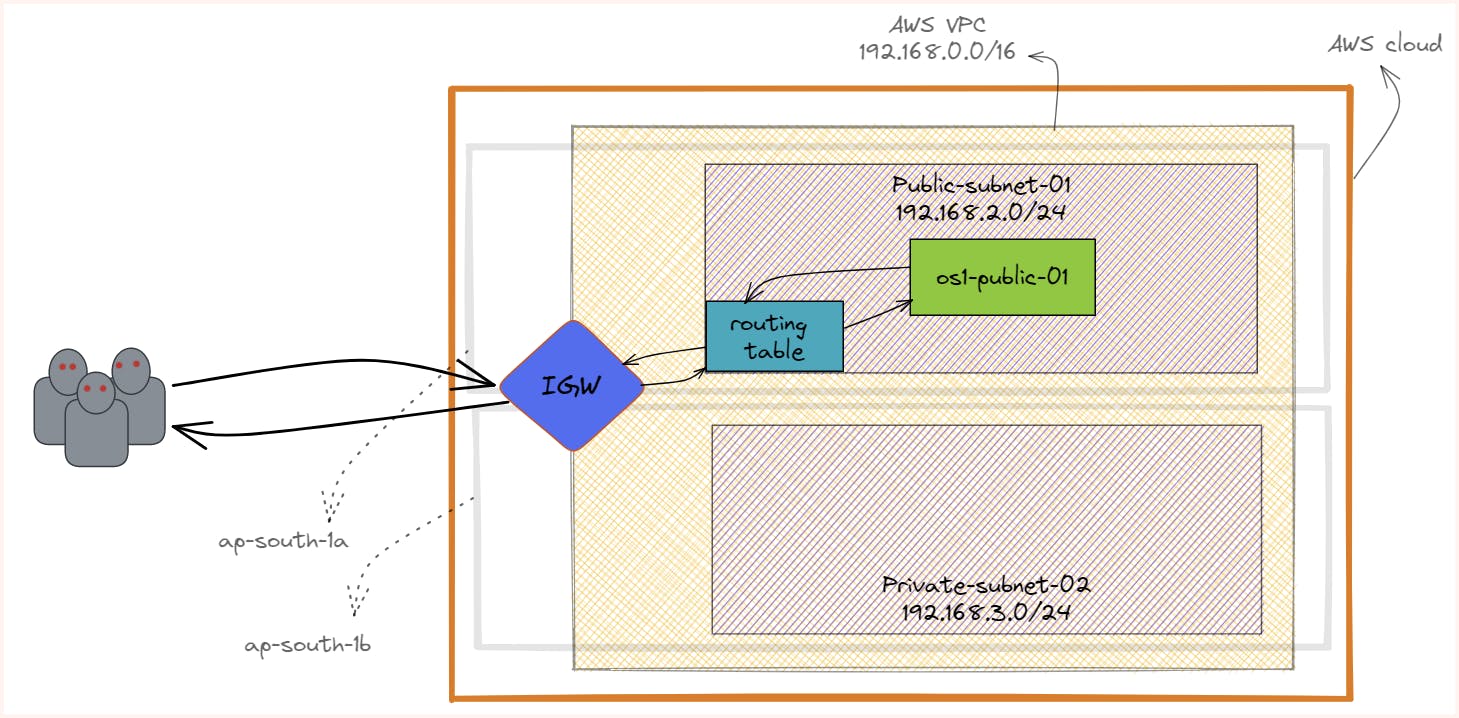
NAT Gateway
Consider a scenario where an application is being run with a web server serving web pages and a database server at the backend. To ensure that the database server is highly secure, we want to restrict access from the outside world by disabling Destination NAT. However, the database servers need to initiate connections to the outside world for updates, software downloads, and other purposes. To enable this, we need to enable Source NAT. VPC provides this feature to users through NAT Gateway.
Using NAT gateway instances in the private subnet can initiate an outbound connection to the internet/ outside world but the outside world is unable to initiate an inbound connection to the instance.
To create a NAT gateway, go to the VPC dashboard and navigate to the NAT Gateway tab. From there, you will find the option to create a NAT gateway.
When creating a NAT Gateway in AWS, it's important to keep in mind that it enables instances in a private subnet to connect to the internet, but the NAT Gateway itself also needs internet connectivity to function properly. Therefore, it must be placed in a public subnet, where resources have access to the internet.
Additionally, even though the NAT Gateway is placed in a public subnet and could obtain a public IP address, it is crucial to allocate a static public IP (known as an Elastic IP) to the NAT Gateway. This is because the internet gateway (IGW) provides dynamic public IP addresses, which could change over time.
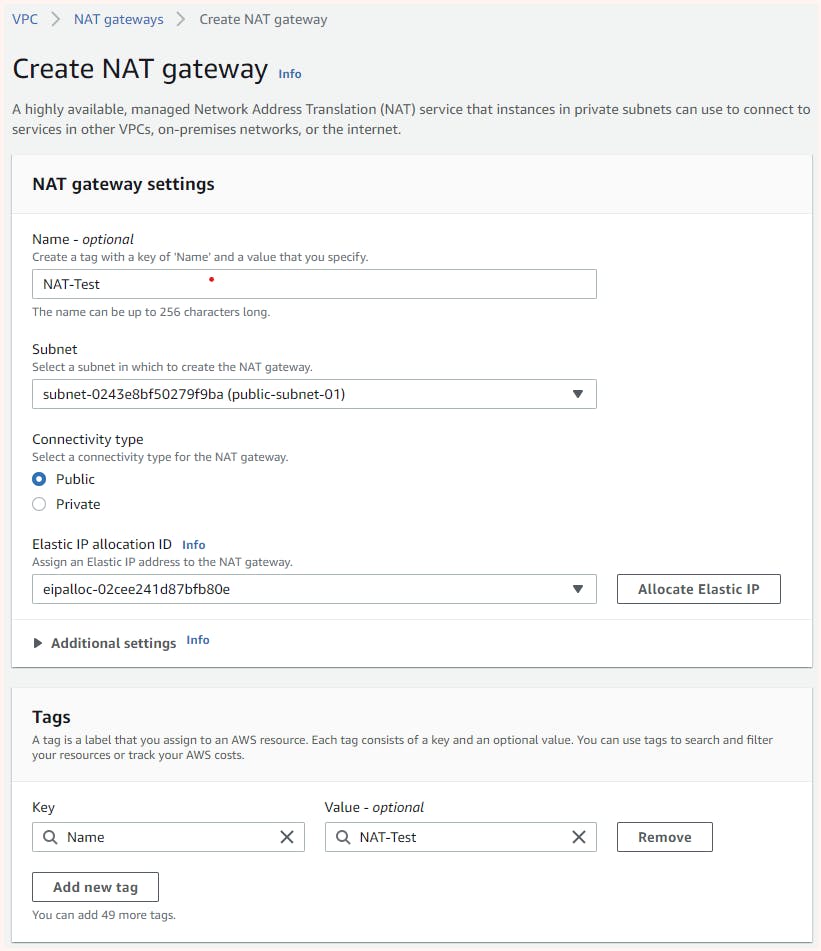
Now to allow instances in a private subnet to access the internet, we need to create a new route table with a rule that says any traffic going outside the network should use the NAT gateway. We also need to associate the private subnet with this new route table. This way, the instances in the private subnet will know how to route traffic to the internet via the NAT gateway
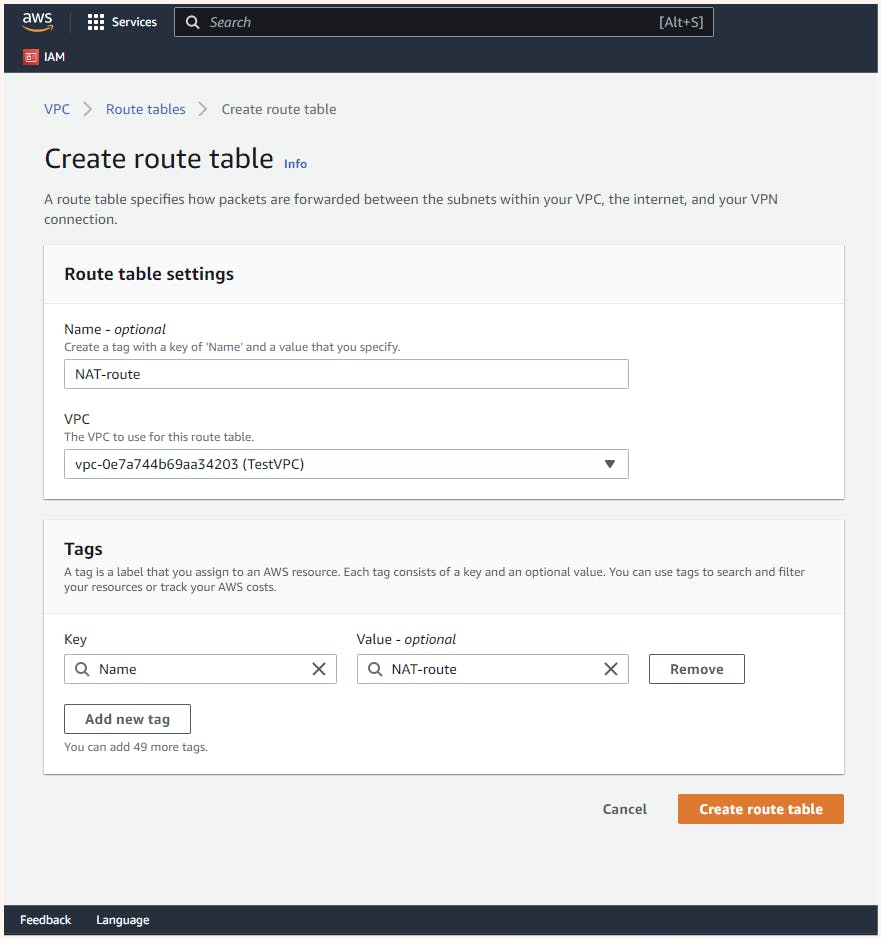
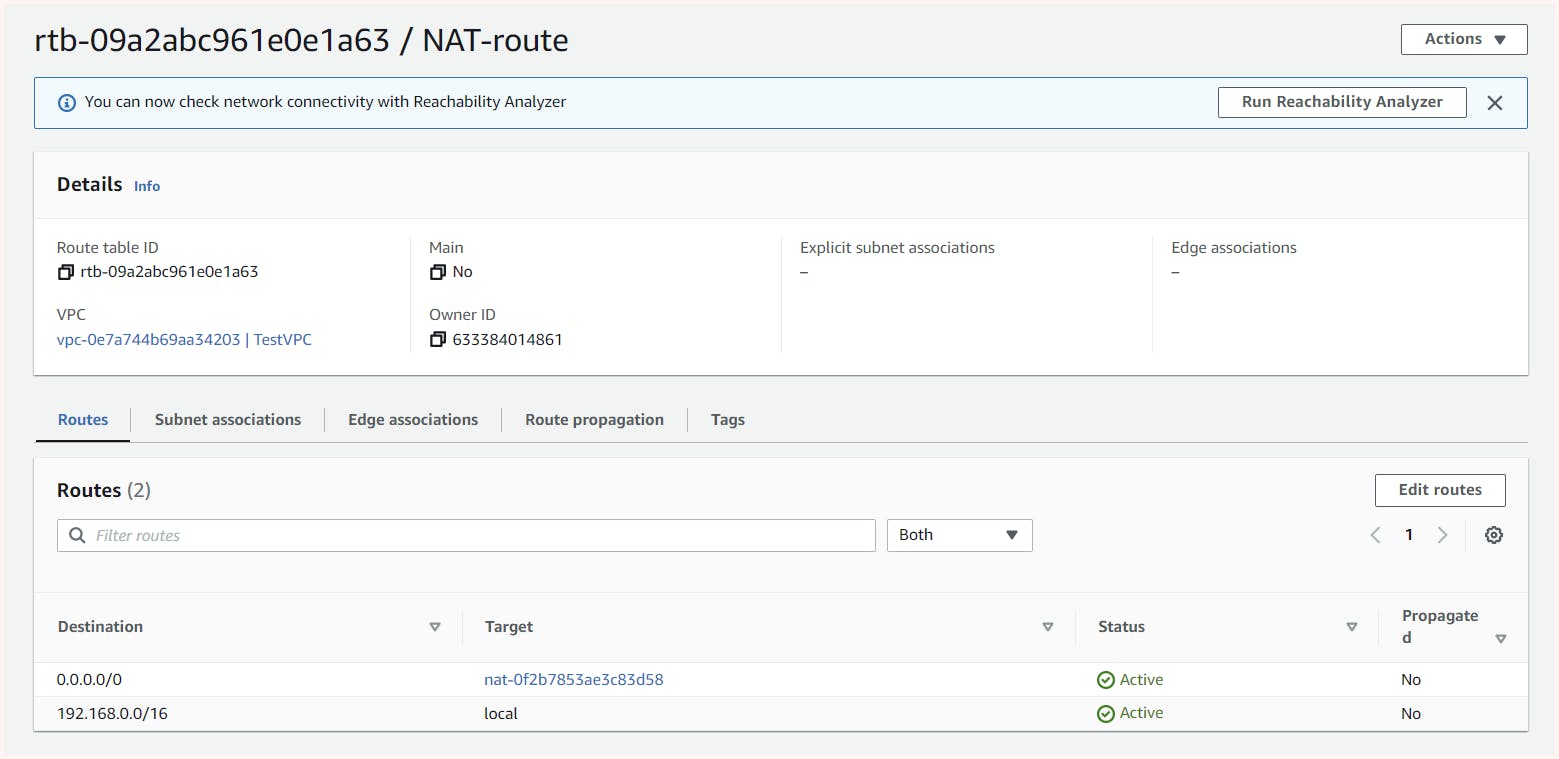

Now if we check connectivity from "os2-private-01" in "private-subnet-01" to the outside world we can see it works absolutely fine.
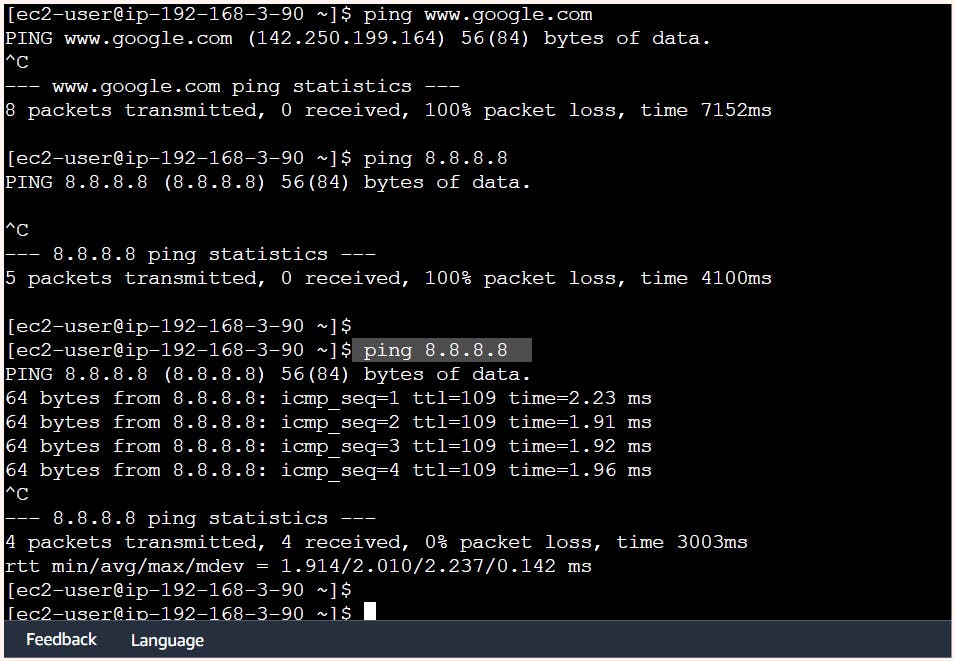
Also at the same time, we are also not able to ping the instance from the local workstation. Thus the SNAT is enabled but DNAT is disabled.
Setup Done till now:
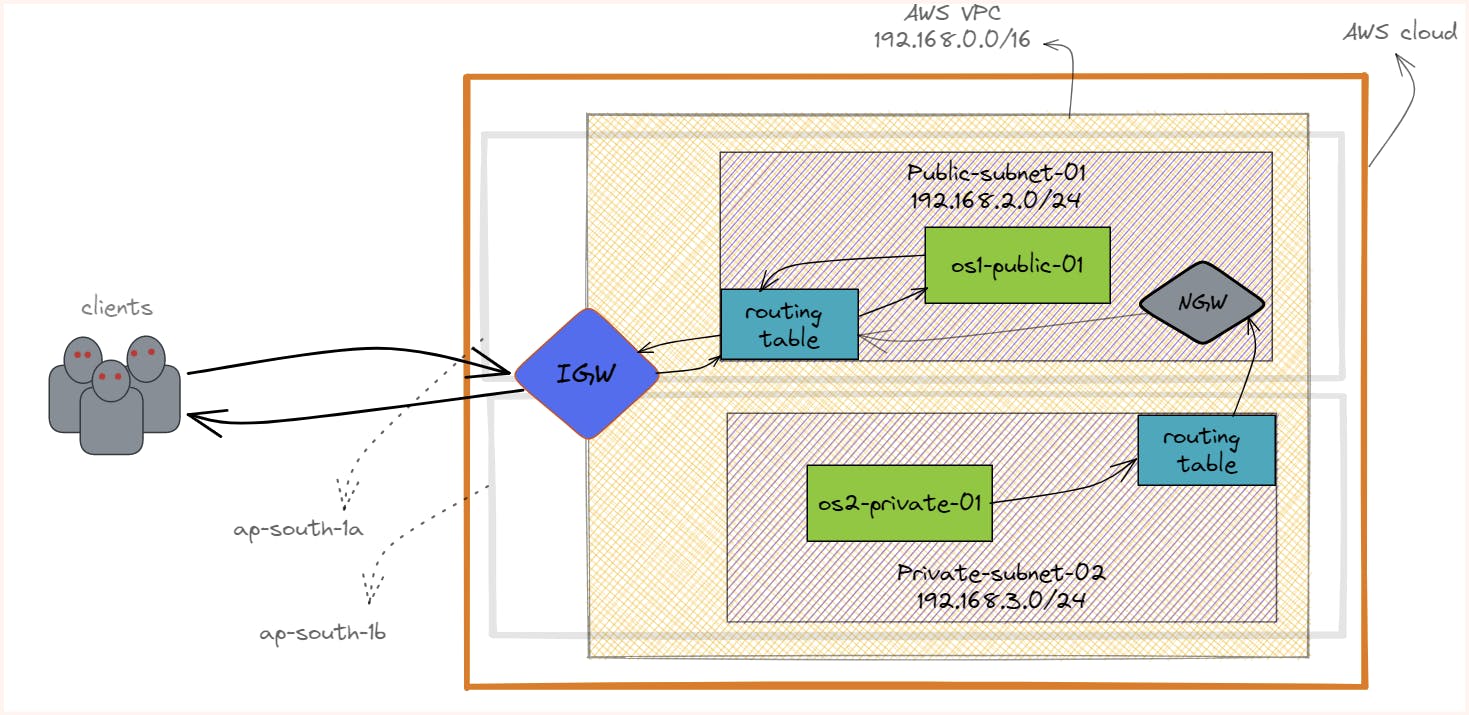
This kind of planning is very much useful in web applications where we have a web server running in the public subnets and a database in private subnets
Summary
This article has provided an overview of AWS VPC, one of the core services offered by AWS. We have covered the main components of VPC like the Internet gateway and NAT gateway we also saw how to implement them practically. Additionally, we have explored the concepts of NAT, DNAT, and SNAT, which are essential for enabling communication between private and public subnets and the outside world.
Additional Resources
https://docs.aws.amazon.com/vpc/latest/userguide/VPC_Internet_Gateway.html
https://docs.aws.amazon.com/vpc/latest/userguide/vpc-nat-gateway.html
That's all for this blog we will be discussing more such services of AWS so stay tuned 🙌
Thank you For Reading :) #HappyLearning
Any query and suggestion are always welcome- Gaurav Pagare

