


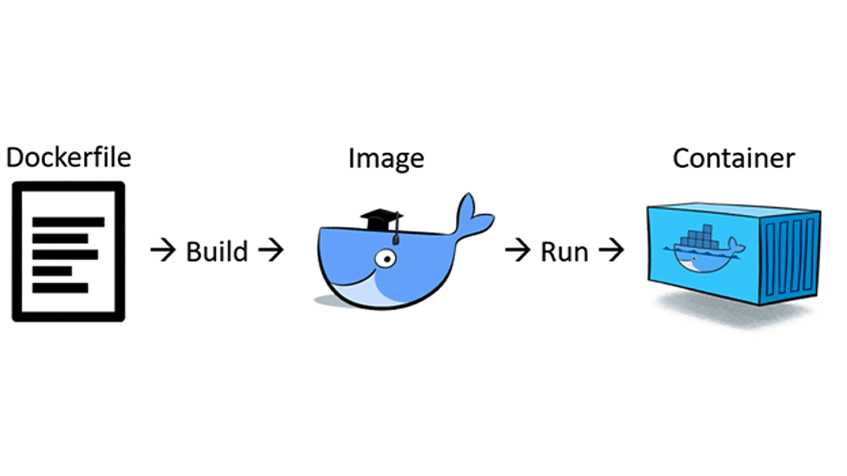
Containerization is a technology that is now adopted worldwide. docker is one of the most famous container platforms out there. (Do check out my previous article to know more on containers technology and the docker tool - here)
Now in order to launch a container we need a container image. we can get these container images from the container repositories. Now, these container repositories can be either public or private. docker hub is one of the famous public container repositories. Here we can find official container images and custom container images created and pushed on the docker hub by the creators of those images.
So, what is the requirement for such custom container images and how can we create them?
Every organization has a different set of requirements depending on the application or project hence it is necessary to use custom container images for containerized applications.
Now in order to create a custom container image in the docker we have 2 ways provided :
Docker commit
Dockerfile
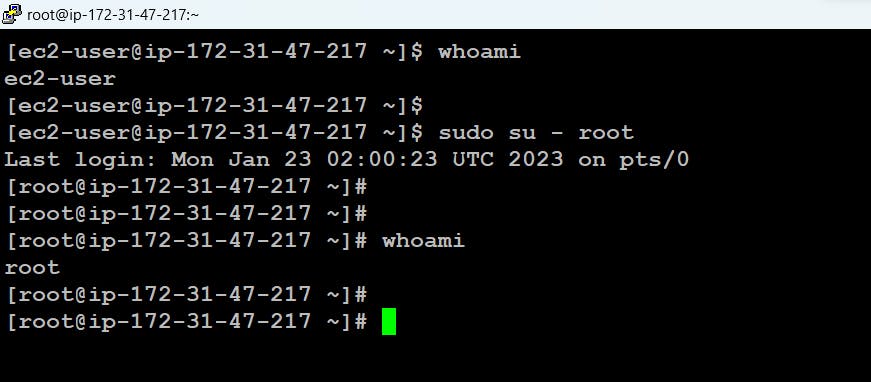
NOTE: Here for all the demonstrations I will be using RHEL-9 Linux with the docker preinstalled in it also as you will notice I haven't used sudo anywhere this is because sudo allows me to use root (Admin) privileges by default from any other account but now I will directly be using the root account.
Tip: for switching from the general account to the root account we can use the command # sudo su - root by this we are just asking the OS to use root privileges to switch to another user i.e root (know more). If this is not done just use sudo before each command I have run.
Before understanding how to use docker commit and dockerfile let's understand how to set up an apache web server over a Linux OS as I will use this in the further demonstration.
How to set up an apache webserver in Redhat Linux?
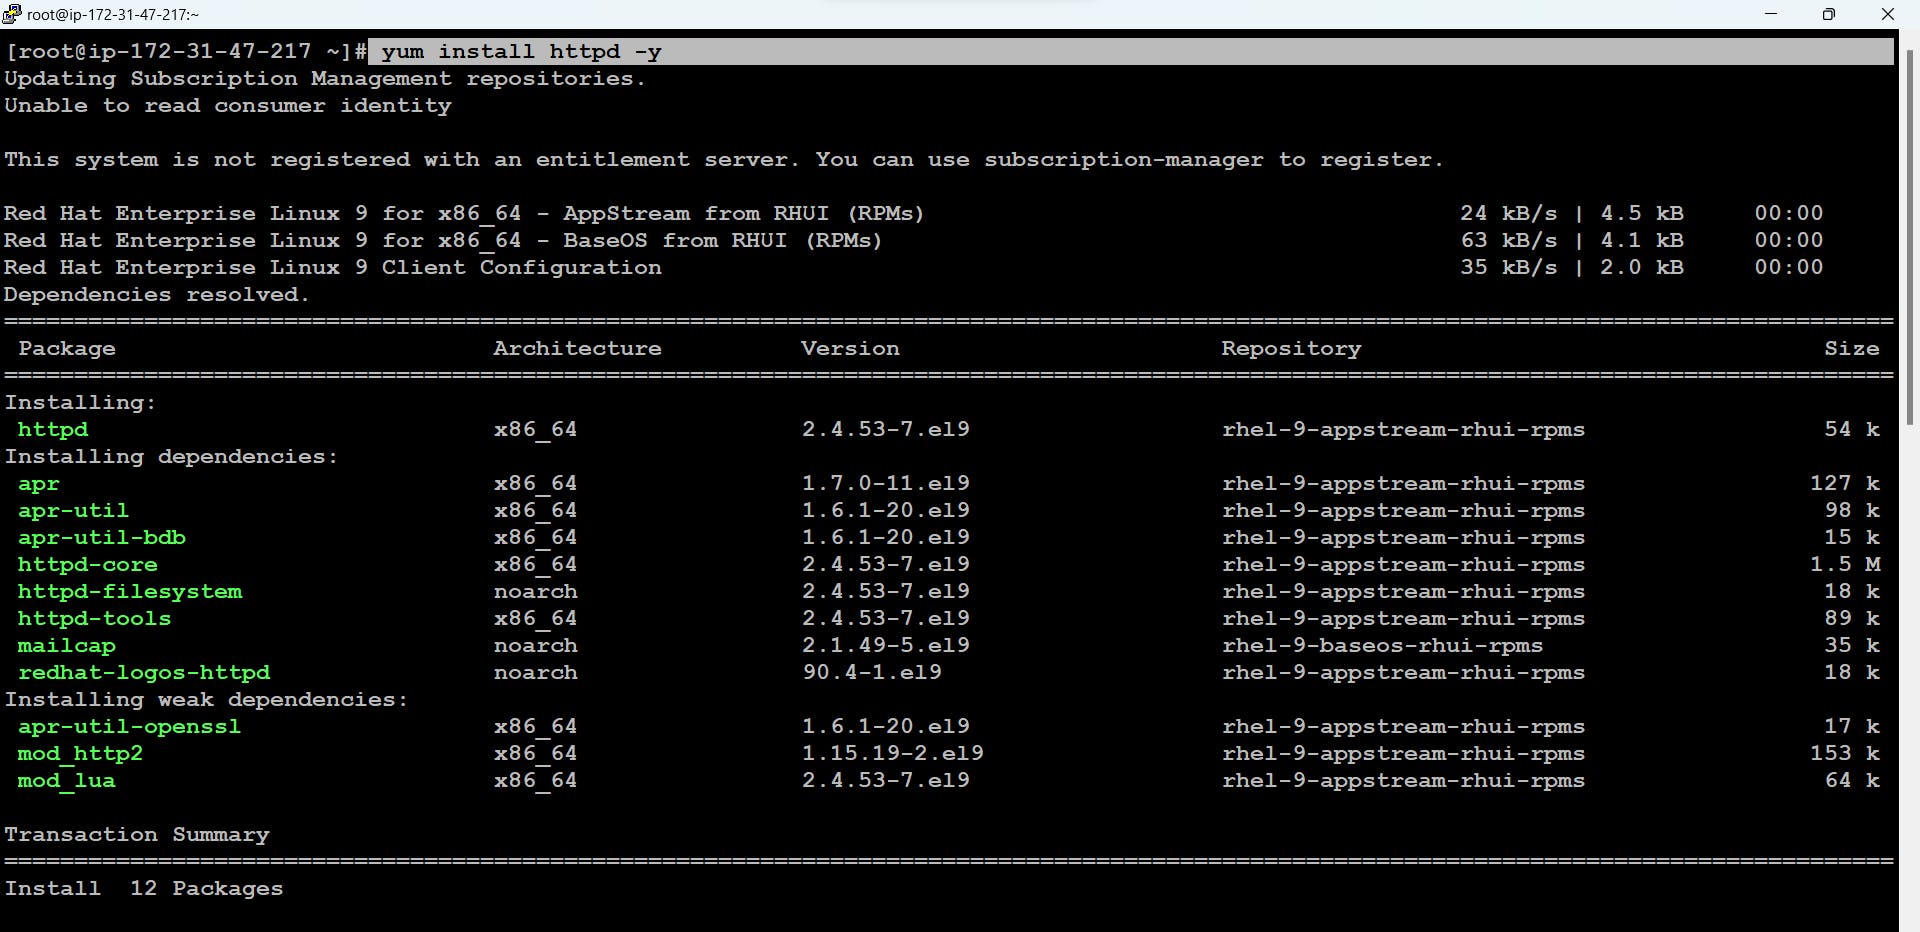
At the most, we have to install the httpd software which will provide the apache web service to us. For download and installation, we can use yum here
Note: if you are using ubuntu then the software name for the apache webserver is apache2 and there we can use apt-get for download and installation
Now services like apache web server need to be started and are daemon services i.e running in the background hence in httpd the 'd' stands for daemon. for starting these we can use
# systemctl start <service_name>command. Also by# systemctl status <service_name>we can check the current status of the service.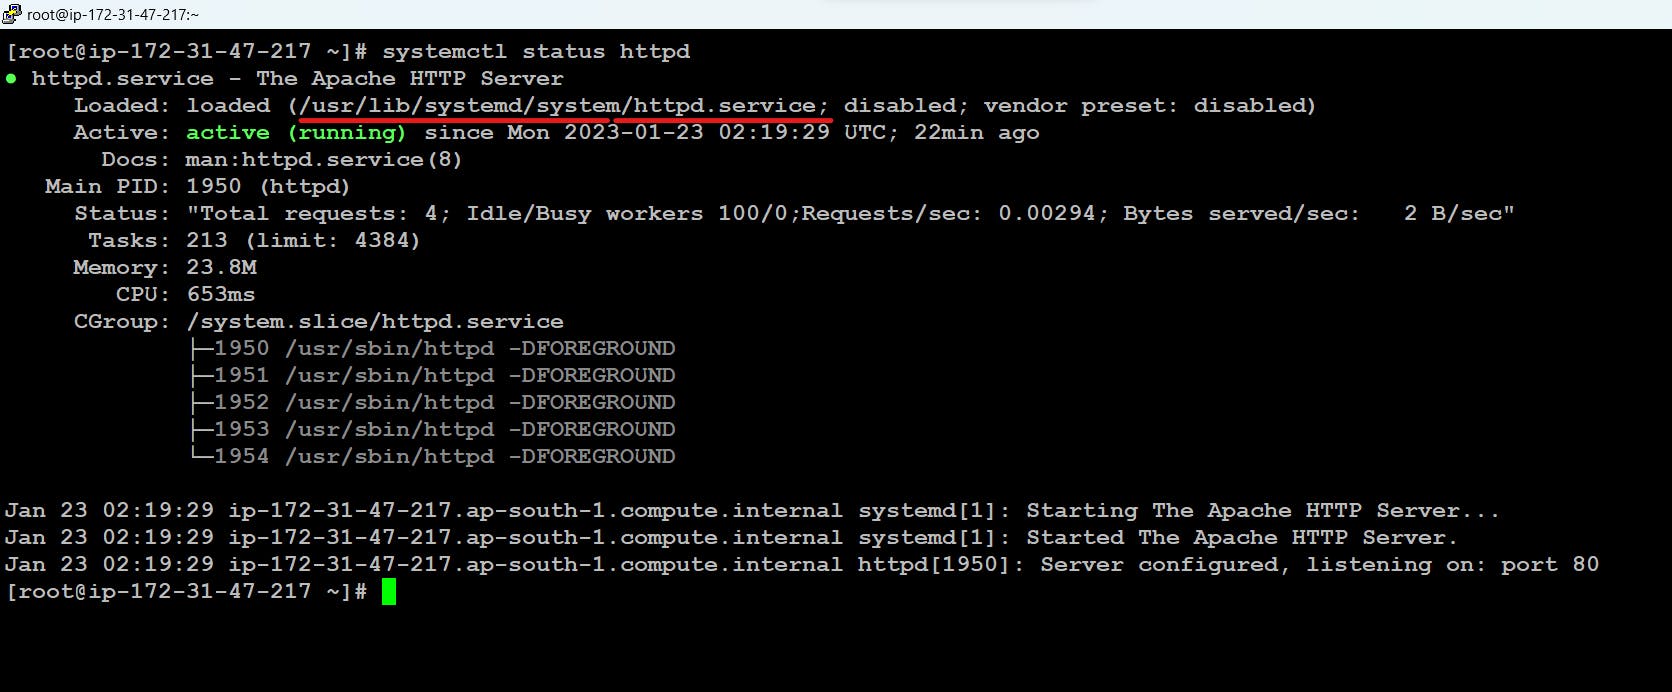
Also please note down here internally it has loaded
/usr/lib/systemd/system/httpd.servicefile. now if we open this file we can see for starting the services internally/usr/sbin/httpdprogram is started.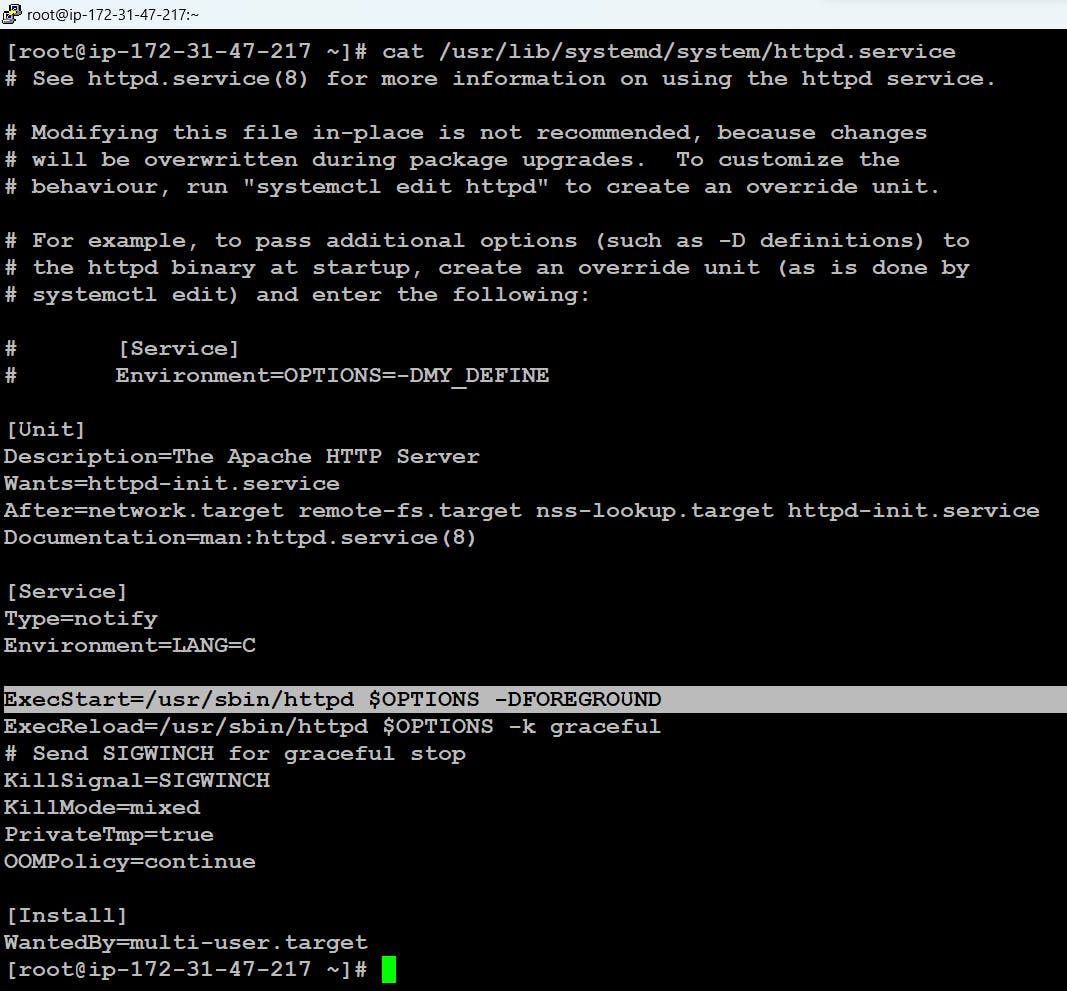
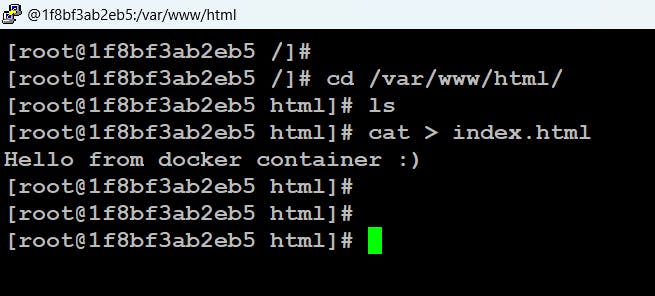
Now web server needs webpages so that the content in the webpages can be shared with the outside world. In the apache webserver, we put the webpages in
/var/www/htmlfolder. (this folder or directory is also known as the root directory in apache webserver)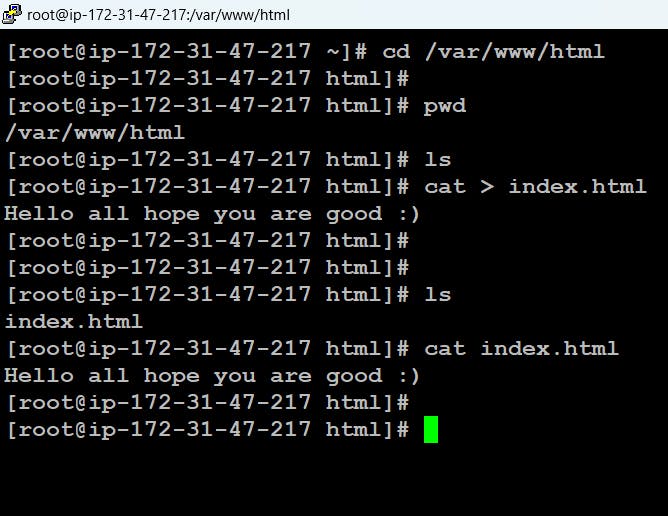
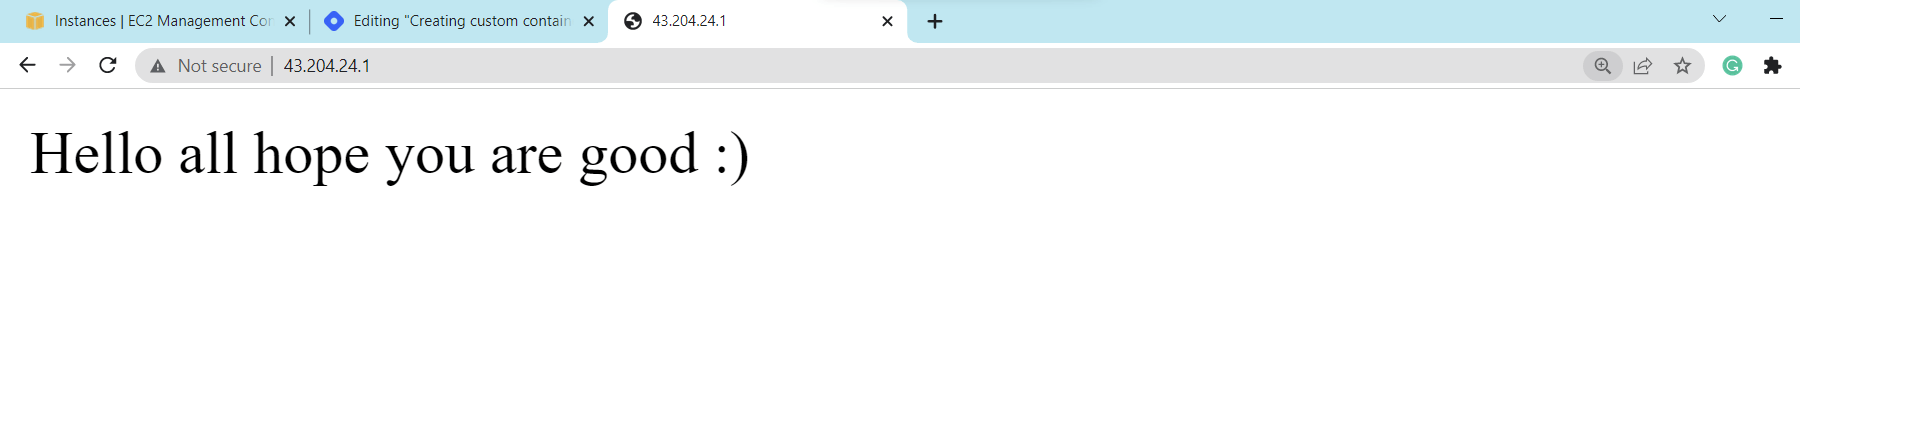
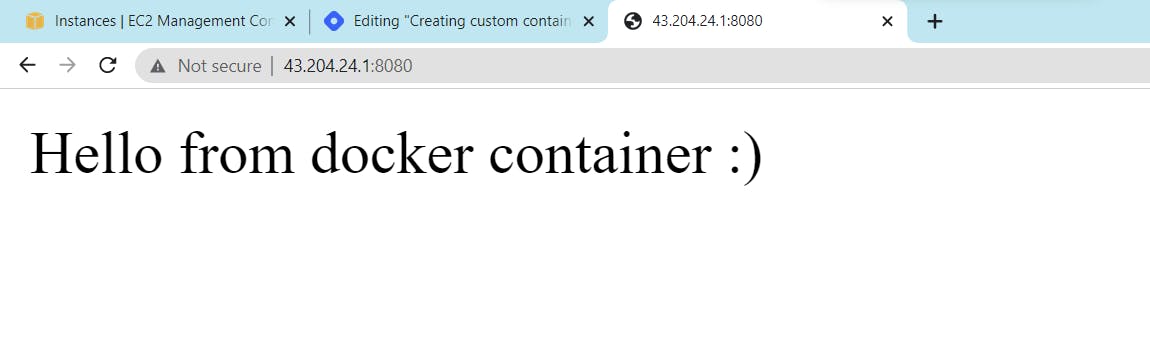
Now, let's check and connect to your public IP at port 80 you can see the content of the webpage or you can also connect to localhost:80

Let's understand what is Docker commit.
The docker commit command is the most intuitive way to create a new image. The process consists of three steps:
Run the container
Modify the container
Save the container as a new image
At the most let's check docker client and server is running or not. for this use command
# docker info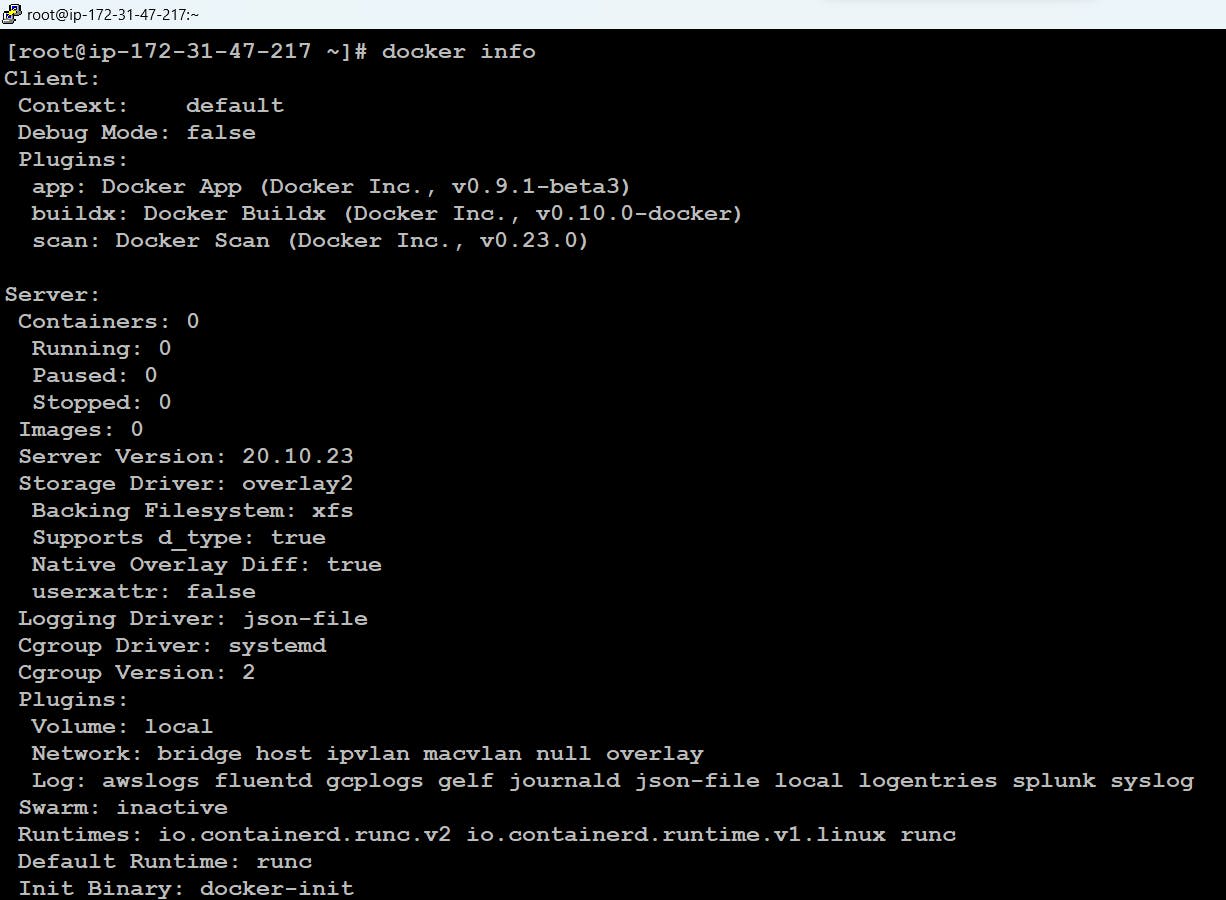
Now let's run a rockylinux container and start the apache webserver in it. (RockyLinux was started by one of the original creators of CentOS. Internally they provide a free, binary-compatible repackaging of RedHat Enterprise Linux.)
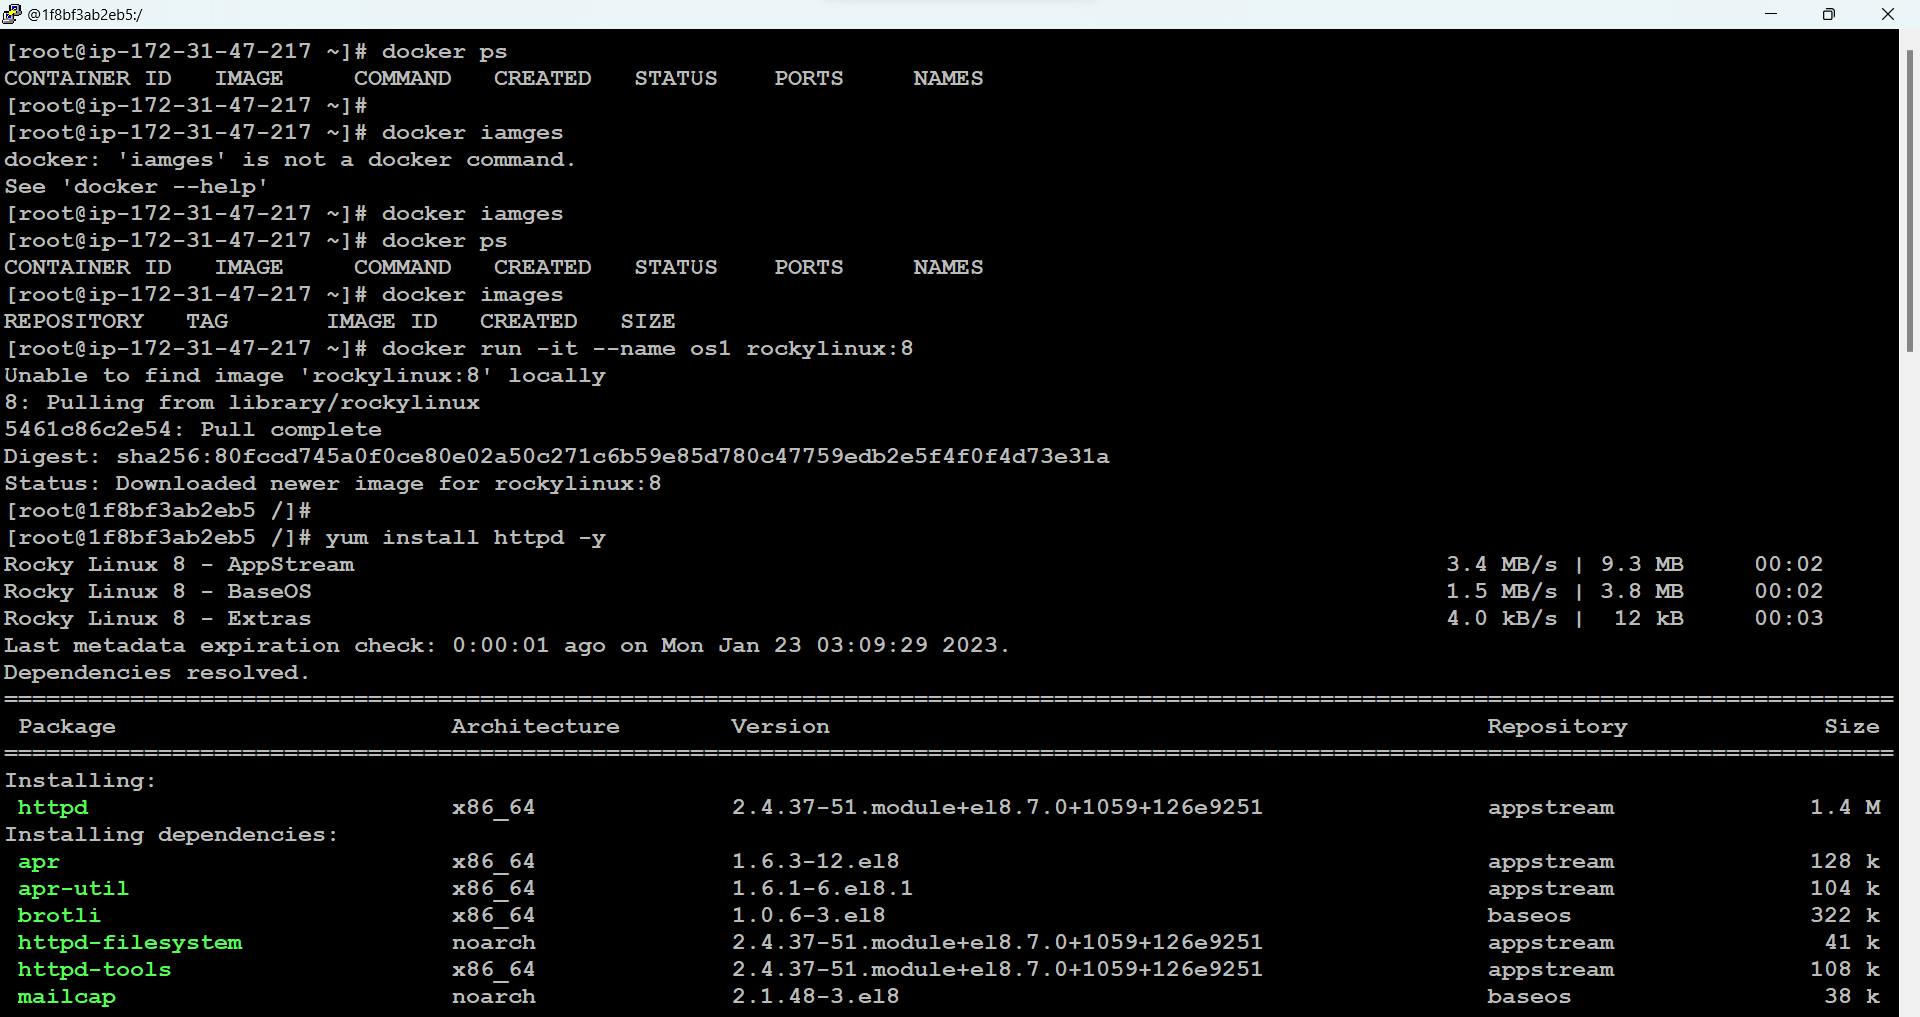
Here we have successfully installed the apache webserver. now lets put the webpages in the root directory.
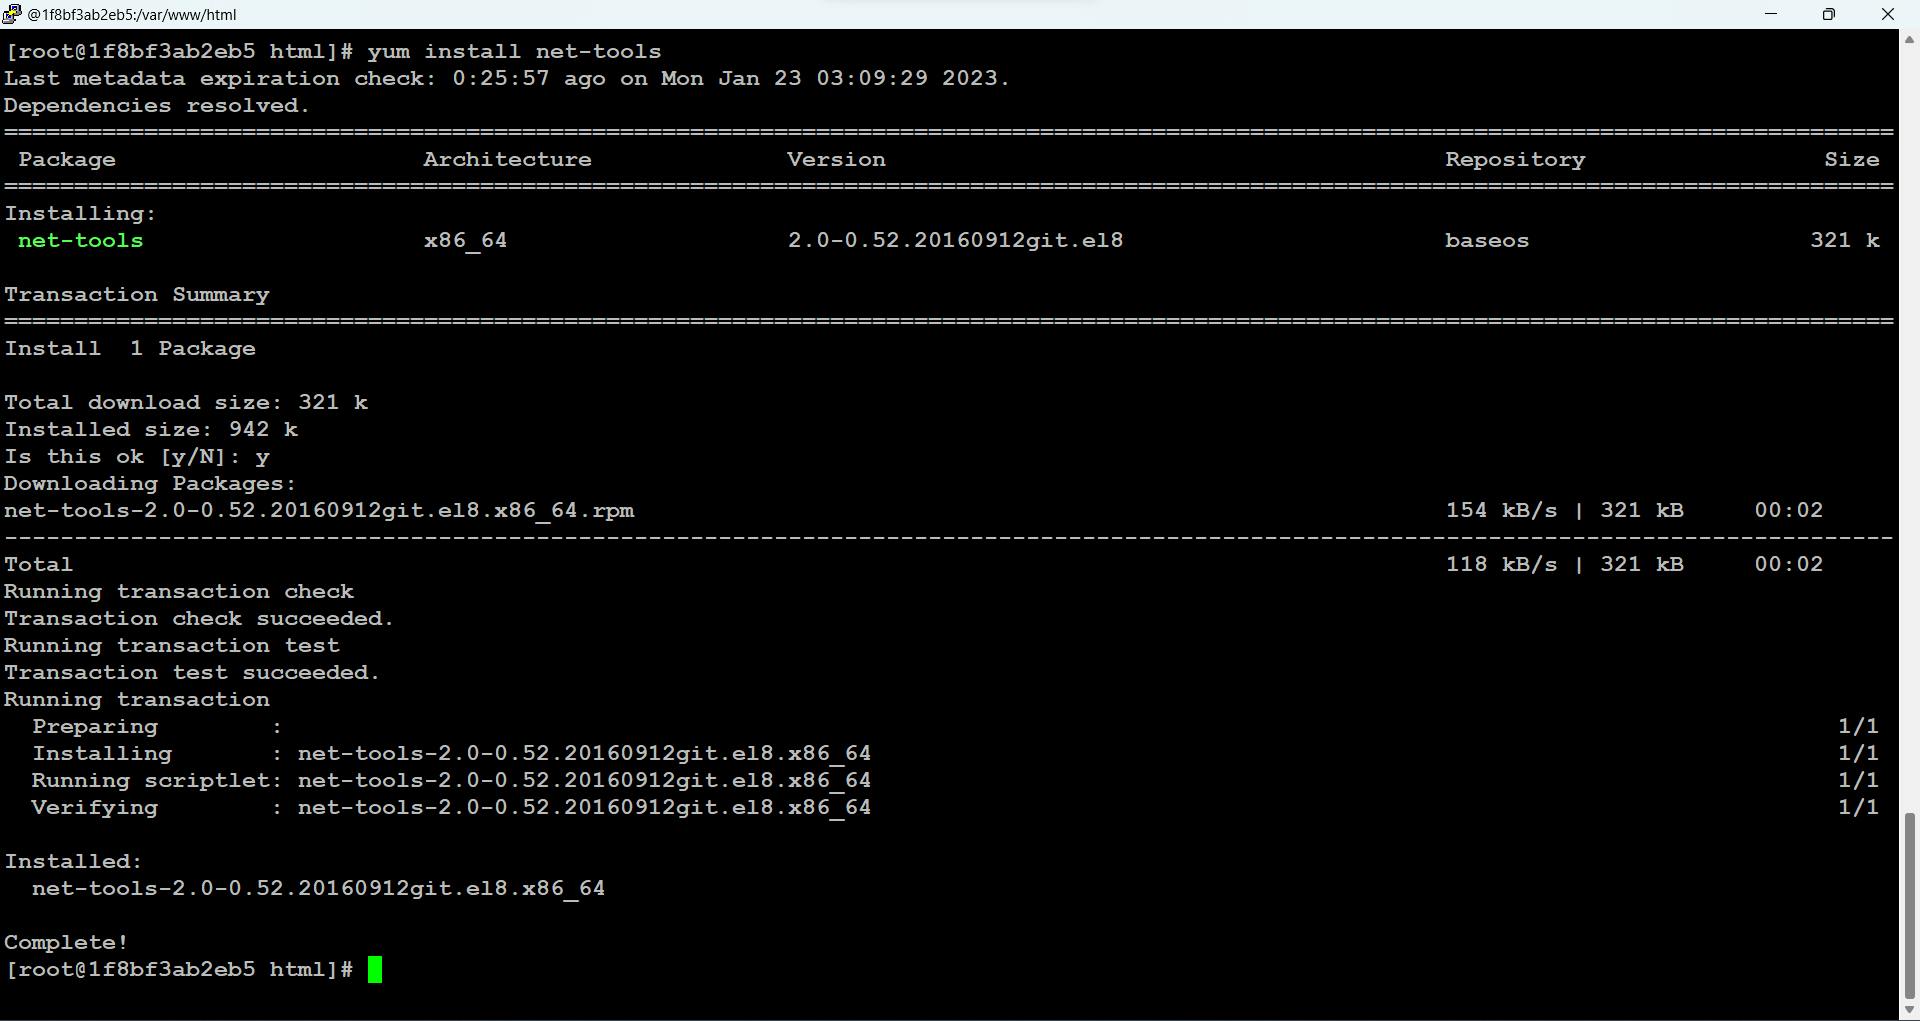
We also need to download and install software named net-tools to check a few more things like IP address, ports utilized, etc. we can get this from yum.
Now we need to start the services for the Apache webserver. for this we used systemctl but inside the container as it uses systemd/ init behind the seen, it doesn't work (know more). To solve this problem we can directly run the file
/usr/sbin/httpdto start the services this program file we have found in the above steps while setting up the apache webserver in RedHat Linux.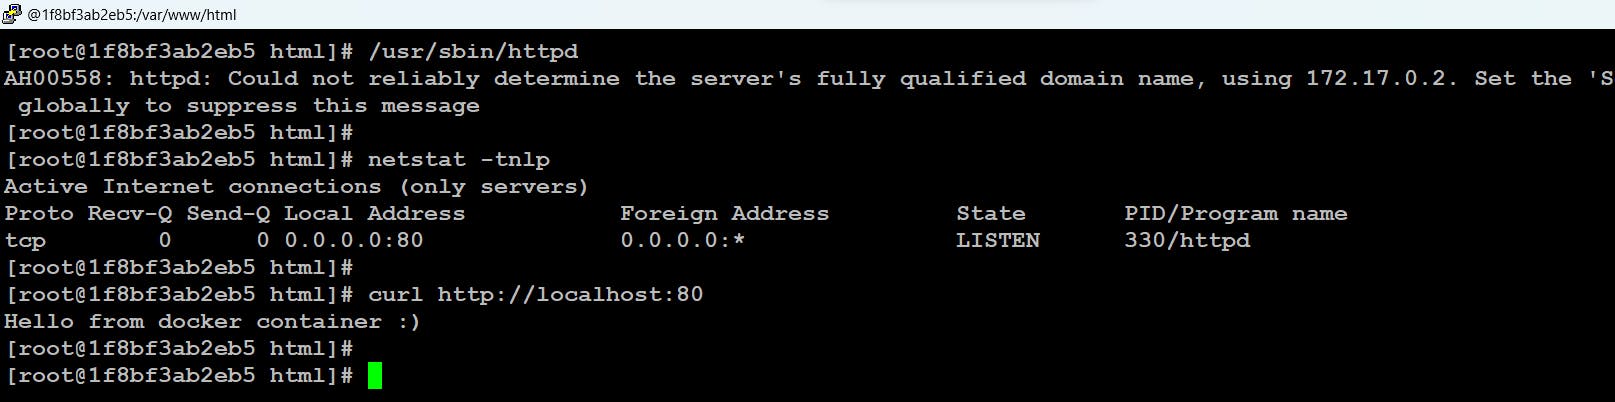
here we can see the process is started and bound to port number 80. netstat command is provided because of the net-tools software we installed.
Now there is a challenge involved if because of any reason the container reboot or restart the httpd process will be stopped and can't start automatically to solve this put the command
/usr/sbin/httpdin the/root/.bashrcfile this file run each time OS is started. so when this file run/usr/sbin/httpdwill automatically run.Also, we need to take care of one more thing we need to delete the previous process history so that the new process can be launched otherwise the system will think the process is already running and will not run the process. for this we can use
# rm -rf /var/run/httpd/*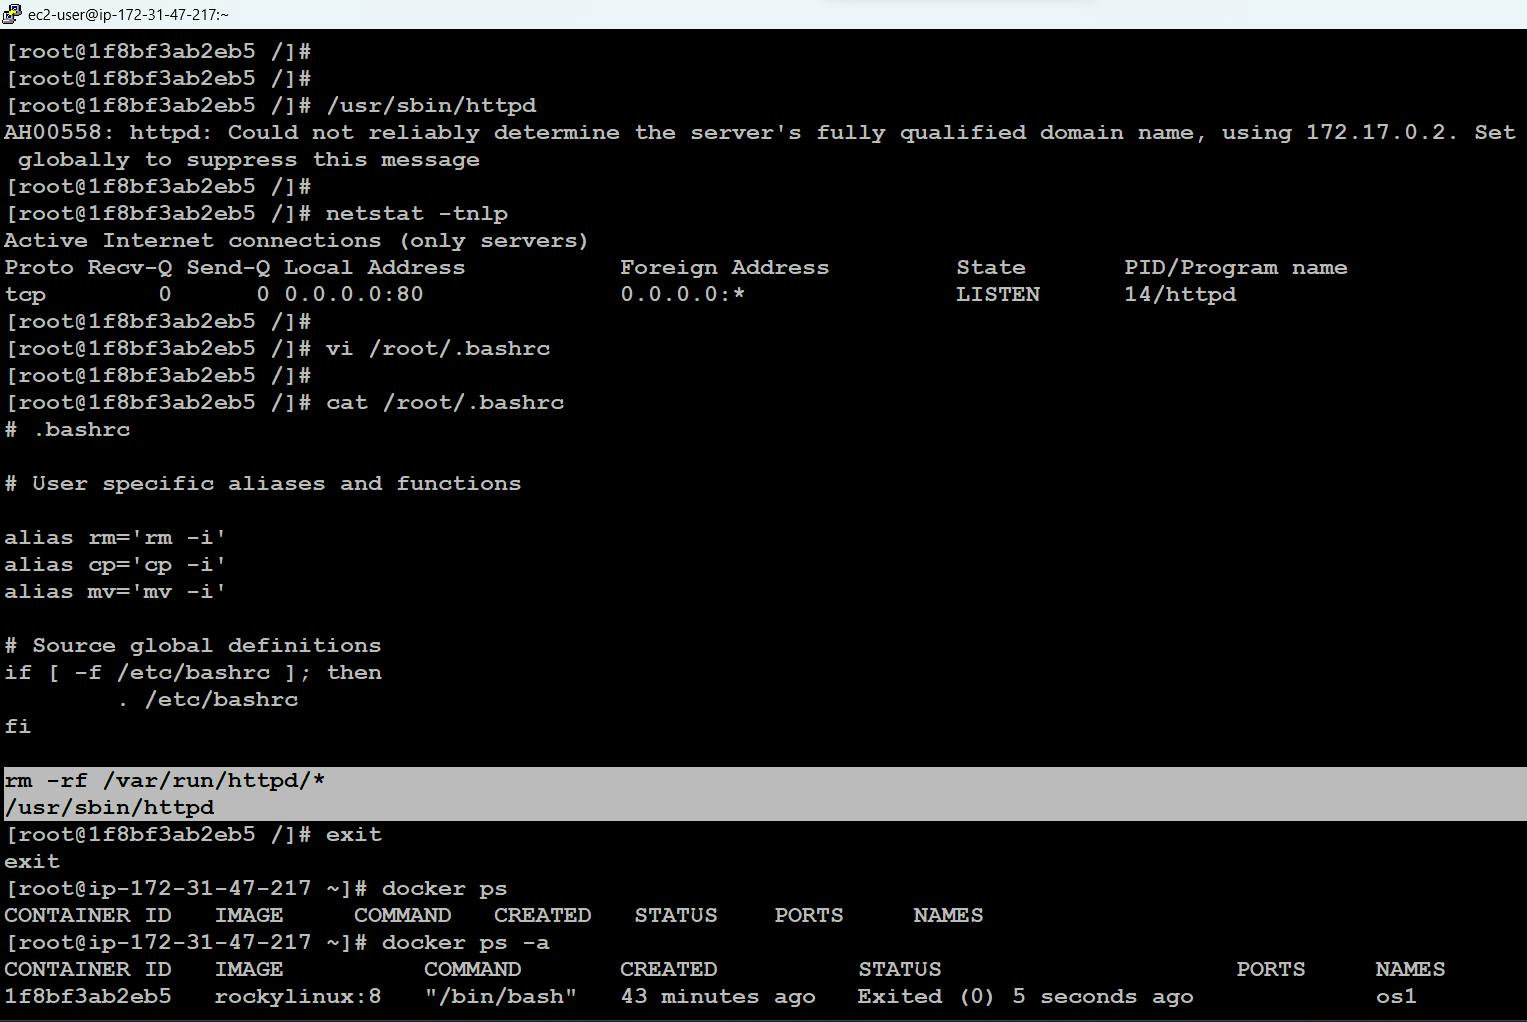
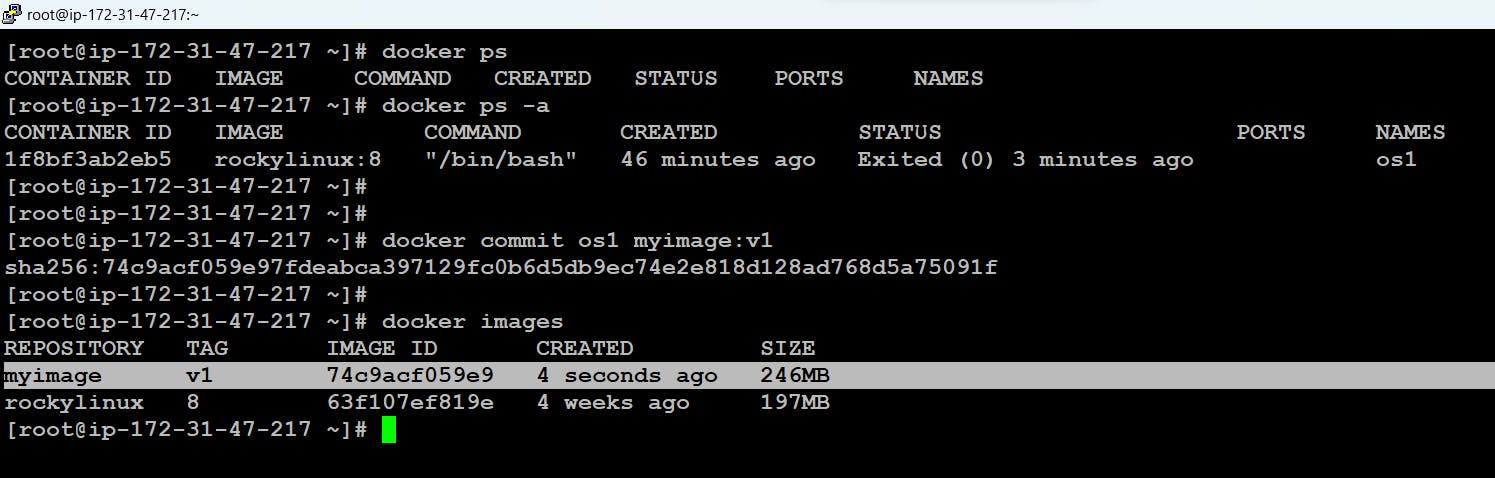
Now let's save the container to the new image. For this use
#docker commit <modified container name> <new image name>:<version>we will be talking about the versions in further discussion.
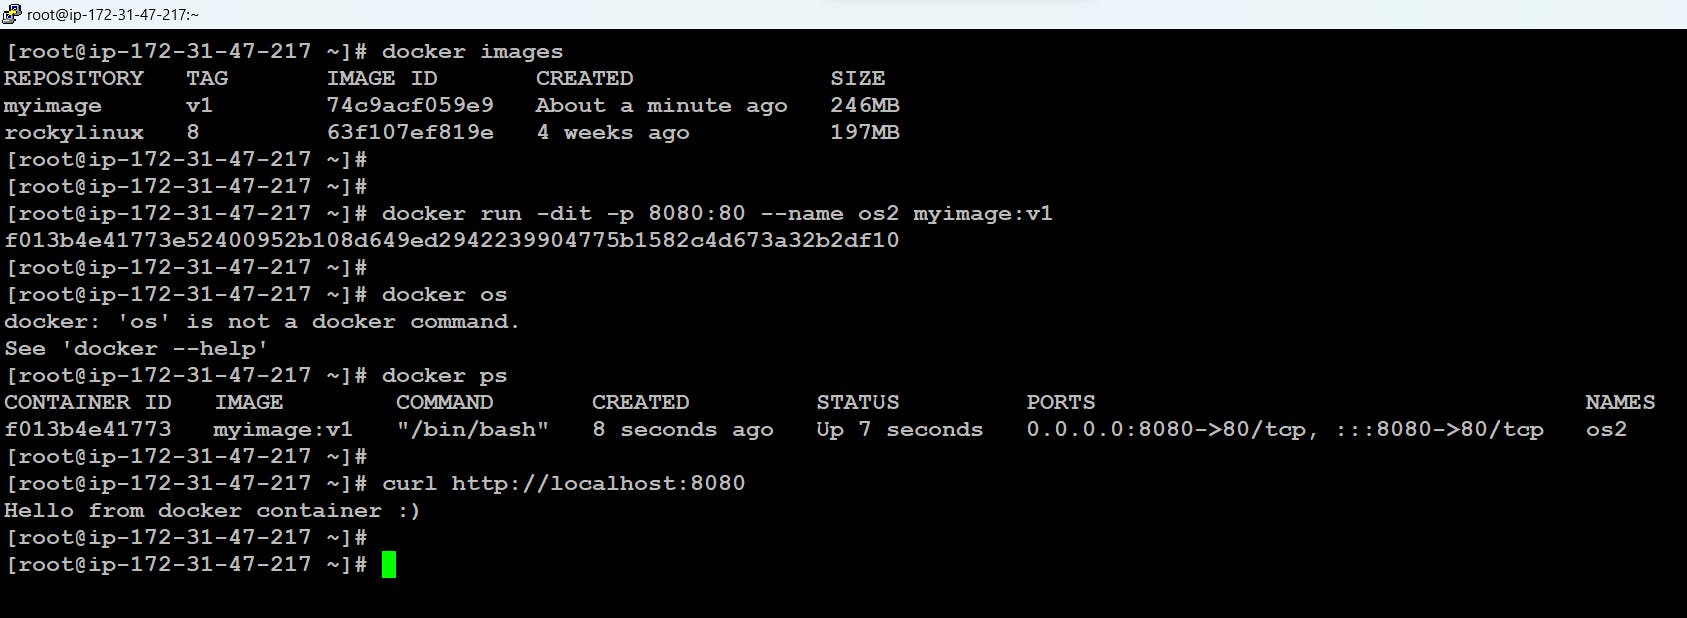
Now let's launch a container with this image here I have also done PATing i.e -p option I have discussed more on it in my previous article do check it out
Let's understand what is Dockerfile.
A Docker File is a simple text file with instructions on how to build your image. Dockerfile involves the use of multiple keywords. the name of the dockerfile should always be Dockerfile.
Example :
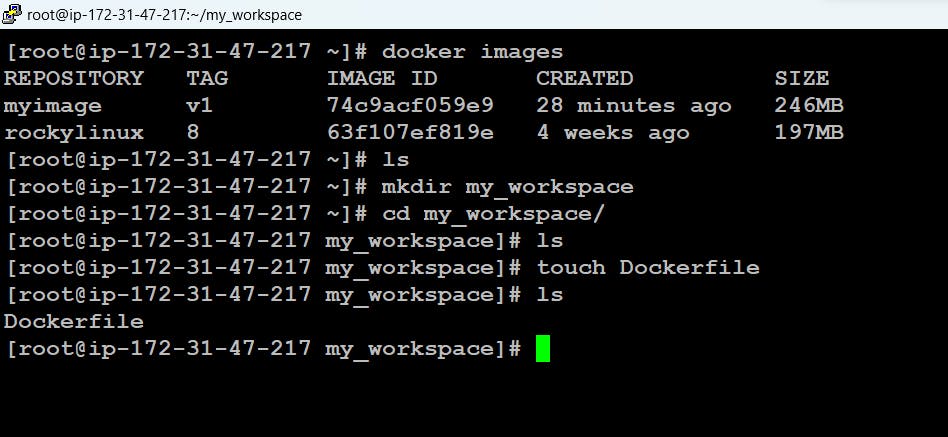
Here we will again try to make the same container image i.e image with the httpd webserver running in it but this time with the Docker file.
Here we first need to create an index.html page and then we need to create the Dockerfile.
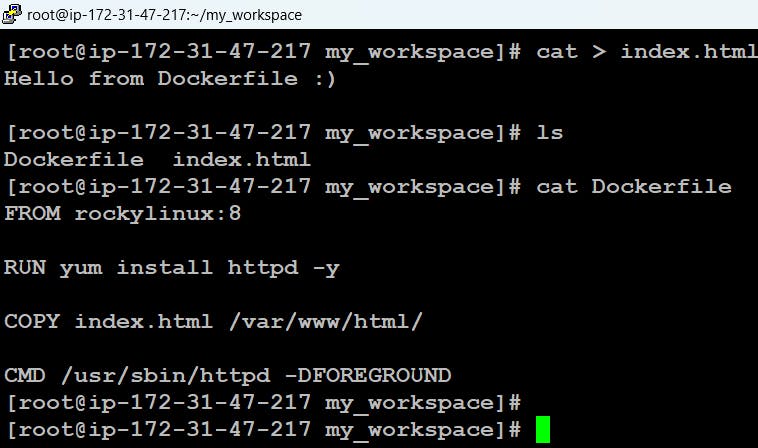
Dockerfile:
  FROM rockylinux:8
  RUN yum install httpd -y
  COPY index.html /var/www/html/
  CMD /usr/sbin/httpd -DFOREGROUND
FROM: from keyword is used in order to tell which base image we wanted to use. here we have used rockeylinux:8
RUN: run keyword is used to run the command mentioned. In the build time of the image that is when the container image will be created.
COPY: whenever we have the requirement to copy the content file from the baseOS here in my case Redhat Linux to a newly created container image.
CMD: cmd keyword helps us to run the command mentioned in it each time any container will be launched by using the container image. that is it runs the command in the runtime.
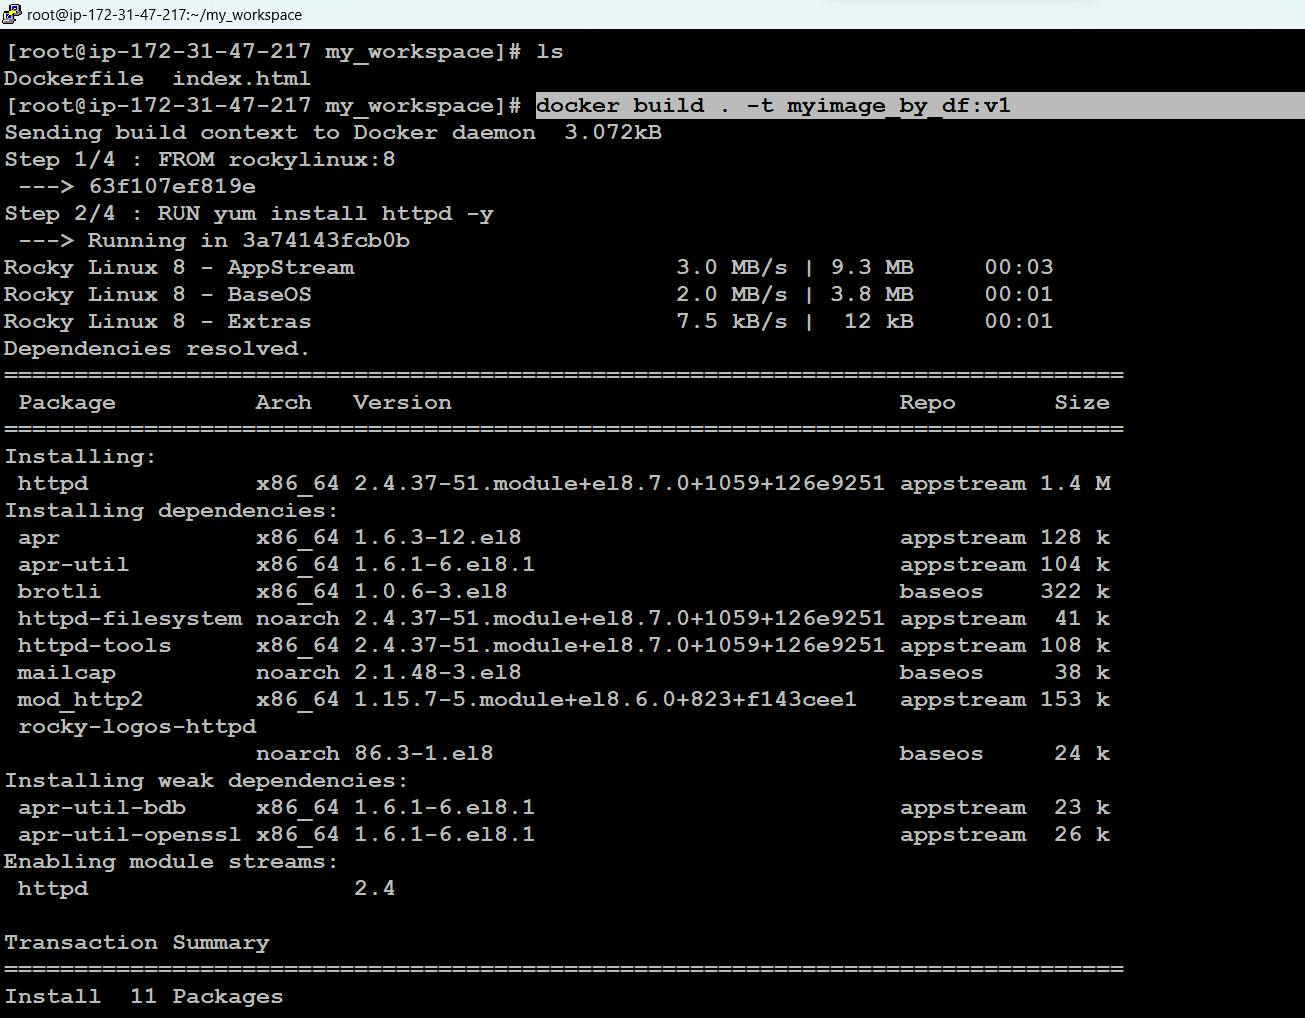
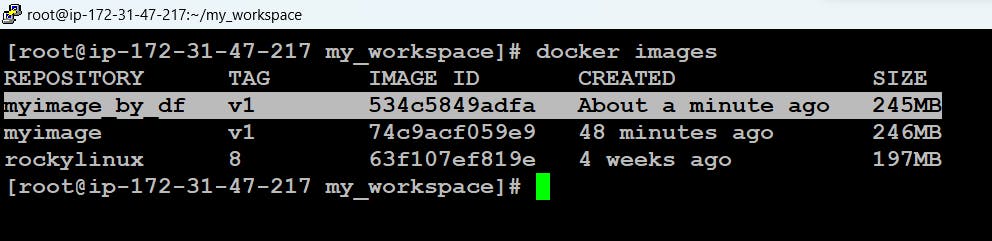
Now let's create a docker image with the help of this file
Now let's launch a container using this container image


Now let's try one more Example:
Consider a simple python program to count the string length
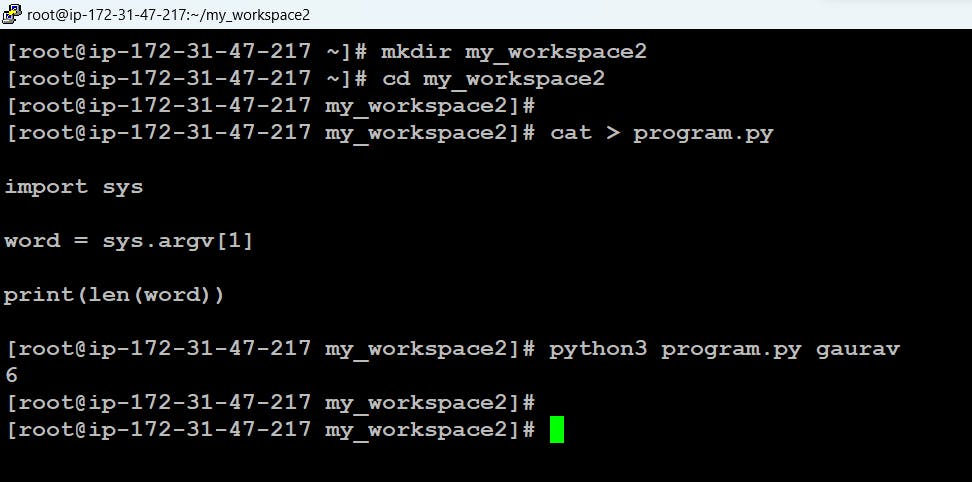
Program:
  import sys
  word = sys.argv[1]
  print(len(word))
Consider this program as our application/ project which we wanted to containerize. For this, we can create a Dockerfile.
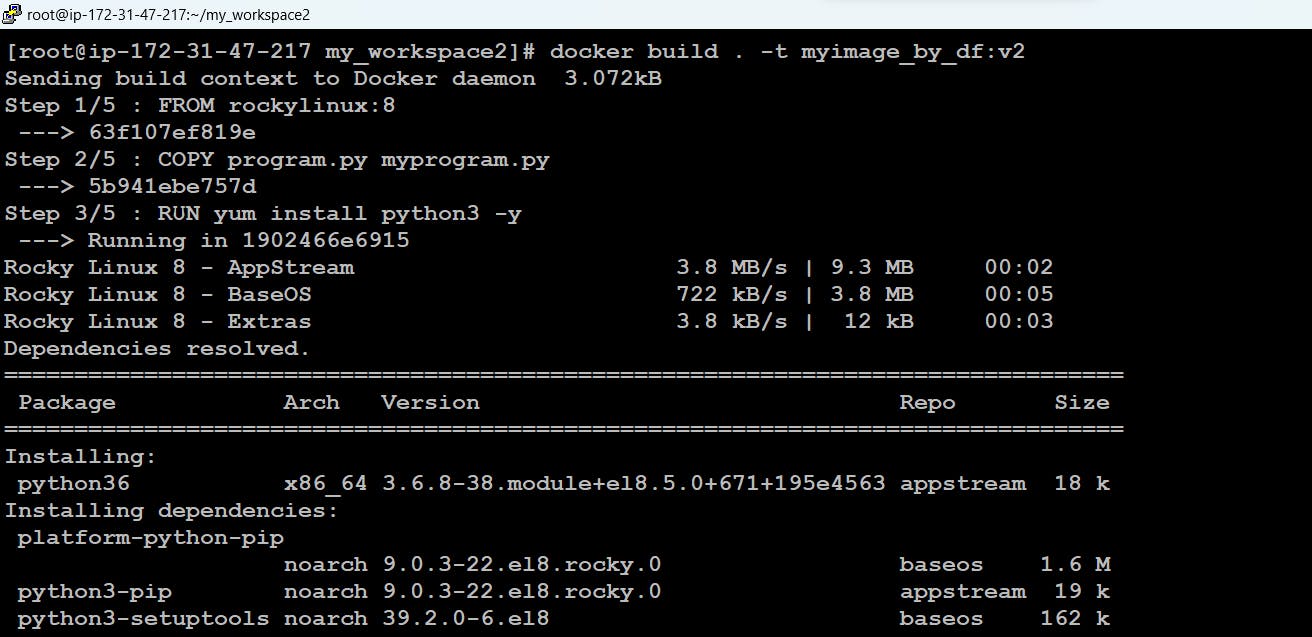
Dockerfile:
  FROM rockylinux:8
  COPY program.py myprogram.py
  RUN yum install python3 -y
  ENTRYPOINT ["python3","myprogram.py"]
  CMD ["gaurav"]
ENTRYPOINT: Entrypoint is exactly similar to the CMD keyword the only difference is Entrypoint is capable to take extra arguments as well. here in the next line, I have given again CMD ["gaurav"] so the default argument for the entry point will be "gaurav".
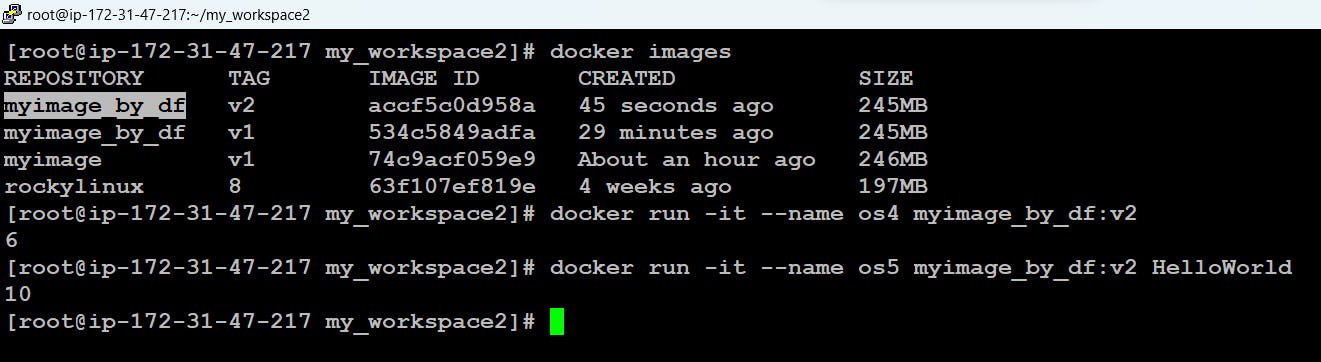
here we can see when we pass the extra argument HelloWorld the output retrieved is 10.
Versioning in the Docker Images:
Versioning container images in a container repository is necessary to denote changes made over its lifecycle. Using a combination of timestamps, commit IDs, and pre-defined strings, a clear picture of what is deployed in what environment can be seen.
Changes can be constantly introduced on top of a container image maybe these are fixing bugs, patches, etc. container images have the capability to keep the track of the changes we perform on top of them.
#docker historycommand helps to see these changes done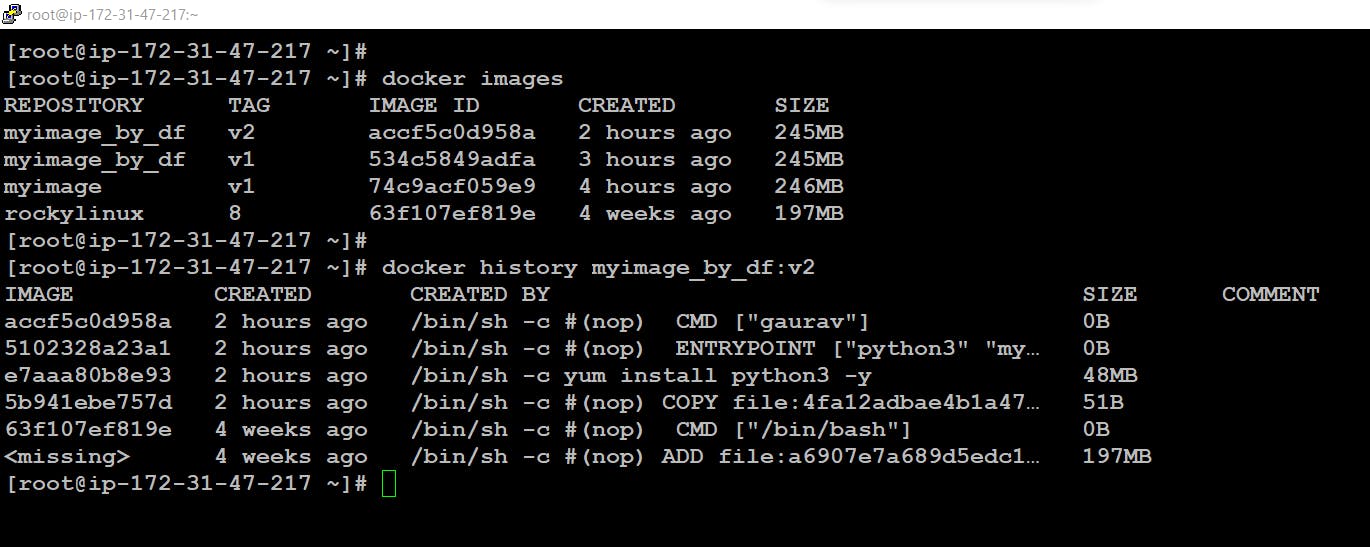
Syntex for giving the versions/tags to the container image
<container_image_name>:<tag/version>
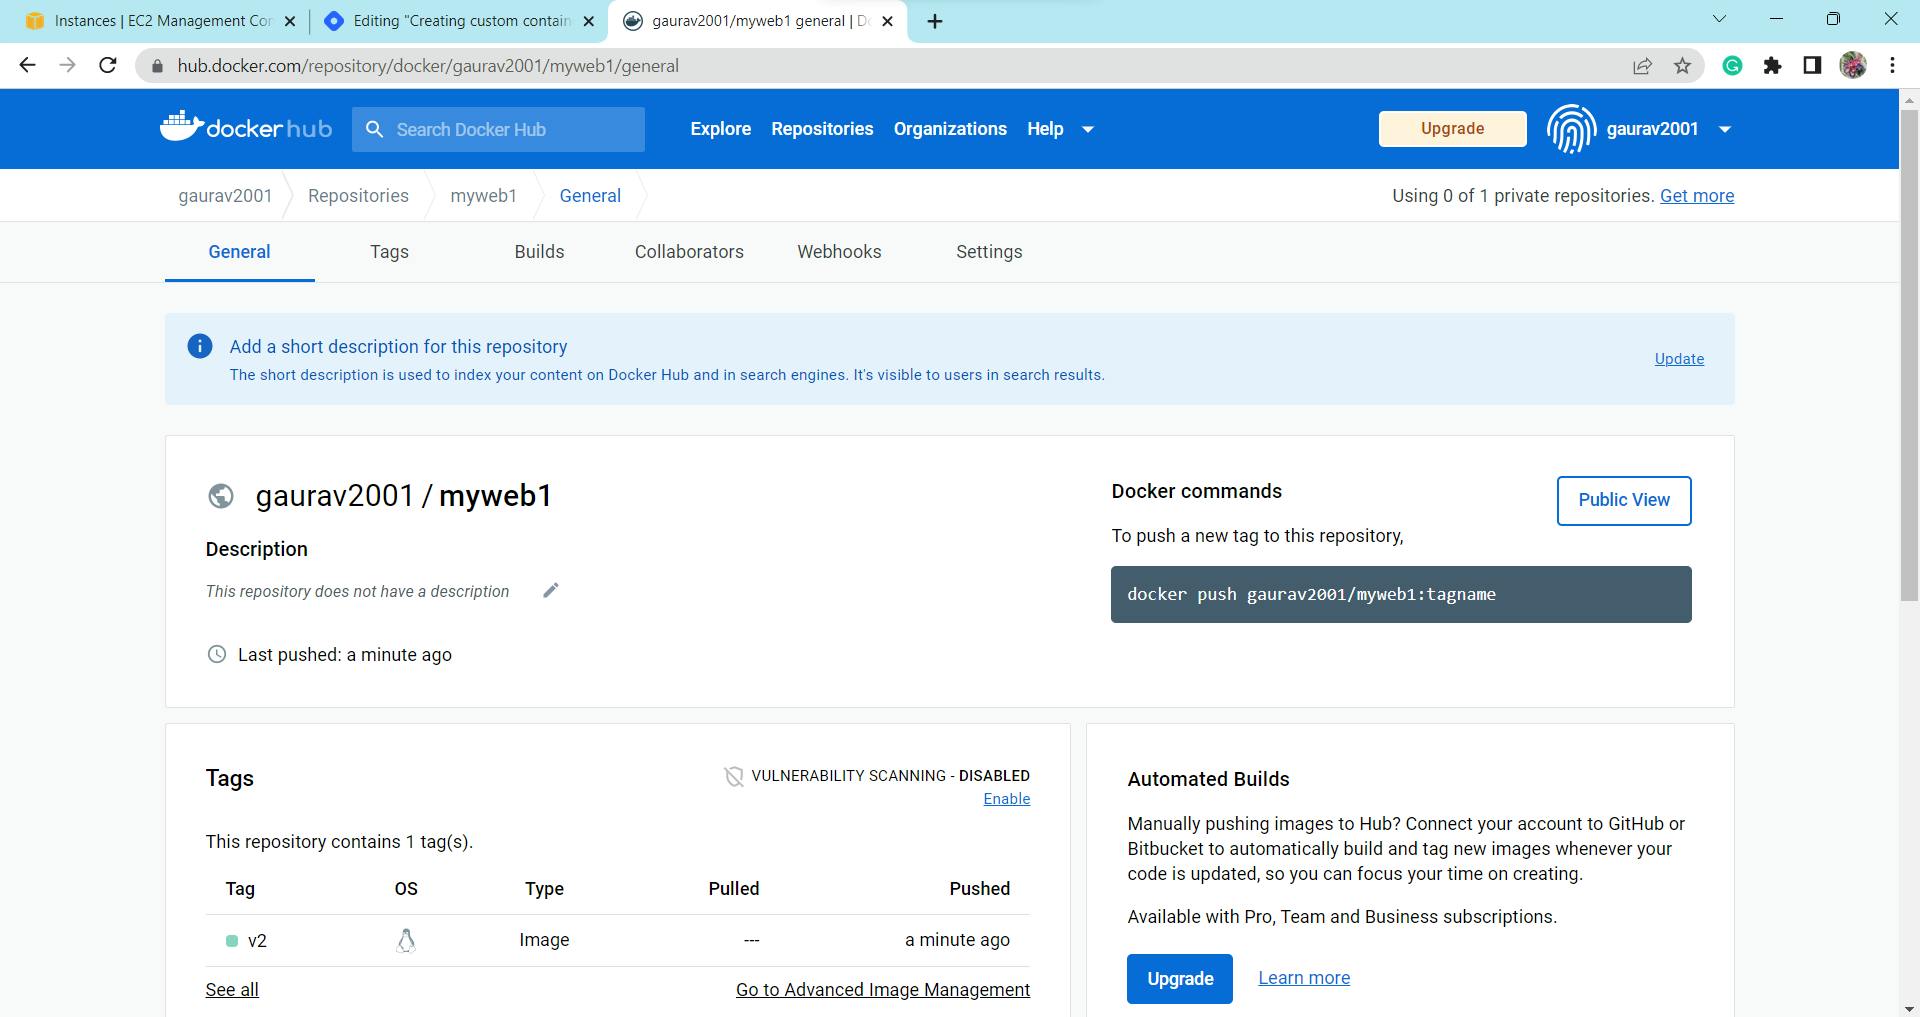
Push Container Image over the DockerHub:
At the most, we need to have an account at the hub.docker.com
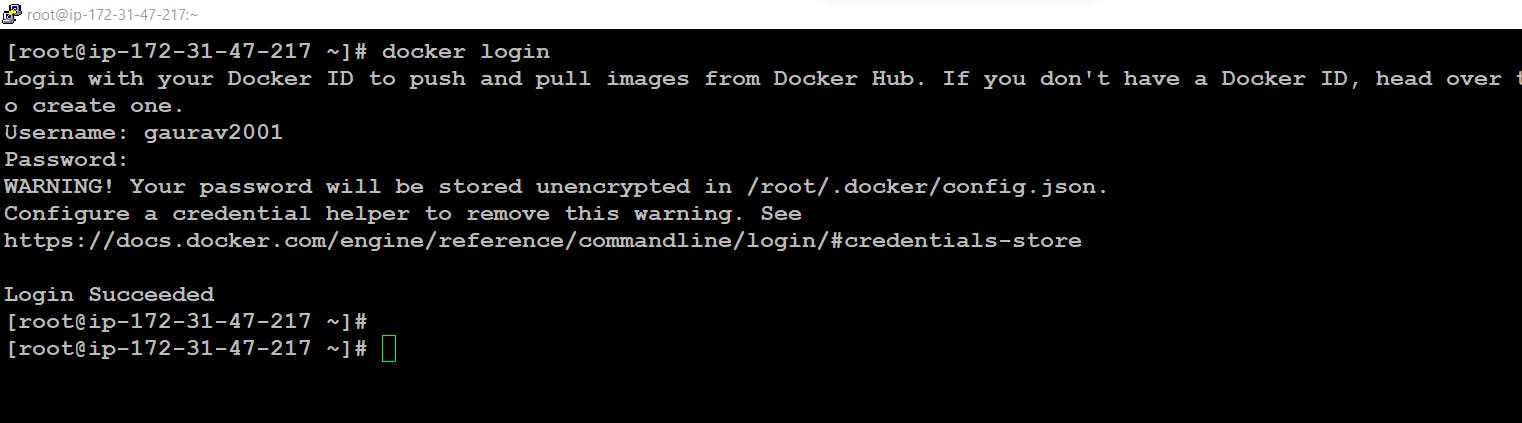
Now in order to push any image to the docker hub we need to follow the naming convention given by the docker hub i.e image name must be <username>/<name>:<version>
here we wanted to push the myimage_by_df:v2 to the docker hub but it doesn't follow the naming convention so first rename it using
docker tagcommand.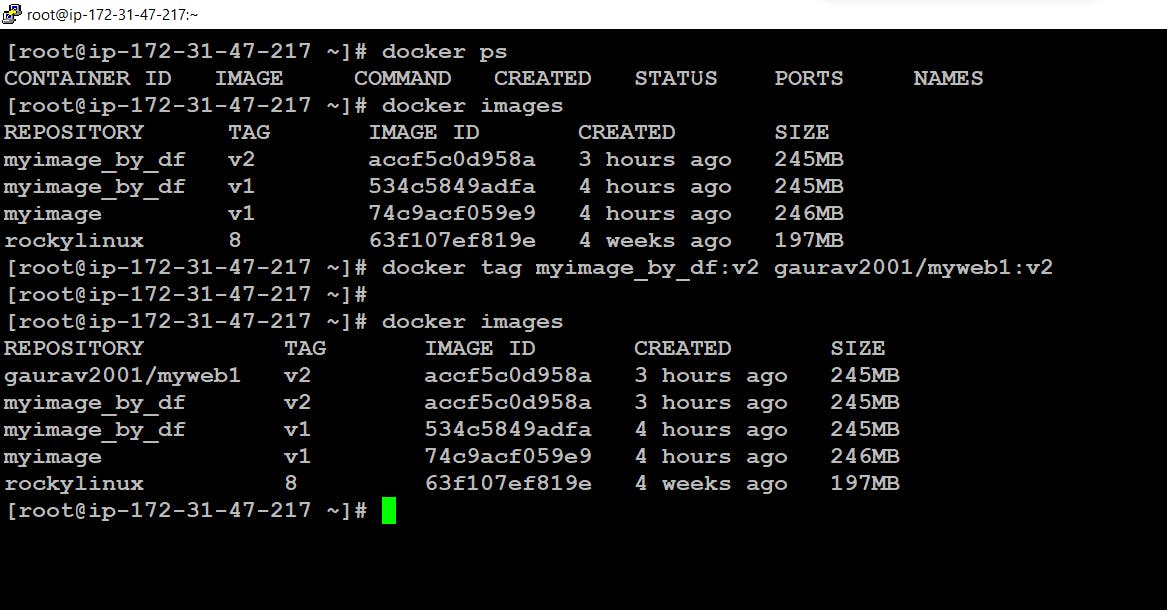
here it is showing 2 records
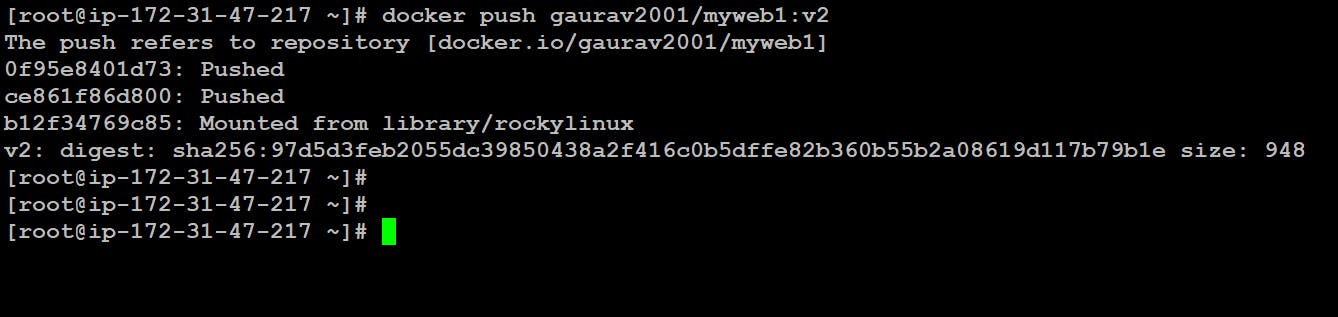
myimage_by_df:v2andgaurav2001/myweb1:v2but their image ID is the same which means they are the same images but have different names.Now let's push the image to the docker hub
Additional learning Resources:
We will be performing more such practicals and understanding concepts on docker and multiple other technologies stay tuned.
That's all for this blog 🙌
Thankyou For Reading
Any query and suggestion are always welcome- Gaurav Pagare