


Need and Requirement of Multinode K8s Cluster
Kubernetes has proven to be an incredible tool for deploying applications and of course for the management of containers efficiently. To gain familiarity with K8S, one can launch a Kubernetes cluster on a single node, such as a computer or a server using tools like minikube. However, in real-world business can't rely on a single node as the failure of hardware, scaling challenges and many more such issues might occur hence here Kubernetes cluster in this case launched on top of multiple nodes, this kind of Kubernetes cluster is also known as Multinode Kubernetes cluster.
A Multi-node Kubernetes cluster in terms of user experience is exactly the same as that of a single-node Kubernetes cluster. Here in a multi-node Kubernetes cluster the nodes communicate with each other to distribute workloads and ensure that the containers are working effectively. because of this kind of setup businesses and organizations can achieve increased redundancy and fault tolerance as well as improved performance and scalability.
Before diving in, it is essential to gain some insights and understand Kubernetes architecture and the components that make it functional.
Kubernetes architecture and Its Components
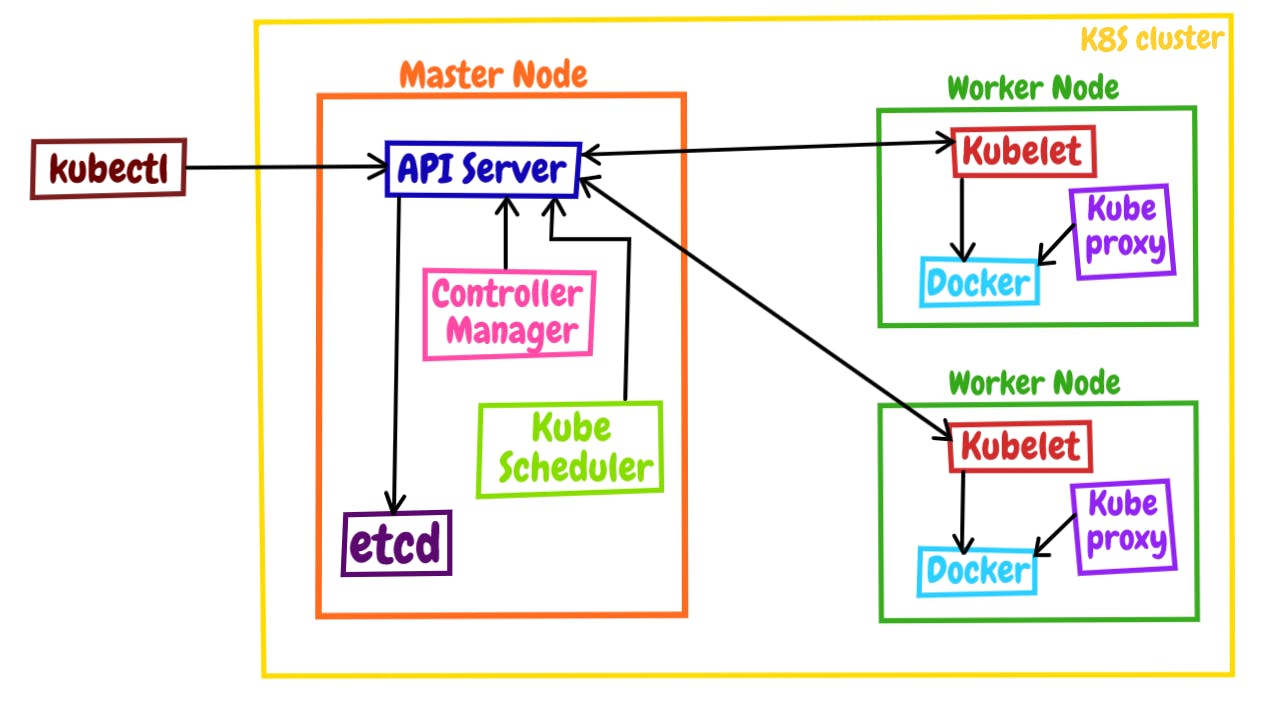
Kubernetes architecture is designed around a master-worker node model meaning the nodes involved in launching the whole cluster are divided into two types master node and the worker node (slave node). The master node holds the responsibility for managing and coordinating all the operations regarding the cluster while the worker nodes are responsible for running the application workload i.e the application launched by the user.
Master Node
Kubernetes master node is also sometimes known as the control plane. It is made up of several components including the Kubernetes API server, Kube Scheduler, etcd data store, and the Kubernetes controller manager. Now setting up a multinode Kubernetes cluster is possible with a single master node too but this may prove to be a single point of failure hence multiple times organizations prefer to have multiple master nodes for their cluster as a high availability practice.
Kubernetes API server
The Kubernetes API server is the primary interface for communicating with a Kubernetes cluster whether its user, management devices or command line interfaces all talk to the API server to interact with the Kubernetes cluster. Kube API exposes all the cluster functionalities to the outside world by processing incoming API calls in form of HTTP requests. it is also responsible for handling authentication, authorization, and validation of requests before executing them.
Kube Scheduler
When a request is been made to the Kubernetes cluster to launch a pod, the kube scheduler decided on which node on the cluster the pod should be launched on. In order to take better decisions several factors are been taken into consideration including the resource requirements of pod-like CPU, memory, and storage. They also consider the taint set on the node and also pod's affinity requirement is checked to ensure that the pod is launched on the node that meets certain criteria such as geographical location or hardware type. This job of the kube scheduler results in better resource utilization and optimal performance for applications launched
Kubernetes Controller Manager
The Kubernetes controller manager as the name indicates manages the controllers in Kubernetes which are like the control loops that continuously watch and make a request for changes if required. they always try to bring the state of the cluster to the desired state from the current state.
Etcd Data Store
Etcd is one of the core components of Kubernetes it is a highly available, distributed key-value store that stores critical and sensitive information including the secrets used by applications over the cluster, it also stores the cluster state information, configuration details of each node, etc.
Worker Node / Slave Node
Kubernetes worker nodes are the main power of the multinode cluster over those nodes the application actually runs. now there are multiple components involved to make up the worker nodes like kubelet and kube-proxy.
Kubelet
Kubelet is a demonize service that runs on every node in the cluster basically. From the worker node, it communicates with the control plane. It also acts as an intermediate program between the container runtime and Kubernetes. Hence if anything needs to be done in the cluster the control plane contacts the kubelet to perform those actions.
Kube-proxy
Kube-proxy is one of the core components of Kubernetes which is responsible to enable Kubernetes networking services. It manages network connectivity to and from the Kubernetes services and pods running on the node.
Container Runtime engine
Behind the see, all the things running in the Kubernetes cluster are launched on top of containers and to launch those we need some container runtime engine. example docker is one of the container runtime engines we can use for Kubernetes.
Launching Multinode Kubernetes Cluster
- For Launching the multinode Kubernetes cluster we need multiple nodes here we will be using AWS Ec2 service for getting those nodes/ machine/ OS.
If you're looking to learn more about the AWS EC2 service, be sure to check out my previous blog post:
Here for this requirement, I will be launching 3 Ec2 instances with the configuration:
AMI: Amazon Linux 2
Instance Type: t2.micro
Storage: 8 Gib
Firewall/ security group: Allow all traffic from anywhere
Now, these configurations might change from requirement to requirement. Also here I kept the firewall to allow all traffic from anywhere this is just to avoid complexity but this is not a good security practice.
- Here we have used 3 nodes one will be used as Kubernetes master node and the other two as the slave nodes.

Master Node Configuration
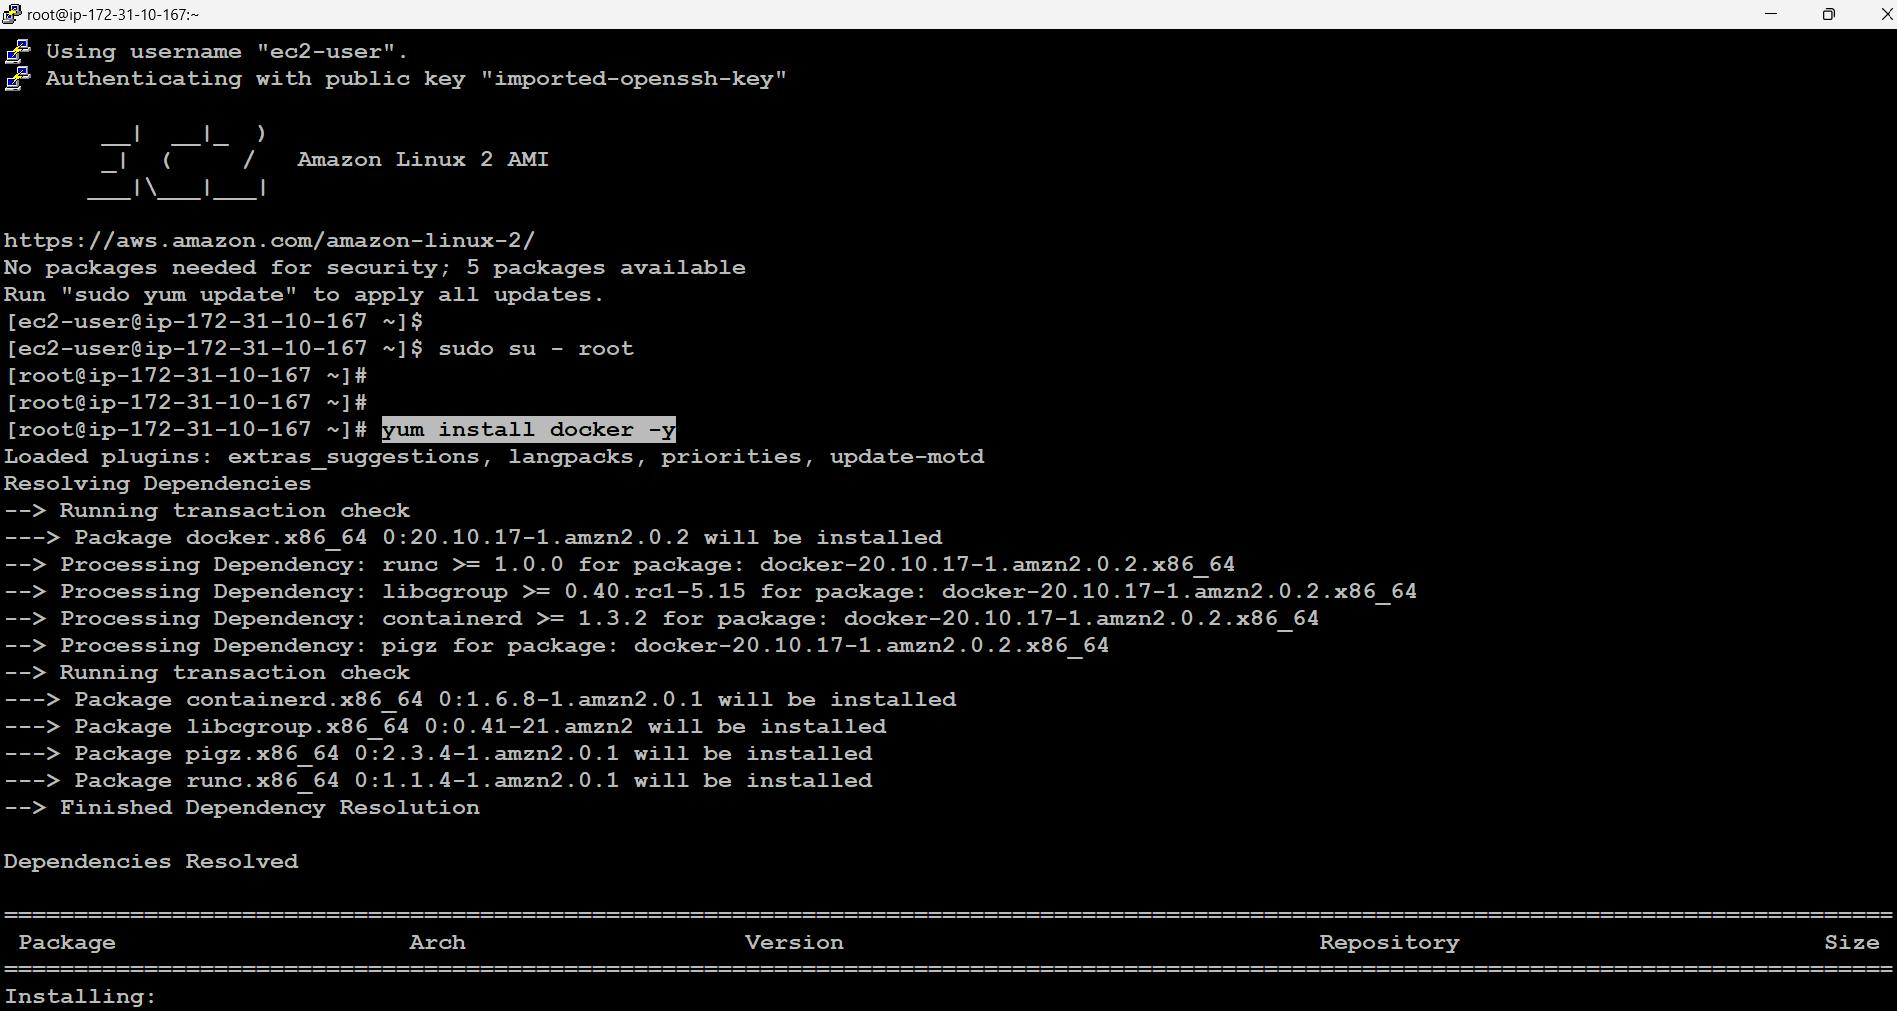
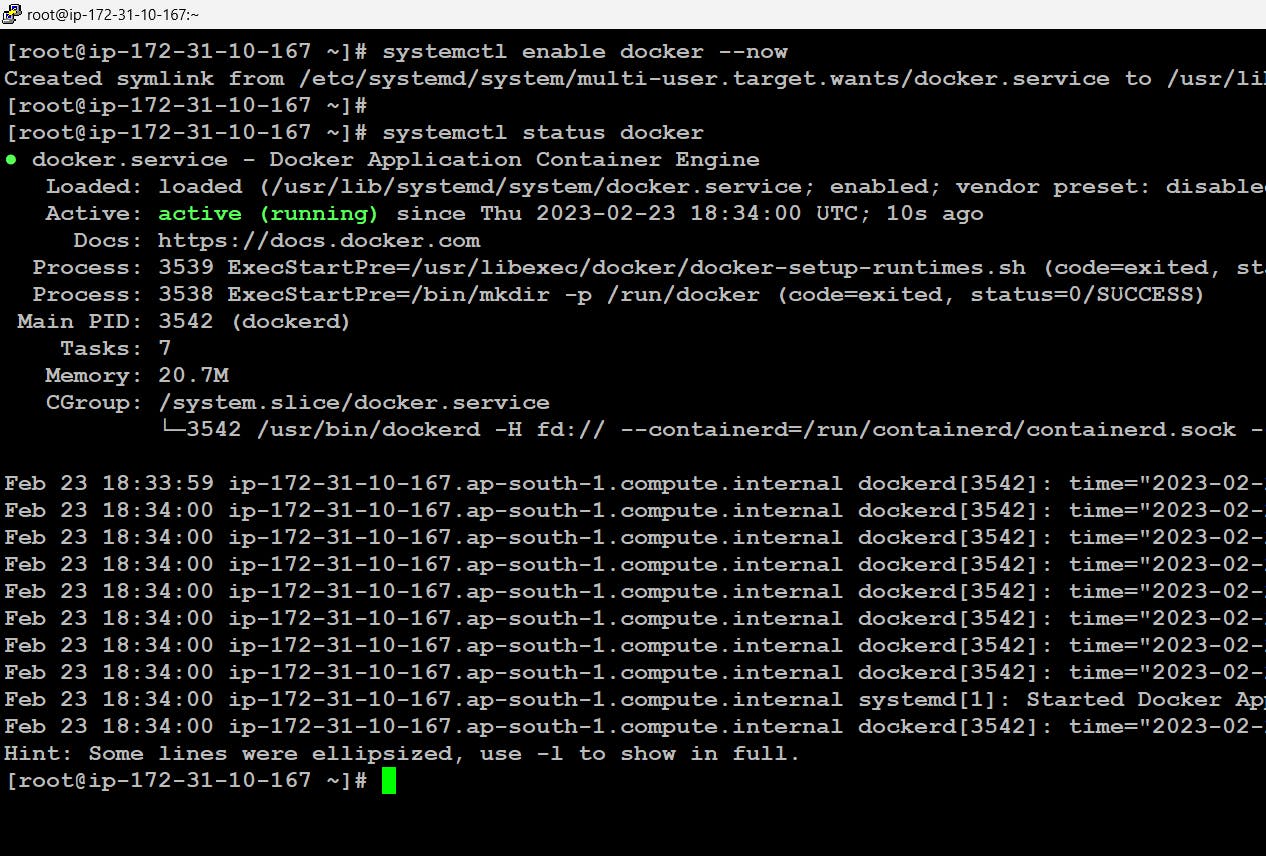
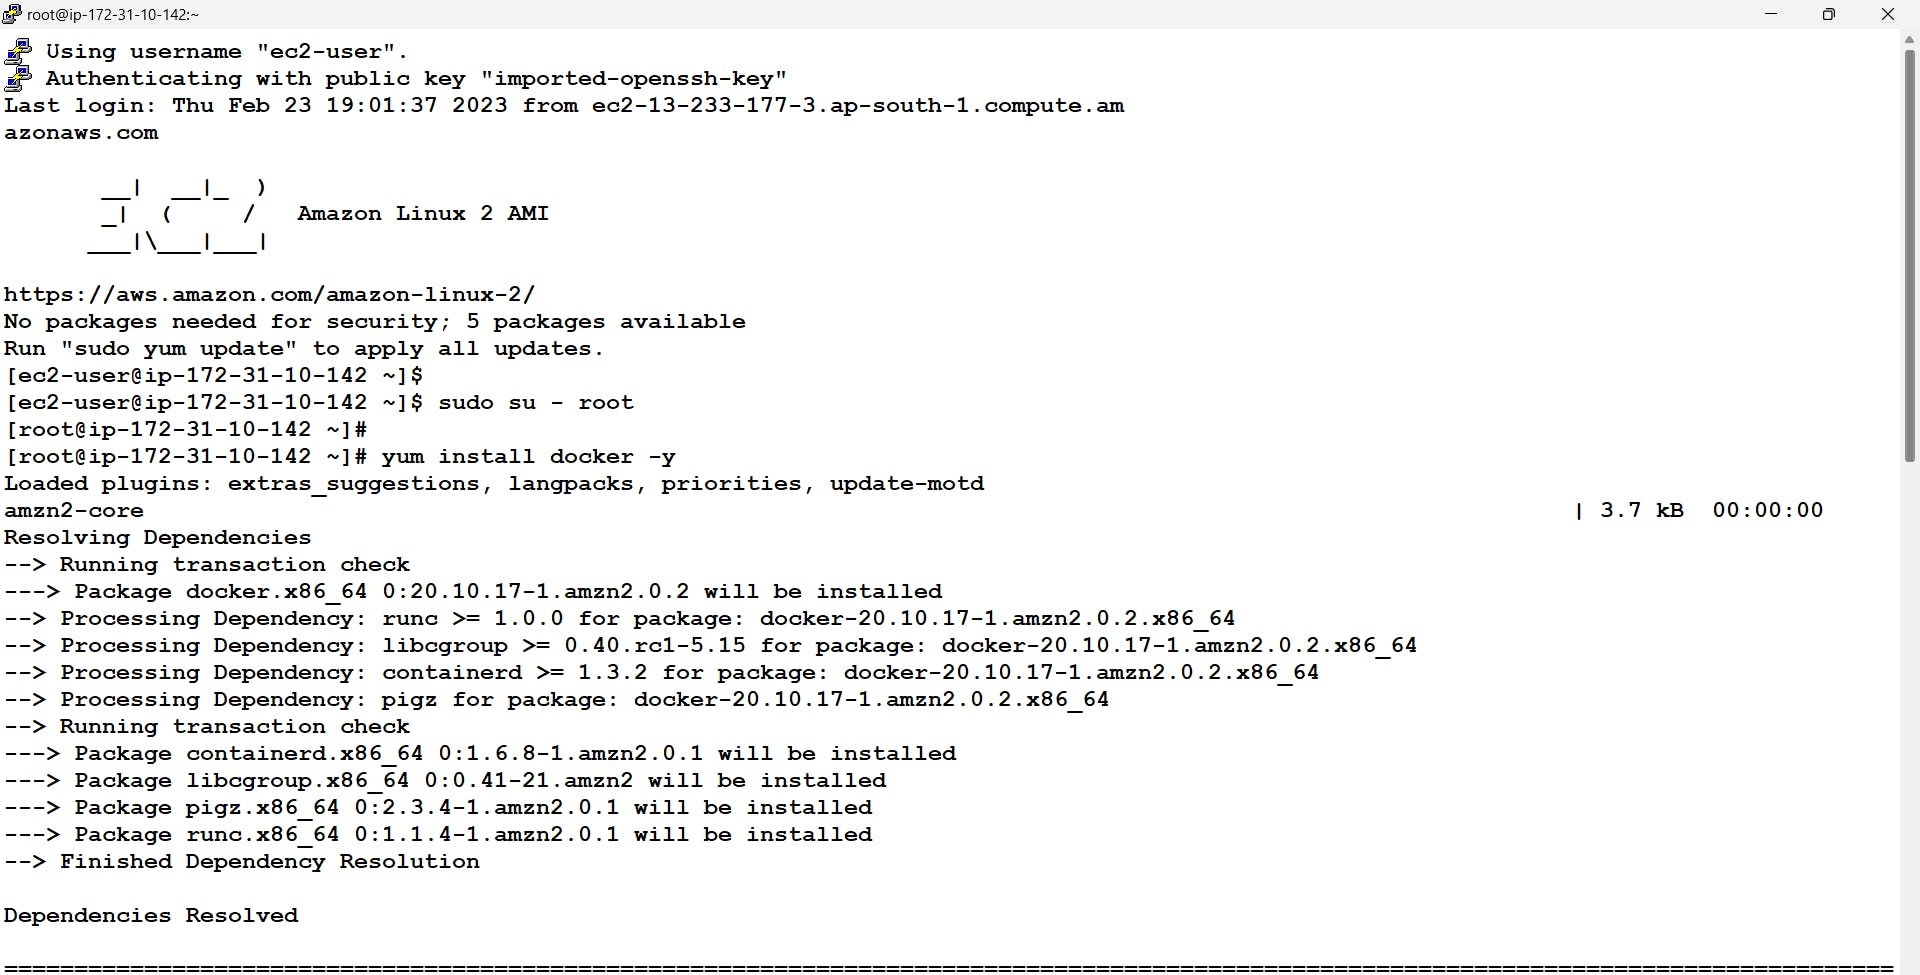
Now we will be connecting to our master node and installing docker on top of it Further start and enable docker services.
  $ sudo su - root // this command will be used to go into root account
  # yum install docker -y
  # systemctl enable docker --now
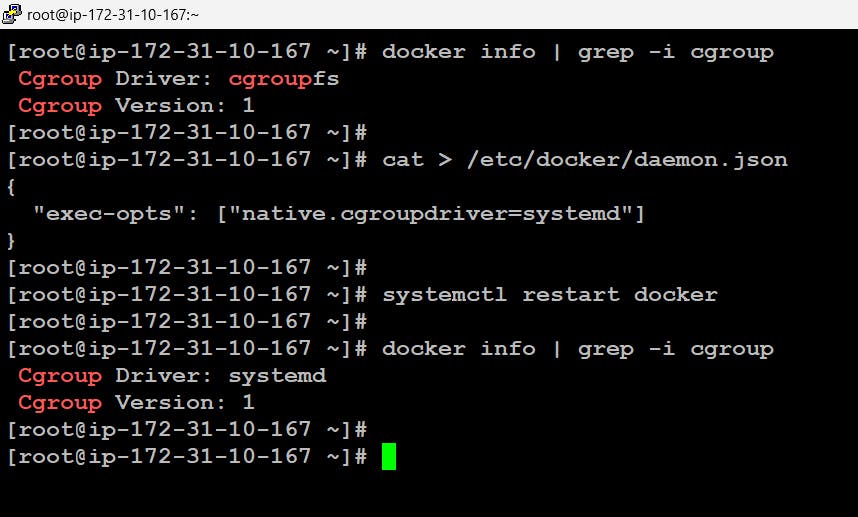
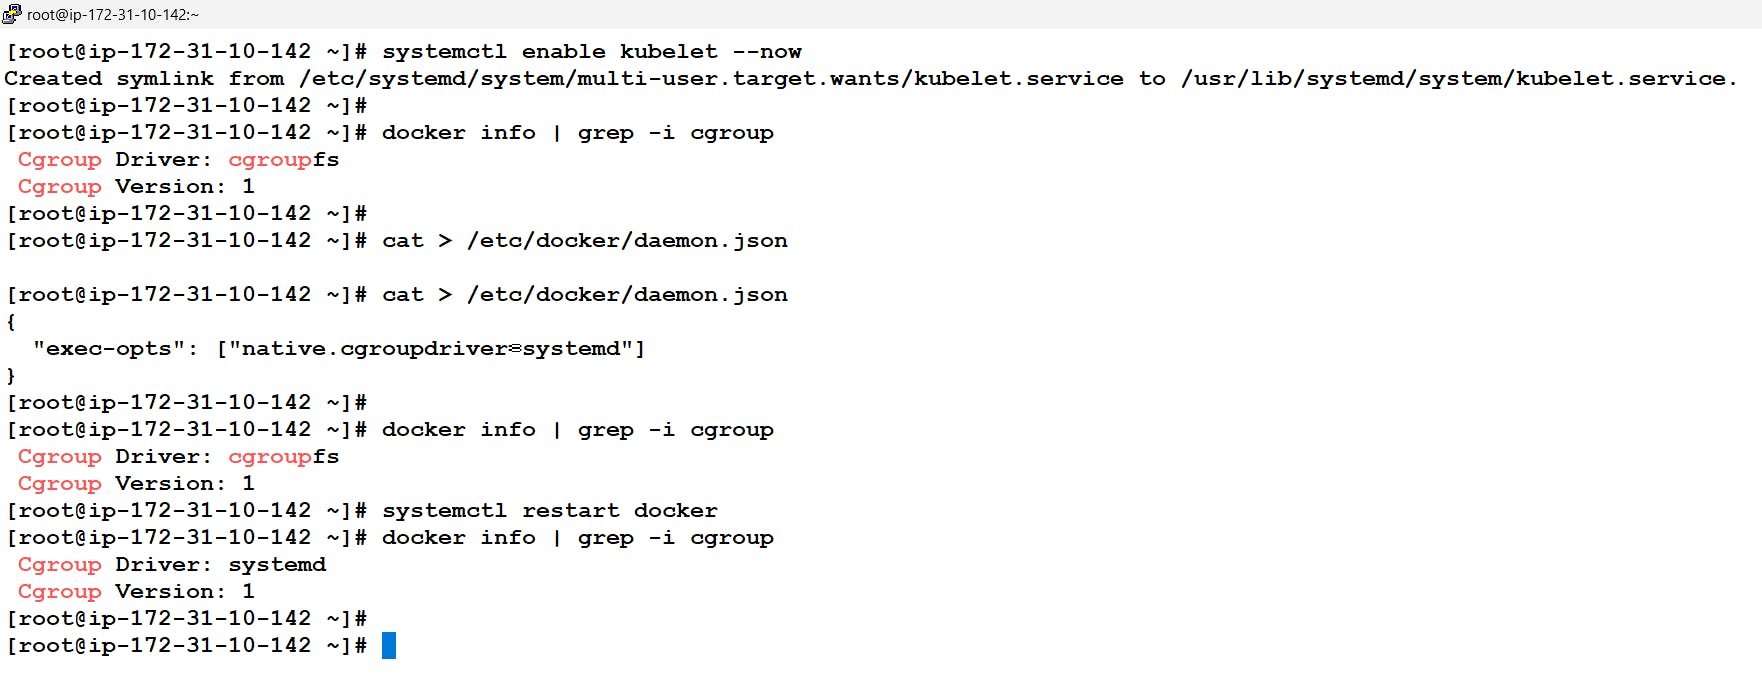
- Here before moving further It is recommended to change the cgroup driver of docker from cgroupfs to systemd this is because kubeadm manages the kubelet as a systemd service.
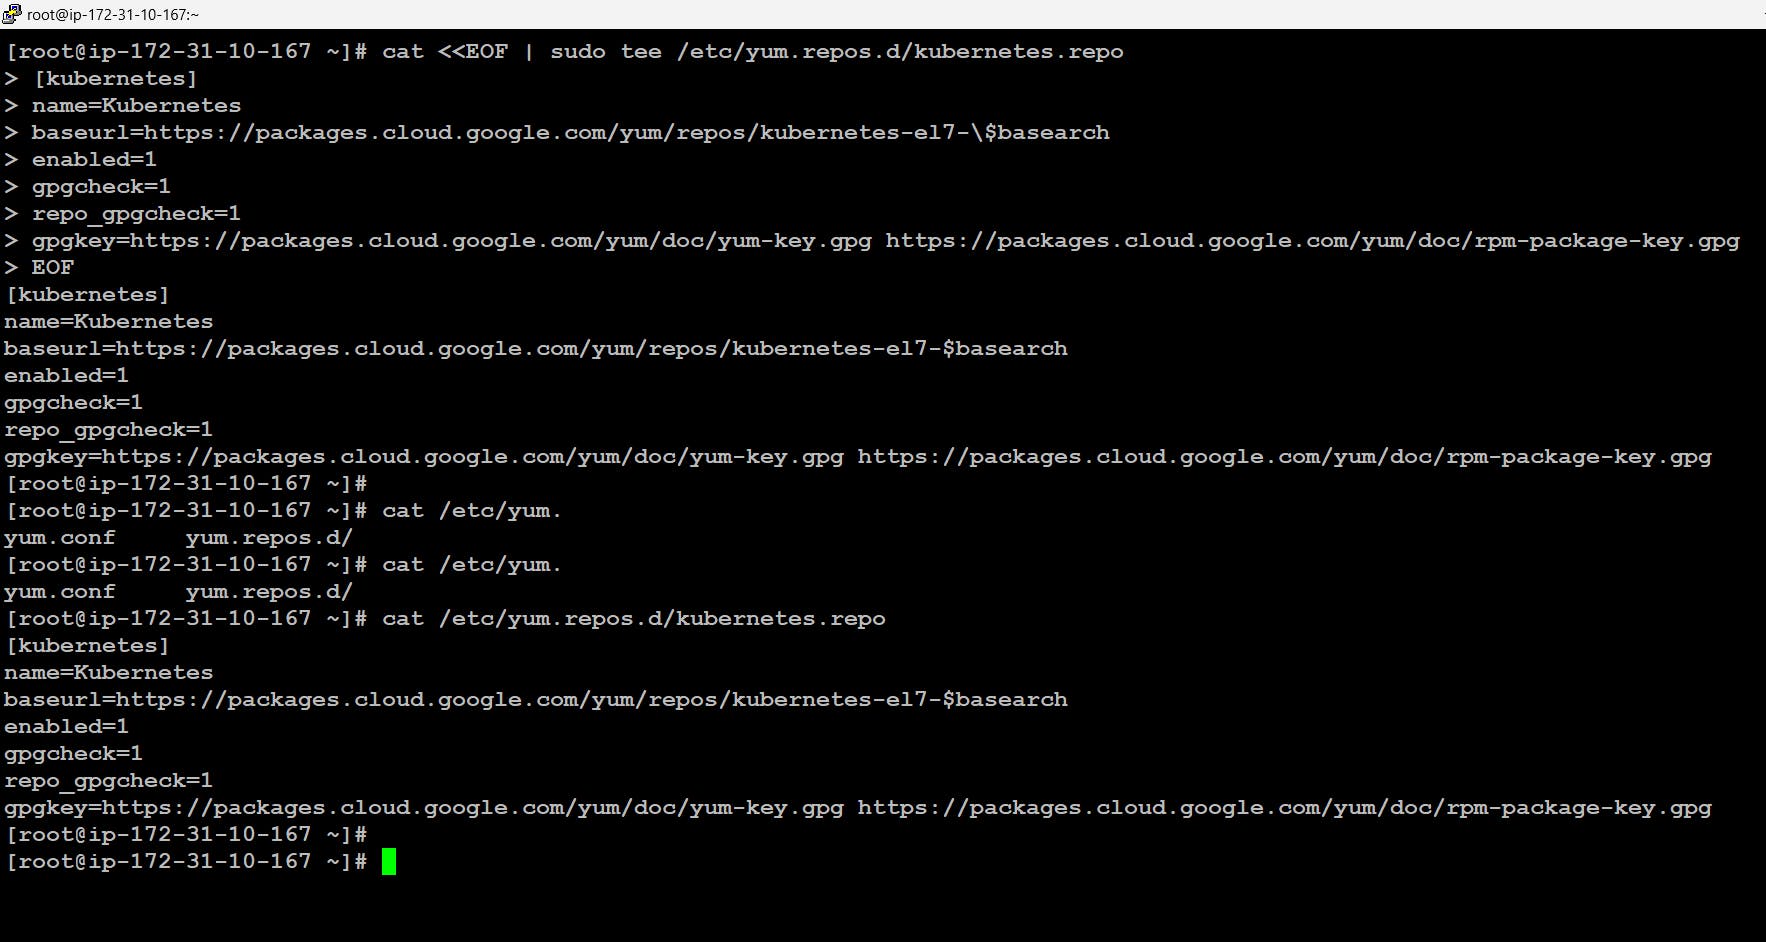
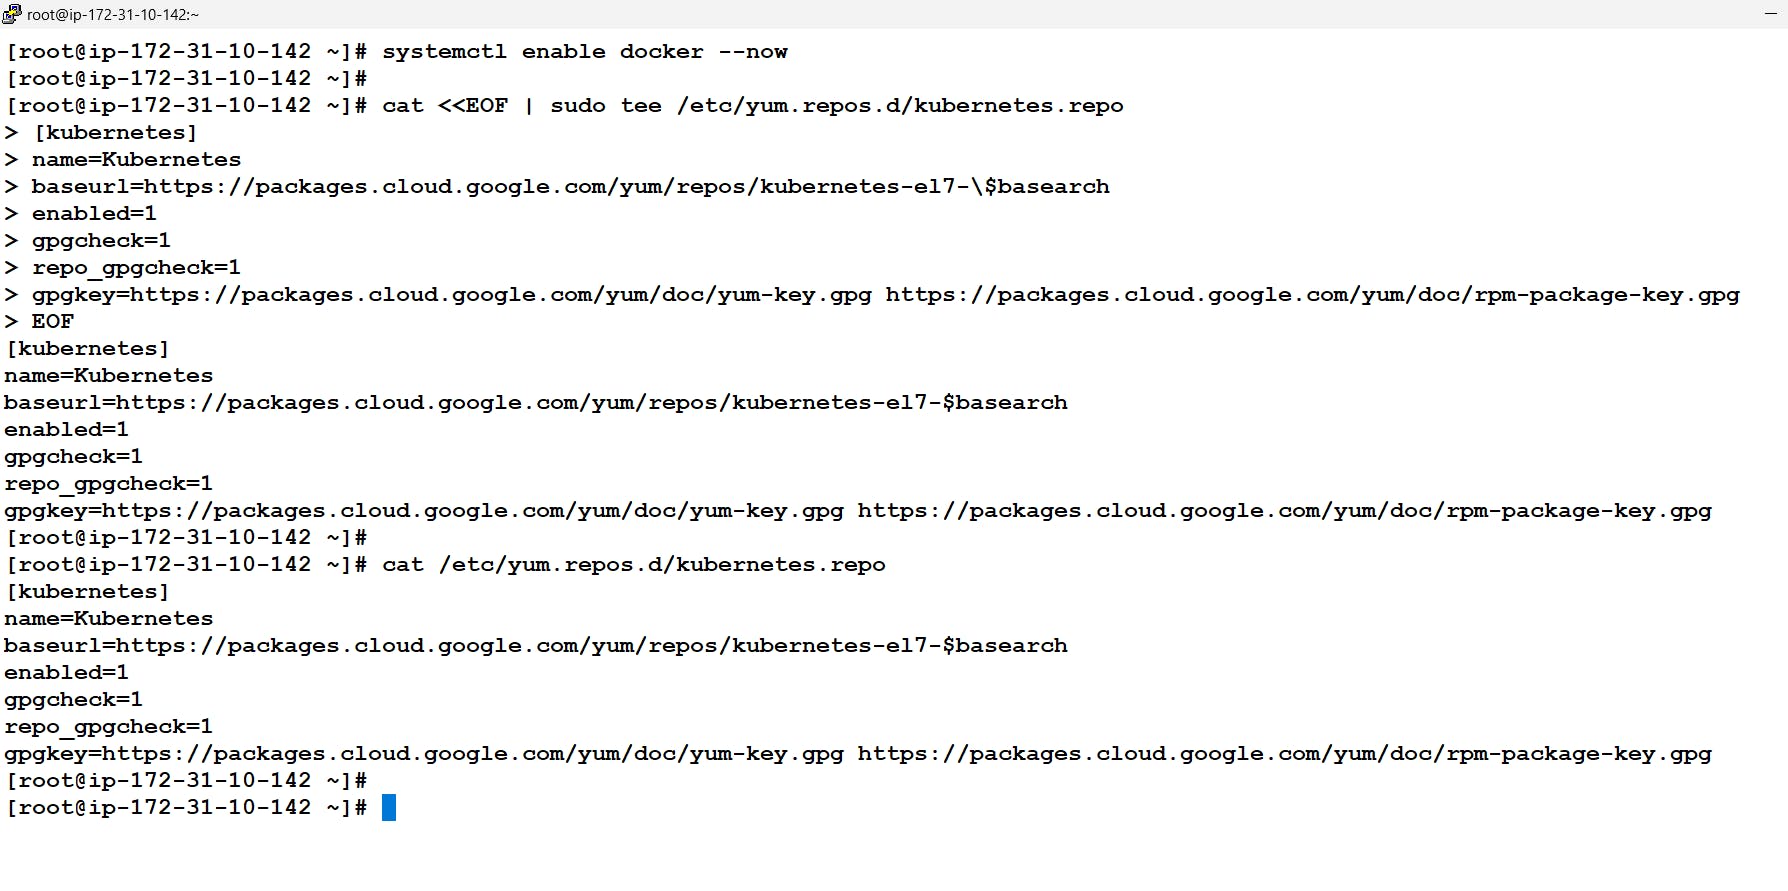
In order to install and configure Kubernetes we will be using kubeadm which is a standard installer for Kubernetes. Now we don't have the location from where to get the kubeadm installer for this in Linux we need to first get the repository configured i.e create a repo file in /etc/yum.repos/ folder. Once done we can get the software via the yum command and further install it.
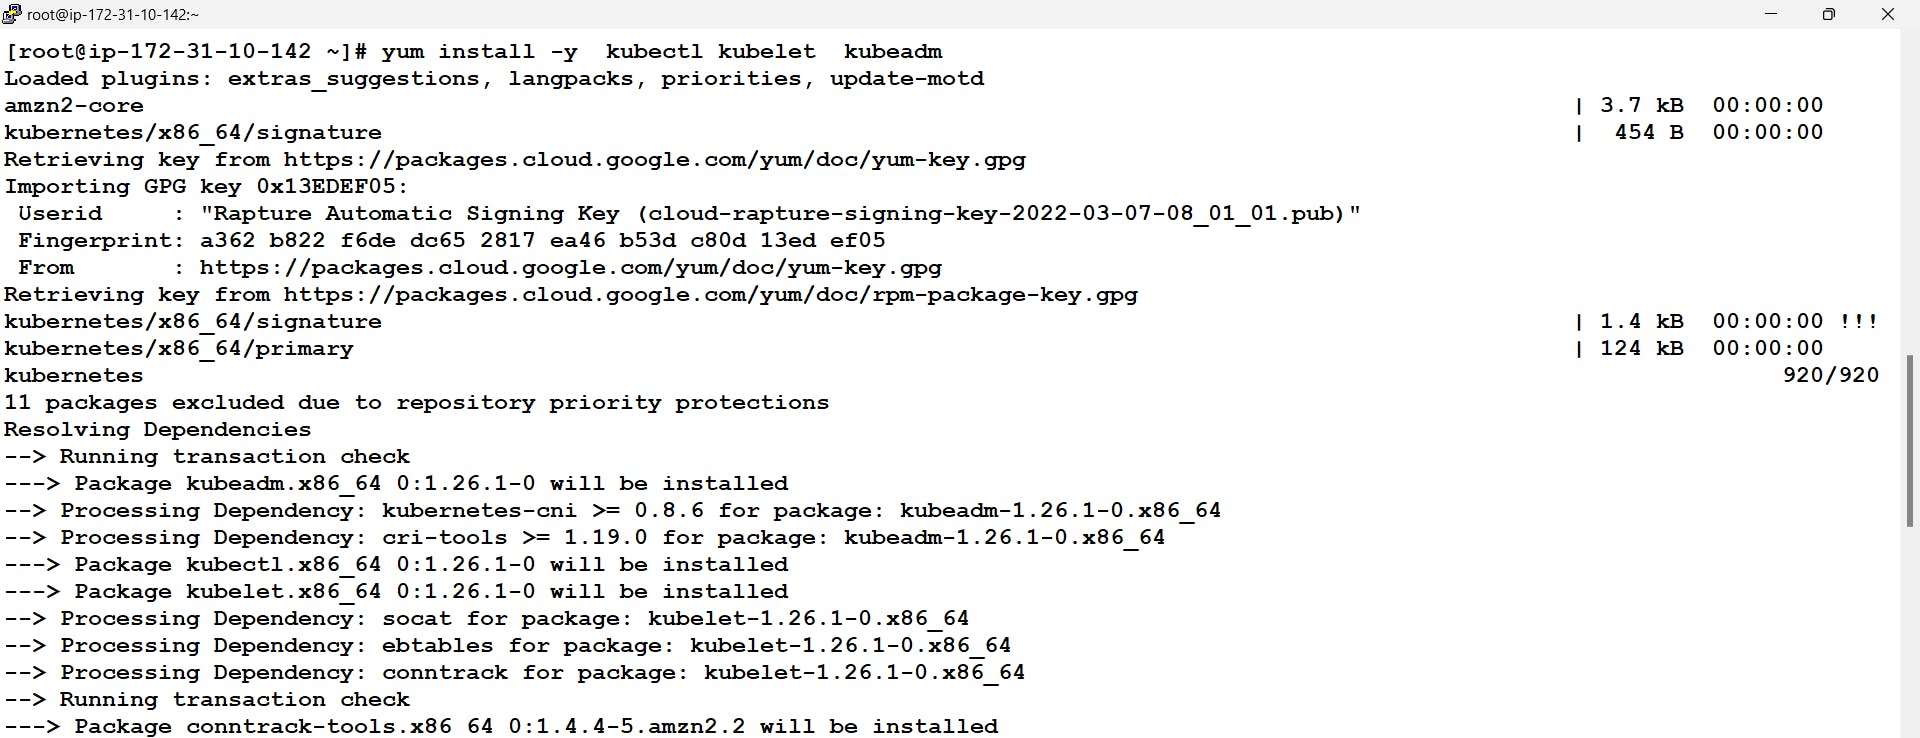
  # cat <<EOF | sudo tee /etc/yum.repos.d/kubernetes.repo
  [kubernetes]
  name=Kubernetes
  baseurl=https://packages.cloud.google.com/yum/repos/kubernetes-el7-\$basearch
  enabled=1
  gpgcheck=1
  repo_gpgcheck=1
  gpgkey=https://packages.cloud.google.com/yum/doc/yum-key.gpg https://packages.cloud.google.com/yum/doc/rpm-package-key.gpg
  EOF

  # yum install -y kubelet kubeadm kubectl
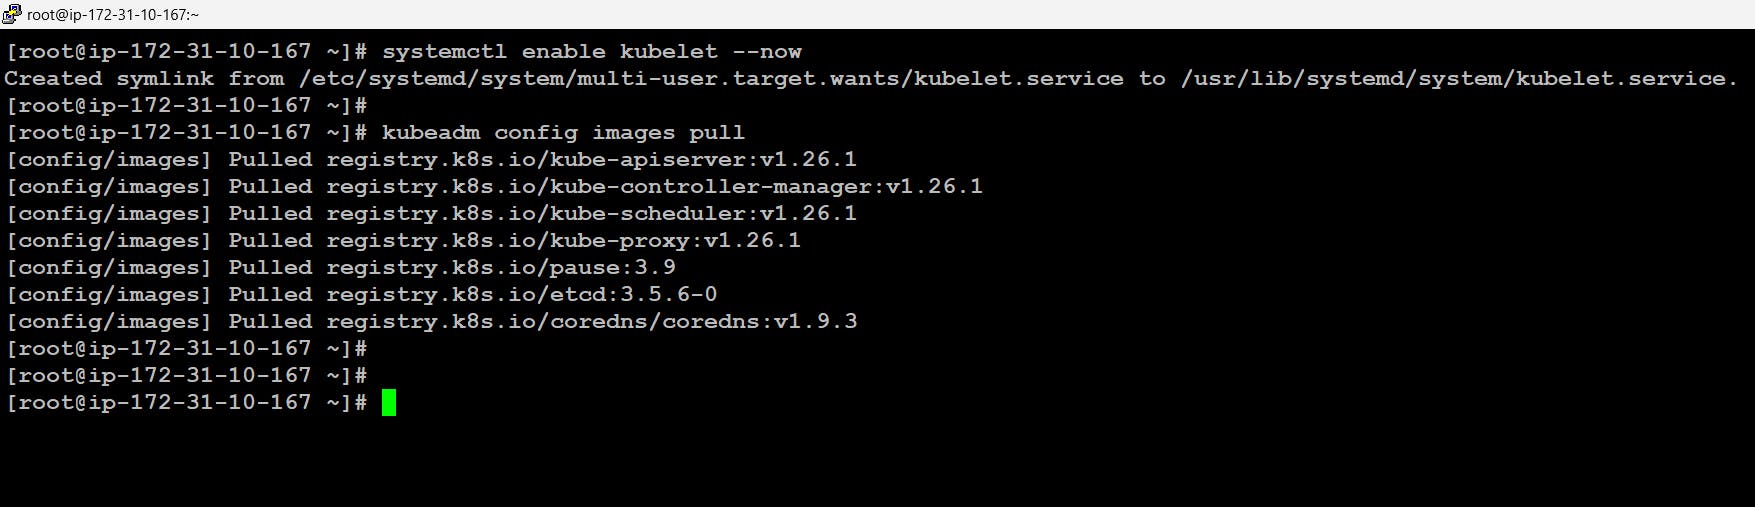
Now when we start the services for the kubelet it will be in the activating state we can start and check the status using the systemctl command. But It will be in the running state once the installation will be done completely.
Now Kubernetes components are internally launched inside a container and the container needs images to launch. we can get all those necessary images using the command by kubeadm:
  # systemctl enable kubelet --now
  # kubeadm config images pull
- We just need to initialize the cluster which will start our master node. This will also be done using the kubeadm command. The key point to note is the CIDR which we have provided i.e 10.240.0.0/16 this means once the cluster will be up and running all the applications running will be having the IP in the network range 10.240.0.0/16
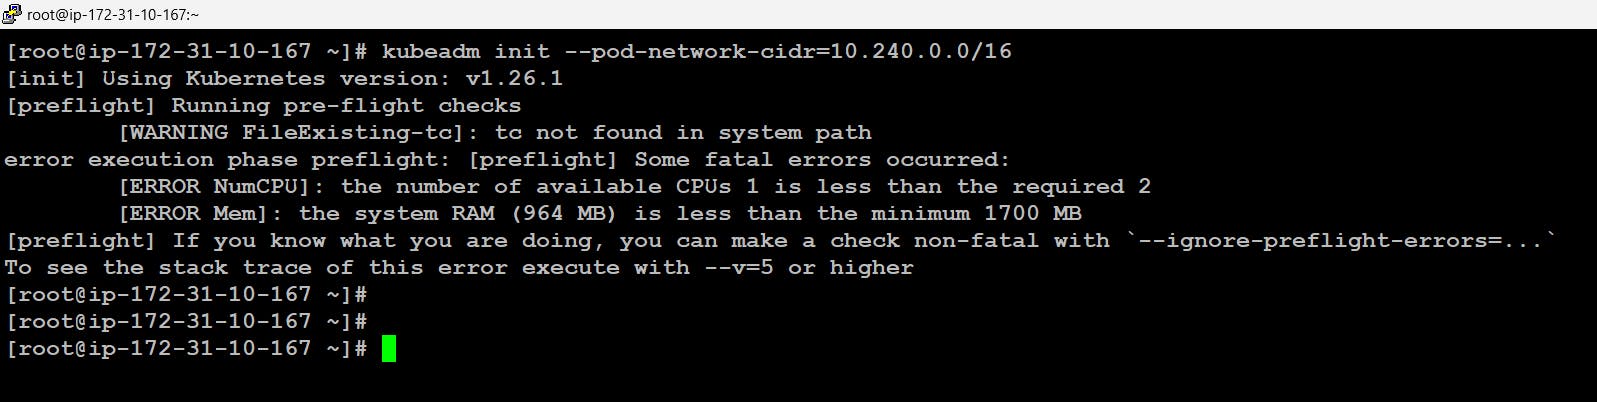
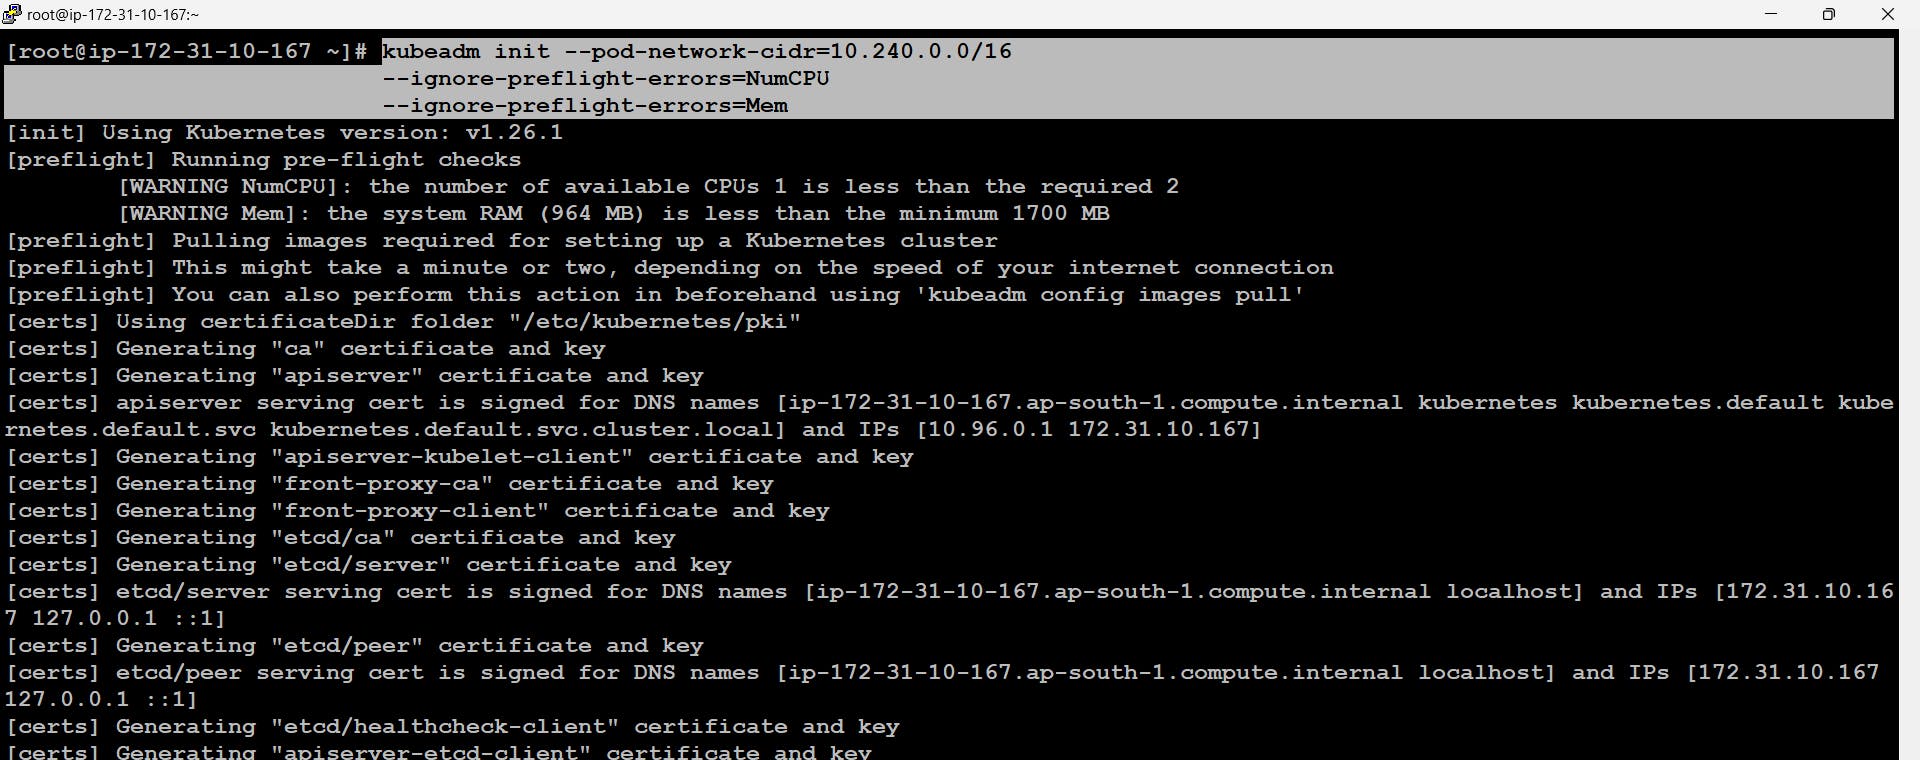
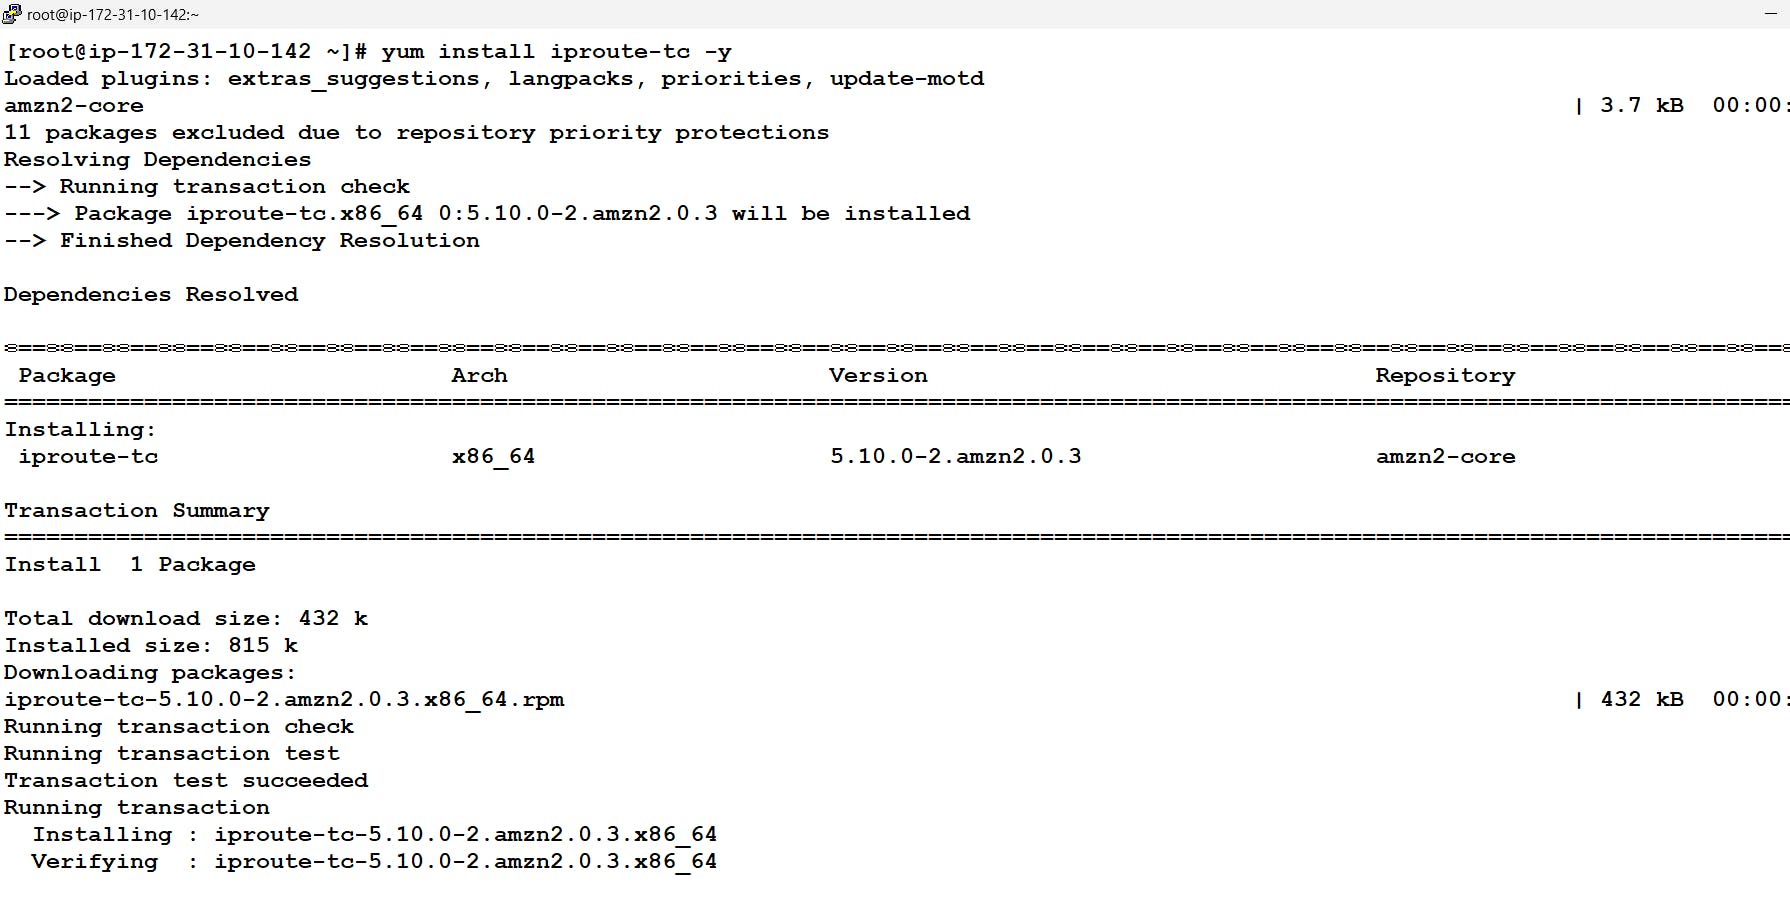
Note: Here we are getting this error regarding tc command because it's not there in our system to solve this we can simply install iproute-tc to get tc command also the error regarding the CPU and memory is because of limited CPU and memory we have in our system we can simply ignore this using the flag called --ignore-preflight-errors
  # yum install iporoute-tc -y
  # kubeadm init --pod-network-cidr=10.240.0.0/16 --ignore-preflight-errors=NumCPU --ignore-preflight-errors=Mem

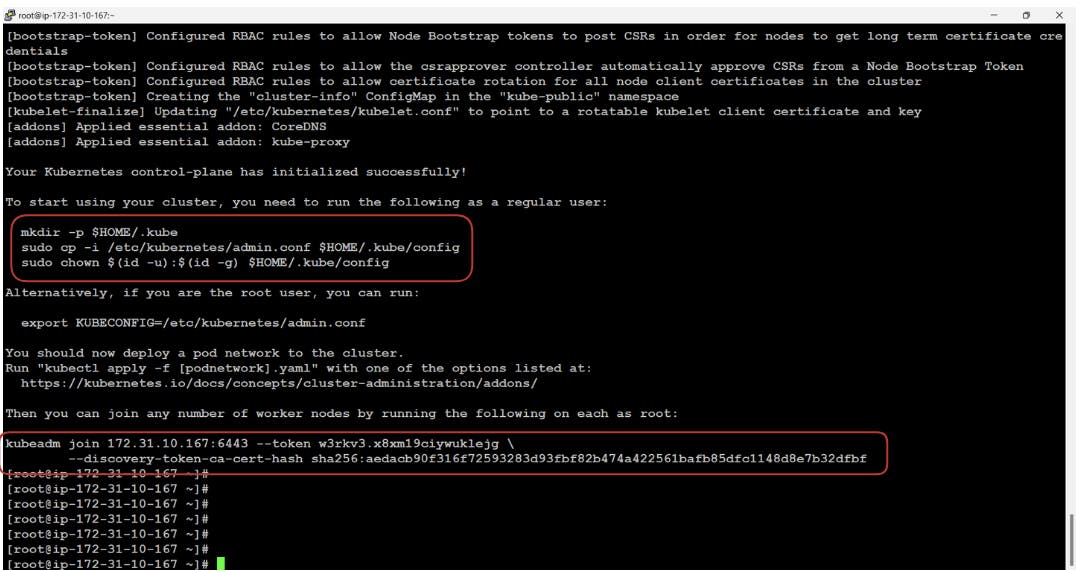
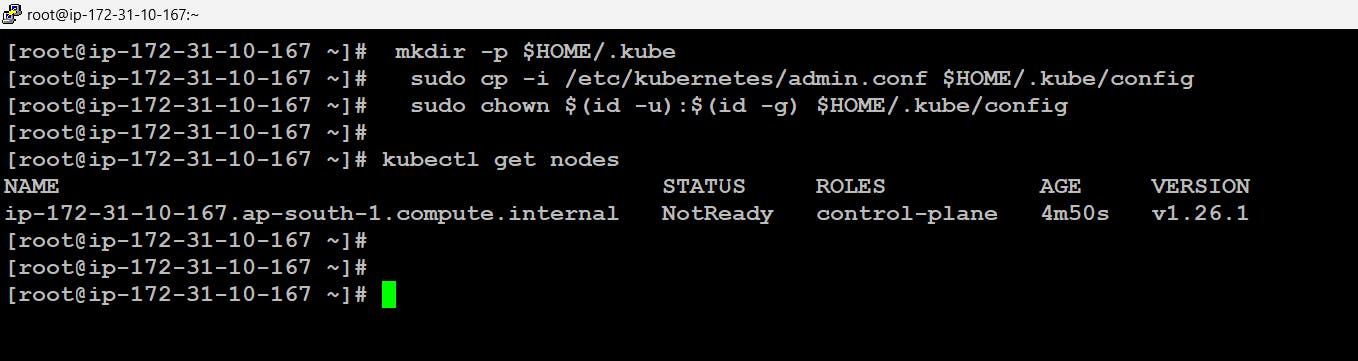
- Now after the init command our master node will be started and running and in order to join this cluster as a worker node we can use the token mentioned at the end of the output. If we observe carefully they have also mentioned ways to connect to the cluster and get authenticated.
Worker Node Configuration
- Now we will be beginning with the configuration of the worker node it will be more or less the same as the configuration of the master node. Initially, we need to install docker and start its services.
- Here in the worker node, we will be needing the kubeadm command so we need to first set up the repo and then install it. we also need to install, start and enable the kubelet services.
- Here too we need to change the Cgroup driver to systemd
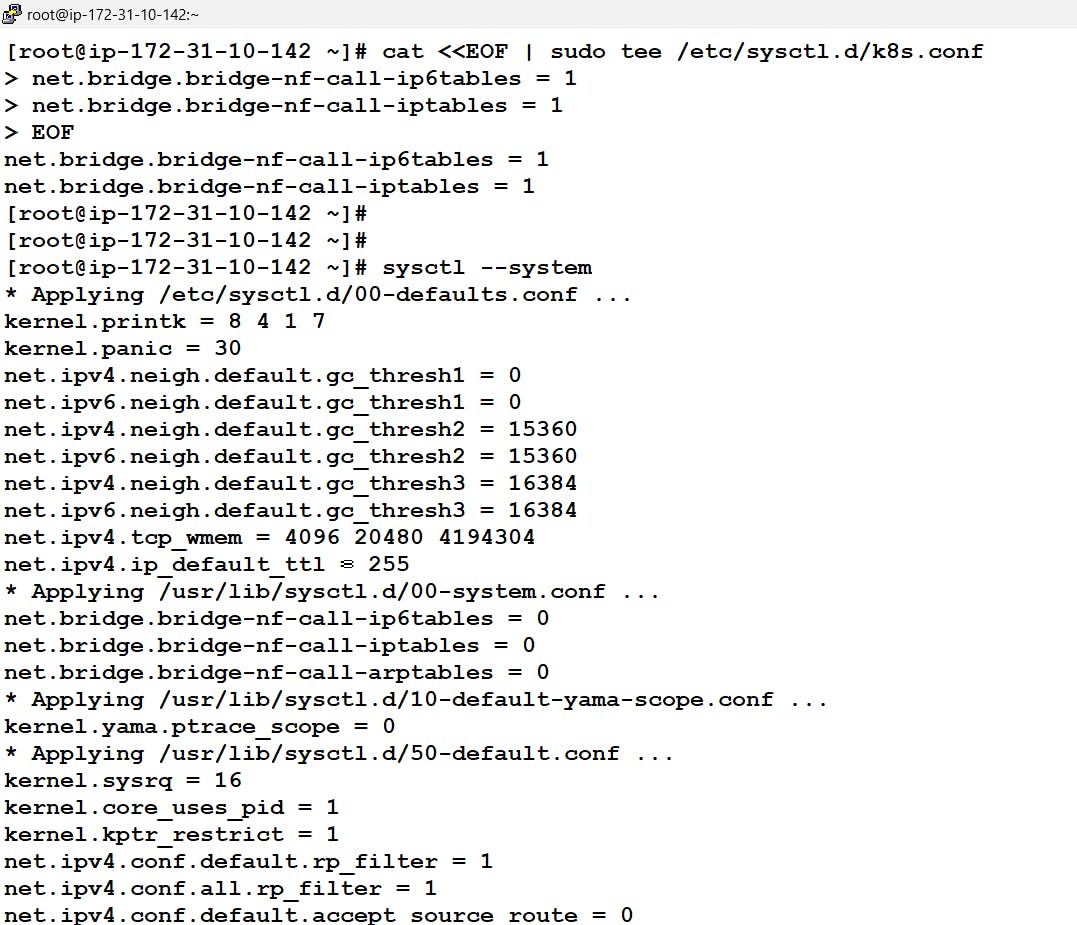
Now we need to update some rules in the IPtables so that packets are properly processed by IP tables during filtering and port forwarding. once the rules are given we will be using
sysctl --systemcommand to apply those rules# cat <<EOF | sudo tee /etc/sysctl.d/k8s.conf net.bridge.bridge-nf-call-ip6tables = 1 net.bridge.bridge-nf-call-iptables = 1 EOF # sysctl --system
- This finishes the configuration of the worker node to join the cluster now we just need to run the join command provided by the master in their init output.
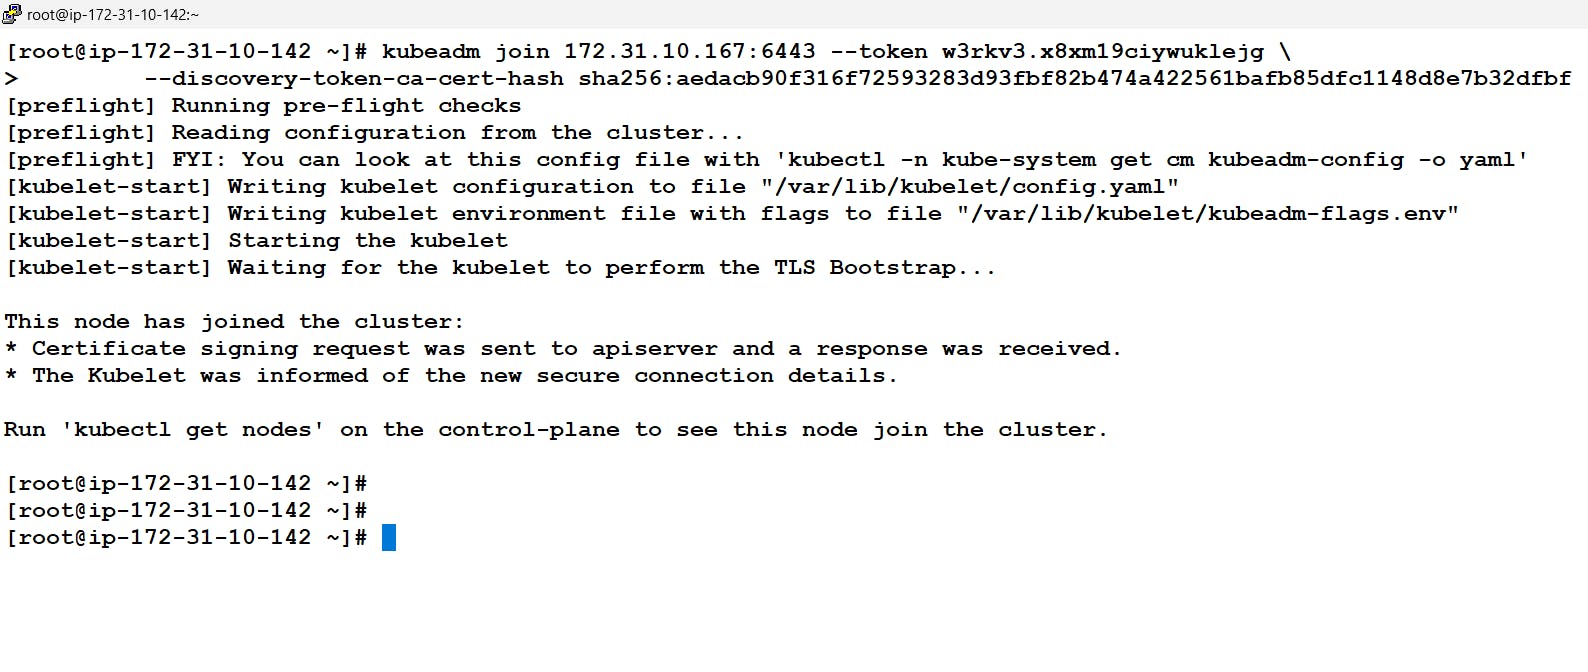
- Exactly in the same way we can configure our second worker node and provide it the same joining command/ token given by the master node.
CNI Configuration
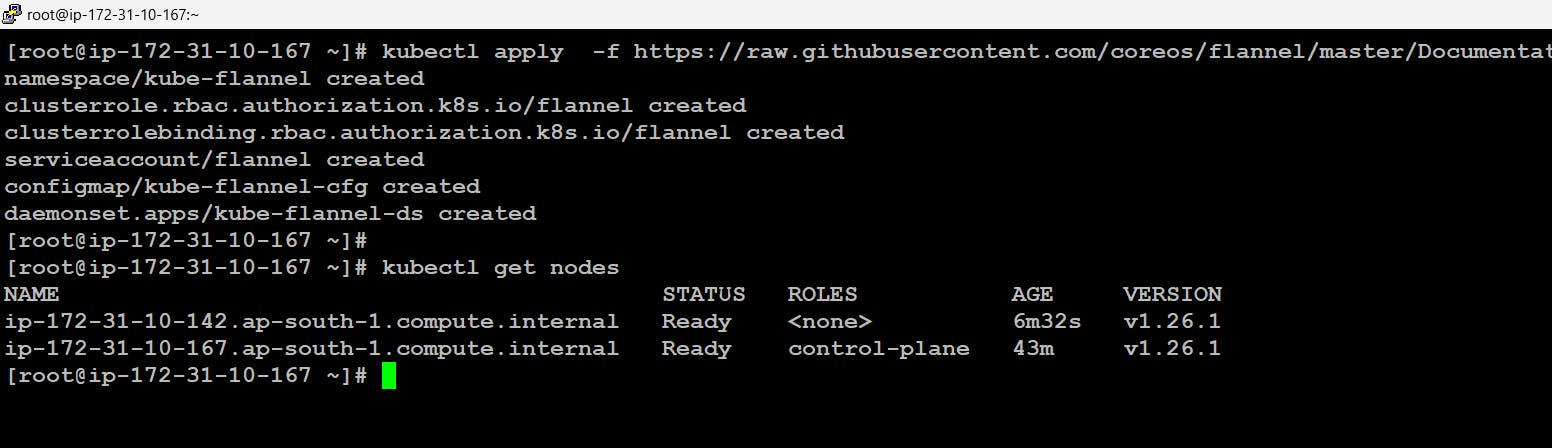
In order to establish a pod network that will allow nodes within the cluster to communicate we need some kind of CNI (container network interface). These CNI will take over responsibilities like inserting a network interface into the container network namespace. there are different - different CNI available in the market like flannel, calico, weave net, etc. here we have installed flannel using the command below:
# kubectl apply -f https://raw.githubusercontent.com/coreos/flannel/master/Documentation/kube-flannel.yml
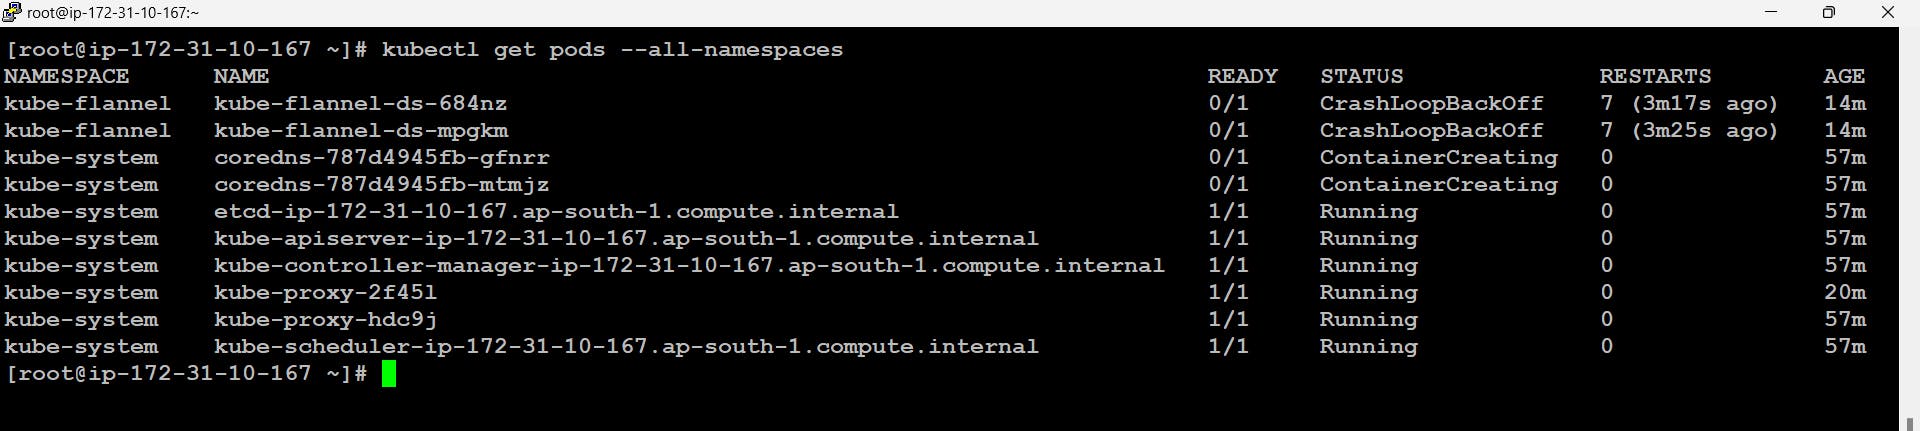
- If we fetch all the pods across the cluster we will find some pods not running like coredns and flannel pods. The reason for this is the CIDR we mentioned
10.240.0.0/16at the start. Actually internally in the configuration file of flannel, we have the CIDR mentioned as10.244.0.0/16because of this conflict the pods are not running.
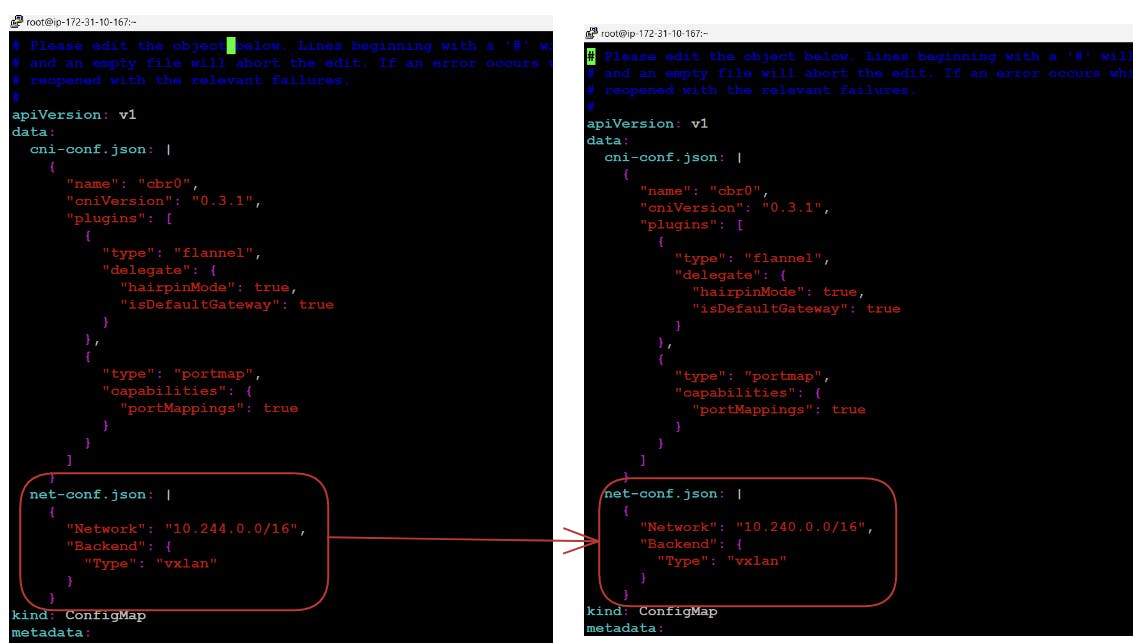
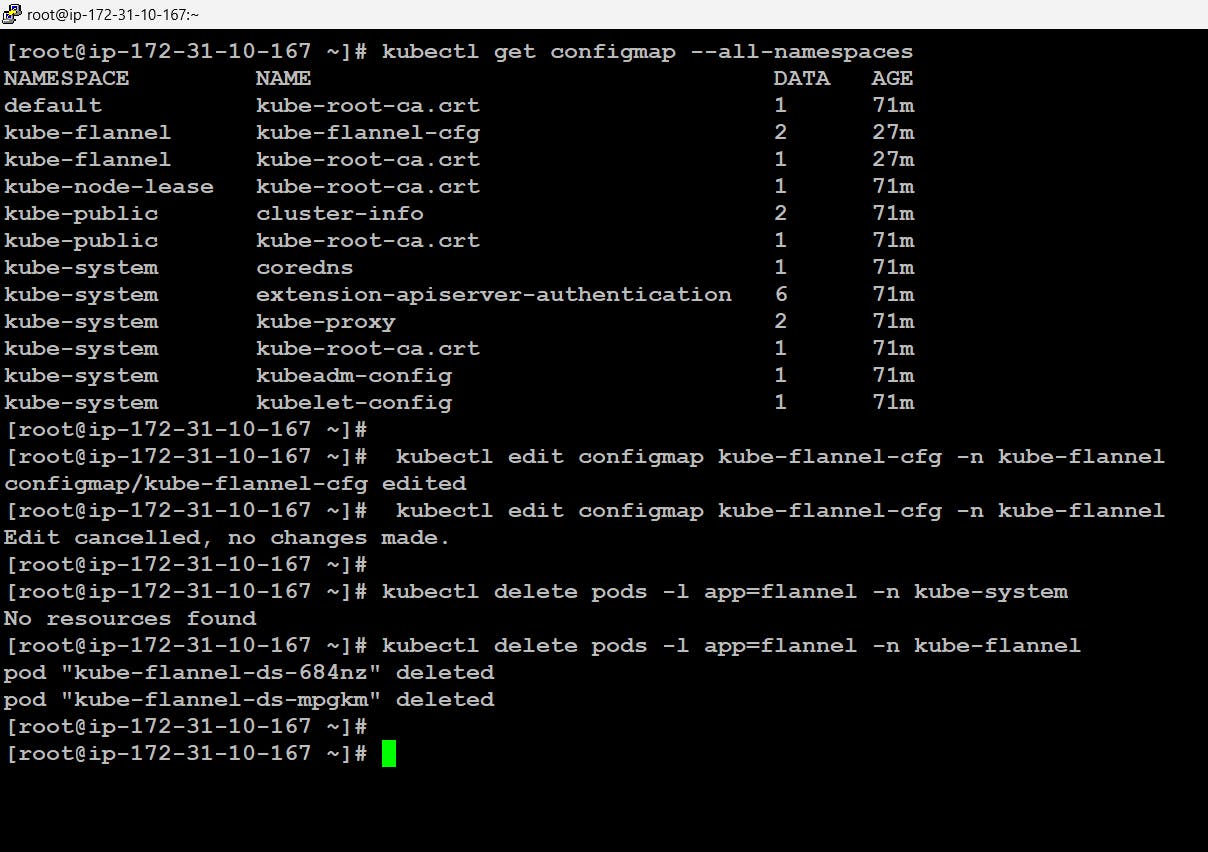
Now if we want to do these changes we can simply do the changes in the configmap of the flannel where all the configurations regarding the flannel are placed. for this first, we will locate the configmap then edit further and delete the previous pod automatically it will be launched again.
  # kubectl get configmap --all-namespaces
  # kubectl edit configmap kube-flannel-cfg -n kube-flannel
  # kubectl delete pods -l app=flannel -n kube-flannel


- Now we can see all the things are running absolutely fine.
With this, we have successfully created and launched our own Multinode Kubernetes Cluster 🤩🥳.
Although we have launched this on top of AWS same steps need to be followed for the configuration of K8s over other clouds or local VM also.
That's all for this blog, folks 🙌 Stay tuned for more amazing stuff on Kubernetes and more such tech. Make sure to subscribe to our newsletter. 📫
Thank you For Reading :) #HappyLearning
Any query and suggestion are always welcome- Gaurav Pagare